*jumps directly into article*

THIS WEEK – STANDOFF

TIP #1 – THIS IS HOW WE DO IT (FIND YOUR GUNS)

Spartan Laser

Rockets

Battle Rifle

TIP #2 – PLANET OF THE HOGS (4 STEP LASER FORMATION)

The Spartan Laser is by far the most important weapon on this map. Standoff is governed by Warthogs (YOU DAMNED, DIRTY HOGS!). Those who destroy them dictate the field (RIP Heston). This is why the laser must be obtained before anything else when you are playing a Team Game on this map.

Here’s a good idea:

1. Send someone to Rocket Spawn and have them focus their star rockets in flight on the enemies who go for the Laser (this is as common as people stampeding to Rocket Spawn on The Pit), enemy Warthogs, or enemy Rockets. This is your first line of defense. Decide who will do this prior to playing.

2. Have your Warthog go the opposite route. If you encounter enemy Rockets, the driver should keep their distance, so as to throw off their accuracy as much as possible. Let the gunner take care of them – make sure to always communicate with your gunner. Then the best ideas it to have the Warthog cover the teammate that goes for the laser.

3. The guy (or gal) who gets the Laser should focus on one thing once they have that big, meaty, thick, black and beautiful piece of equipment in their hands – The Enemy Warthog. Everyone should approach the Hog with ‘nades and work together to bring it down.

4. Once it is down, feel free to eff up the people who are coming in late to the battle. You should have your whole team there with you. Boyz ‘N Da Hood up in here.


TIP #3 -INVISIDOUCHES NOT TOLERATED

The camo should only be used for infiltration and ninja missions. And please, don’t get it and immediately start firing away. It defeats the purpose of the camo since when you shoot you become visible. People who do this are called invisidouches. Don’t become an invisidouche. Be a ninja and hold it together. Shoot when you actually need to. Don’t be an invisidouche.

The best way to enter the bases would be to use the side routes. A Shotgun would be nice too. This is to the side of the front entrance to each base. Crouch into their base and camp inside. Once the enemies start spawning out in the open, your teammates can pick them off. Your invisibility isn’t endless, though, so make sure you’re prepared to hide and join the party of shooting those who are out in the open.


TiIP #4 – WHIP OUT YOUR EQUIPMENT

Bubble Shield

Power Drainer

Bubble Shields are especially helpful when shielding yourself from a Warthog. If they’re stupid enough to try and run you over, step to the side and either hijack their vehicle or stick ’em. They deserve it for trying to run you over. Eff those guys.

Power Drainers shouldn’t be used to destroy Warthogs, but rather disable them so that teammates can commander them. Once the Warthog is stopped, BR them until they DIE. Then take hold of the map with the Warthog. Do NOT destroy it. Use it. With a buddy! It’s like going to the bathroom in elementary school – always do it with a buddy…do kids still do that?


TIP #5 – DISABLE – DO NOT DESTROY

 Warthogs should never stop, unless you’re picking up a flag or bomb-carrying teammate during an Objective match. Keep moving at all times with the Hog so that the difficulty of getting direct hits on you goes up – and so does your kill count. Use familiar routes over and over so that you cover the whole map. Always help your teammates.

Things to Remember:

  • Be a Team Player – communicate.
  • Get to the Laser!
  • Use invisibility, don’t waste it.
  • Warthogs DOMINATE this map, like social situations do you.
  • Temporarily DISABLE a Warthog using a Power Drainer. Commandeer it. Don’t destroy it. Use it and Dominate with your buddies.
  • Never pee alone.

This Week’s Teabag Prevention was brought to you by:

jake108

Edited by:

Brian Gilmore

For any comments, suggestions, or inquiries please email us at:

TeabagPrevention@gmail.com

Join our Facebook Group!

Watch matches and clips at gamevee.com

And don’t forget to add us on myspace at:

www.myspace.com/teabag_prevention


Tell your friends about us!

Tatooine? No thanks. Sandtrap makes it look like a sandbox where the little girls play dolls. Here’s how to get sand in their vaginas:


TIP # 1 – FIND YOUR TOYS


Sniper Rifle

Spartan Laser

Rockets


Missile Pod


Tip #2 – HOW TO GET THE BANSHEE SCREAMIN’

The Banshee is very important on this map. Many rush it from the start of the match but they won’t get far if they’re ill prepared. DO NOT take a Mongoose. They are the fastest way to get there, but also the weakest. You have nothing protecting you from enemy fire and will probably be gunned down by the swarm of people going the same direction you are.

A Chopper (not the helicopter – the awesome looking blade pod-racer looking one) is the best vehicle to take over there from the start. Not only do you have the advantage of splattering opponents, you have the upper hand on other ground vehicles, especially Warthogs.  

Clearing out and making sure everyone around the Banshee is dead should be first priority. Once it’s clear, take off and start your reign of terror, fear, and rape. Well, terror and fear.


TIP #3 – MEANWHILE, IN THE LAND OF THE HOGS…

While you have your teammates securing the Banshee, a Warthog should be sent out to kill the enemy who has a Spartan Laser. These two events should happen at the same time. Lasers spawn on both ends of the map. Get to them and you have control of the vehicles, don’t get to them on time and it looks like you’ll be hunting on foot. And this map is so big you’ll wish it had public transportation.

Routes vary depending on the danger.


TIP #4 – I LOVE THAT GOD DAMNED BRUTE

If you’re the unlucky fellow to encounter a ground-based vehicle in combat, you’re going to HAVE to be well equipped to kill it. A Spartan Laser, Missle Pod, or Rockets would be ideal for this; but what if you can’t get to them? A Brute Shot, then, is your next best option – as it can take down medium-sized vehicles. The Sparta Laser really is your best friend on this map, though, when it comes to dealing with the barrage of vehicles you will inevitably be encountering.

But once again, you can kick some serious vehicles ass with the Brute Shot. You’ll be able to flip Warthogs. It’ll also keep you from ending up a pile of chunks artistically decorating the walls when you’re fighting a Chopper. Choppers flip over and around like Canyoneros.


TIP #5 – BRING FRIENDS TO THE SNIPER PARTY

Never go alone with the Sniper Rifle on this map. Camping by yourself will eventually lead to an angry enemy set out to kill you and you only.

You should always travel with the group, but don’t get pushed up to the front. Hang back and do the sniping from afar, but not to far. If a vehicle sets out for you, you have your minions to fight with you. Work as a team. Always.

Things to Remember

  • Head for the Banshee
  • Become the cast of Wild Hogs
  • The Laser is your friend
  • The Brute Shot is your back-up girl
  • Snipe with a spotter

This Week’s Teabag Prevention was brought to you by:

jake108

Edited by:

Brian Gilmore

For any comments, suggestions, or inquiries please email us at:

TeabagPrevention@gmail.com

Join our Facebook Group!

Watch matches and clips at gamevee.com

And don’t forget to add us on myspace at:

www.myspace.com/teabag_prevention


Tell your friends about us!

What does this new expansion mean, other than the fact that we had a geekgasm yesterday? Where does it fall into Master Chief’s story? What will happen? The Teabag Prevention Team gives its own vison of things to come. Its. That’s right. We’re an organization now.

As predicted, Bungie has announced their new project at this year’s Tokyo Game Show. This expansion will cover the events that lead up to Halo 3’s story. It’s set in New Mombassa, after the Covenant invasion. At this time, Master Chief would be no where near Earth, which means we have a new hero – this guy:

ODST‘s (Orbital Drop Shock Troopers), arrive to battle via a drop-pod thats released from a frigate that is in orbit. They are usually sent into battle first and are also known as “Helljumpers.” (why you always gotta send in the black guys first?)

Their strength is no different from regular Marines, but they are still in a class all of their own. They’re like super-marines, which means they can kick a regular marine’s ass. Hard. They’re totally bad ass, they travel in squads, and as you can see, they carry a different set of armor. They typically handle Shotguns, Sniper Rifles, and Battle Rifles.

When Master Chief left, Humanity was left to fend for itself. I’m certain that this lone ODST will not be alone in this story arc. My guess is that this ODST will find a camp and hold a defense on New Mombassa which means this will all be on Earth.

As far as gameplay/multiplayer goes, one can only imagine. Will it be ODST-only? Will Spartans be playable just like the first three games? This is Bungie’s only chance to take a shot at CoD 4’s multiplayer gameplay. ODST = no shields. You know what that means? Underdog status. We won’t have all the luxuries in this gameplay that we do when we play as Master Chief. We may lose the ability to jump from anywhere we want, to withstand as much fire power as we do, and possibly the super-happy-mega-hurt that our melee’s currently have on opponents. This is incredibly exciting, as most people who have been playing Halo 3 since it came out need, and deserve (tee hee), the constant expansions to the multiplayer (new maps, achievements, etc.); but this really brings that entire idea to another level. We need to up the difficulty and that is exactly what Bungie is doing. Genius.

Will we be able to play ODST vs. Spartan vs. Elite? Will the entire multiplayer platform be changed/affected by this expansion? Will Bungie allow this type of handicap so that advanced players can play with beginner-Spartans?…the world will never know…until it does.

Written by: jake108

Edited by: Brian Gilmore

For any comments, suggestions, or inquiries please email us at:

TeabagPrevention@gmail.com

Join our Facebook Group!

Watch matches and clips at gamevee.com

And don’t forget to add us on myspace at:

www.myspace.com/teabag_prevention

Tell your friends about us!

The newest jewel of Microsoft hasn’t been brighter. Multiple tweaks have been added to an already great game. I was at E for All and I played Gears 2 for a solid two hours. I played three maps, all in the Horde gametype. There is a slight learning curve, even being a veteran to the previous title. For those of you who know my sensitivity on Halo 2 & 3, you’ll know default setting ain’t my thing.

Learning Curve?

During my first playthrough, my accuracy was a little off. I didn’t really see any change in graphics other than some slight detail enhancements on a regular (Carmine) helmet. The weapons are somewhat different. For instance, when they’re available for pick-up, there’s a shine that goes over there which makes it easy to spot. The level detail was outstanding at some points. One one of the levels I played, the water looked no different. The parts that were amazing was the detail inside buildings. Vines grew inside a destroyed two story house I was sniping from.

Weapons

I have to admit, I was surprised at one weapon in particular. This was the Motar. You carry it around Missile Pod style (Halo 3), there fore you cant run with it and in fact walk slow with it. To use it properly, you must hold the left trigger for your character to set it down, aim, then fire with the R trigger.

The Flamethrower. I was afraid of this being a letdown after seeing some videos of it being used on the enemy. For example, I would see that the character would not catch on fire and would just fall down. Not the case here. They BURN. Their armor/skin glows red and black. When they fall, there’s great satisfaction of burning them literally to the ground.The Boomers that wield it are frightening. First, its hard enough bring down a Boomer. Combine that with the wide range of flames the flamethrower has, and it becomes a serious threat. Also, this is not the type of weapon you have to haul around. You CAN sprint with it. The ammo for the Hammer is displayed through a bar. Like the Hammer, you can also get an Active Reload.

Now this is what surprised me the most. The Hammer of Dawn no longer has unlimited ammo. I discovered this when I needed the Hammer most.

The portable shield is a nice touch. It will save many, especially in “Horde.”

All of the other weapons are relatively the same.

Enemies

I saw roughly six new Locusts. I say roughly because two might have been the same. I’ll start with the Butcher. This is a giant Boomer walking around with a giant butcher knife. That is all. Another Boomer I saw was one wielding a machine gun turret. Another Boomer wielded a chain with The final Boomer I saw was the Flamethrower one. Seeing any Boomer go hand-to-hand combat was funny to watch, but painful to endure. I witnessed my buddy get thrown to the wall. He died shortly after. Imagine the Cave Troll battle in LOTR: The Fellowship of the Ring…..but Gears style.

A new Locust class I encountered was one called “Bolter.” This can have to meanings because for one, this guy runs fast, but that’s only because he carries around a Boltok Pistol. Just imagine a Locust running around really fast shooting his pistol….got it?……yeeaaaah.

So this is where it gets confusing. I saw one Locust that scared the crap out of me because it also ran fast and had tentacles on it’s back. It reminds me of those flying ants in the movie, “Ants.” They seem to resemble an all around warrior class, but hold superiority over its kin. Now I saw another that looked like this one on another map. This time it screamed really loud which brought the COG fighting it to the ground. He was immobilized for less than thirty seconds which made him vulnerable to other Locusts.

Wretches are the same only they seemed less of a threat. They are the “Grunts” of Halo. Get swarmed/cornered by them, then there’s the real threat. All Locusts are the same, except for minor costume changes.

The xO of Gears of War 2

 What stood out above the rest was the way every one of the game models moved. It’s much more realistic than the first. If a Locust is running at you and you shoot it with a shotgun, his whole body flies back. If you shoot it in the shoulder, that shoulder goes back. Also, you don’t “ice skate” when you slide to a wall you want to use for cover. The player models are a definite upgrade.

Executions. I can honestly say I didn’t see one curb stomp. A good thing? Could be. I saw the swinging of the shotgun decapitating a Locust, a burning corpse, and the whole fist-to-the-face.

The Cherry on Top

 While in the camera mode in-game, I was able to use a screenshot  function similar to Halo 3. Now, this is in-game. It’s unknown whether or not there will be a Theater mode. Also, I was able to switch between players and set camera positions, just like the  first Gears. What’s so different? Ghost Cam. This allows you to free roam around the entire map. Though it’s controls aren’t that well done, it’s a damn good idea, especially in Horde mode. Hopefully it’s touched up before release.


Written by

-jake108


Edited by

Jonathan London


For any comments, suggestions, or inquiries please email us at:

TeabagPrevention@gmail.com

Join our Facebook Group!

And don’t forget to add us on myspace at:

www.myspace.com/teabag_prevention

Tell your friends about us!

Alright, bitches, it’s time to step it up. We’ve gone through all the Lone Wolves maps, and by now you should have learned how to kill anyone and everyone working solo like Wolverine. Now it’s time to join the X-Men. We WILL show you how to play well with others. Even if it’s not depending on your team mates, helping them out is key, and knowing where everything is, what the best points in the maps are, and how to most effectively kill on these team maps is important to being in a team. Even if you aren’t directly interacting with your teams, here is the best way to kill everyone you possibly can on these team maps. 

THIS WEEK: VALHALLA


TIP #1 – WHERE MAH POWER WEAPONS AT?

Spartan Laser


This weapon is located in the center of the map. It’s ideal for vehicles and more importantly, Banshees. The fight for the Spartan Laser may be tough, as it is a lot of people’s first destination. Flank around the perimeter and hit ’em from behind. Once you’ve thinned out the herd, go claim your prize and destroy any vehicles that may come your way. Get to a side or a base quick, though, as you might be sniped by the guy who just got the…

Sniper Rifle


Sniper Rifles are located on the lower level of the base. Be weary of going off the lift right away. It’s possible to snipe someone from the opposite base. Ideal camping spots may not necessarily be in the center of the map, but on the sides.

Most Popular Sniping Spots

Pelican


Bubble Shield Spawn.


Next Weapon:

Missile Pod


The Missile Pod can be used against any vehicle and spawns symmetrically on both bases (the identical structures on either side of this map). You may not to waste it on a Mongoose, unless the passenger is carrying something important, but rather a Banshee or Warthog.


TIP #2 – USE YOUR POWER DRAINER TO INCAPACITATE AN ENEMY VEHICLE

The Power Drainer can be found at the base. As Brian would say it, “Use it to stop an enemy vehicle.”

This also comes in handy when you’re guarding a strategic area. Let’s say the flag is dropped during a game of Capture the Flag and you’re defending – throw a Power Drainer to discourage anyone from even coming near it. Don’t you wish you could throw a Power Drainer near your hot sister?


Bubble Shields could also be used to guard an area. It’s also especially helpful when a Warthog or Banshee is firing on you or a team mate. Don’t be selfish. Protect your team, but make sure you don’t get killed while doing it. That’s something we call “counter productive”. Say it. Gooooood. 


Regenerators can be used to HOLD a strategic area. Use it to get that extra boost during a firefight. It’s used best when you have your team behind you.


TIP #3 – THE BATTLE RIFLE IS YO FRAIND

The Battle Rifle is important here. It’s found at the base near the SMG’s. An Assault Rifle isn’t going to do you much good if the person you’re killing is far away. While using the BR, it’s important to use cover. It’s also important to cover your teammates. One cannot be more grateful to a teammate if they’re the one who saved their Killing Frenzy. BR’s are the way to go. Practice the techniques articulated in the hyperlinked Battle Rifle article above. 


TIP #4 – MAPS.GEEKSCAPE.NET

The art of driving a Mongoose can be difficult to learn on Valhalla. You don’t want to go down the center right away, so you need to find a different route. The least bumpy, but possibly the most dangerous route would be down the Bubble Shield side. You have balls, but you’re going to die with them in your hands…


…so feel free to take the other side.

If you want to be protected. be able to step off the Mongoose, and be provided with cover right away, your best bet would be to cruise down down the Pelican side. It’s more populated with your team mates (usually), and gives you the cover of the caves on your way to the other base. 


 The emergency route, would be of course, the center.

 
Things To Remember:
  • Choose the routes you take wisely.
  • Use your power weapons efficiently.
  • Banshees CAN dodge Missle Pod shots. 
  • It’s not the end of the world if the enemy has a vehicle.
  • Laser your enemies. Laser them long and Laser them hard.
  • The BR is your best friend both in Halo and in real life. 
  • Use the Equipment on the map to your advantage.
Written by: jake108

 Edited by: Brian Gilmore

For any comments, suggestions, or inquiries please email us at:

TeabagPrevention@gmail.com

Join our Facebook Group!

Watch matches and clips at gamevee.com

And don’t forget to add us on myspace at:

www.myspace.com/teabag_prevention

Tell your friends about us!


TIP #1 OH OH OH OH

The Gravity Hammer DOES have lunge capabilities. This, however, only occurs when your crosshair is red.

When it comes to the Hammer, camping around a corner or when you have no time to swap to a different weapon are the proper times to use it. It may not seem ideal like a Sword might, but keep this in mind: Swords don’t make people fly over the edge of maps…usually.

In fact, knocking someone into the air with the Hammer usually surprises both people. In order to knock people off the map, or away from you, with the shockwave made from your hammer alone, having your opponent in the red cross hairs is not necessary. Just knock them away from you and throw a grenade or two and they are history…or toast. 


TIP #2 HAMMERING OUT THE VEHICLES

After you’ve mastered killing humans with hammers, turn yourself in to the police. After you’ve mastered killing Spartans and Elites with a Gravity Hammer in Halo 3, start branching out. Hammers are the best short-range weapon available in the game that will not hurt you when you use them, but kill the shit out of vehicles. It’s incredibly useful against vehicles. 

Hitting one directly kills the driver of the vehicle or will send the vehicle and the driver flying away, Mongeese (that’s a word now, deal with it) especially. Don’t be afraid of using the Hammer to bash away rockets and grenades either. The Hammer is your friend. Now, stop killing real people. 

NOTE: Hitting the vehicles on the SIDE causes the most damage.


TIP #3 THE SWORD IN THE BONE

Two basic buttons you need to know while wielding the Sword are the R trigger and the B button. The R trigger is for lunging. Use this ONLY when the opponent is either alone, more than three feet away, doesn’t have a Sword/Hammer, or all of the above. The reason for this is simple, you do any of those things I just mentioned and you die…well you increase your chances of dying.

When you see someone and they are as vulnerable as previously described, you should lunge at them using your RT trigger. Lunge at them with all your might.

NOTE: If playing a game of Swords, or if you think your opponent can out-slice you in close range, a good thing to do is to jump and dice them from the top. Keep in mind this can give them the advantage if you jump toward them, but just make sure to swing as soon as you can. This takes some Intermediate level maneuvering, but can be done and disorients your opponent slightly, because as you make your movements more unpredictable, they are less likely to shoot or swing at you and actually land a hit.  


TIP #4 HACK AWAY

Now, if you had the time to run that little checklist through your head, and you’re not sure sure with the go-ahead, resort to the B button. By using this technique, you’re able to swing at a faster rate. This is especially handy in a Sword fight in that you will kill everyone. Now a surprise lunger might swoop in and kill you, but for the fight at hand, using your B button to hit your opponent with a sword will give you the advantage of swinging faster than they are (if they are using the RT trigger).

Try to circle around them while tapping B and just hack away.

Just hack away until your problems disappear, just hack away until your problems disappear, just hack away until your problems disappear, just hack away until your problems disappear, just hack awa-…oh. Hi. Moving on…


TIP #5 DO NOT CHARGE WITH A SWORD OR A HAMMER

Do NOT charge with a sword or a hammer from medium of long distance. If they are not close enough to kill by your crosshairs turning red and you lunging at their asses, do not charge at them. They have guns. Guns are a long range weapon. Guns will also kill you. This is a horrible decision. Every time you charge someone from medium to long range with a sword or a hammer, you have made a decision worthy of the Darwin Award. If you live, you are basically one of those guys who climbs buildings and uses his freak-occurence survival as “empirical proof” that was he does is “safe”. Never charge at someone with a sword or a hammer. There is no advantage, even if you throw grenades. No advantage. Don’t do it. Ever. Seriously. Stop it.

Things to Remember:

  • Gravity Hammer has the ability to damage people through walls
  • The sides of vechicles are most vunerable
  • Keep moving
  • Use B when in doubt
  • Don’t lunge until that crosshair is red
  • What did we say about charging with a sword or a hammer?


This week’s Teabag Prevention article was written by:

 – jake108

This week’s Teabag Prevention article was edited by:

– Jonathan London (because Gilmore was out last night macking)

– Gilmore ate tacos last night

– That’s what I meant: “Macking on tacos.” They were delicious. -Editor and Taco Macker

For any comments, suggestions, or inquiries please email us at:

TeabagPrevention@gmail.com

Join our Facebook Group!

Watch matches and clips at gamevee.com

And don’t forget to add us on myspace at:

www.myspace.com/teabag_prevention

Tell your friends about us!


Once again, the Superintendent is back. Visit Bungie.net to see what the deal is. Below is taken straight from their website:

<\\> UNSC OFFICE OF NAVAL INTELLIGENCE

<\\> CLASSIFIED SIGNALS ARCHIVE [ONI.SEC.PRTCL-1A]                 

<\ OPENED PER OFFICIAL REQUEST [DARE.V.500341(S1)]  

\ SOURCE: URBAN INFRASTRUCTURE A.I. [SUPERINTENDENT]

\ RECEPIENT: PROWLER “TOKYO RULES” [COMM.DUTY.OFFICER]                                                                
>> NOTATION KEYWORD SEARCH: “EMERGENCY” “DATA” “CORRUPTION”                                
>> (…) ~ QUERY RUNNING                                
>> (..)                                
>> (.)   \ VTT TRANSCRIPT AS FOLOWS…                   

            [SUPERINTENDENT]: “METROPOLITAN EMERGENCY!”                 
            [SUPERINTENDENT]: “METROPOLITAN EMERGENCY!”                 
            [SUPERINTENDENT]: “METROPOLITAN EMER–!”                 
            [COMM.DUTY.OFFICER]: “We know. Personnel are en route. Can you–”                 
            [SUPERINTENDENT]: “DETOUR! PROCEED WITH CAUTION!”                 
            [COMM.DUTY.OFFICER]: “–put Kinsler on the line?”                 
            [SUPERINTENDENT]: [UNITELLIGIBLE > DOG GROWLING(?)]                 
            [COMM.DUTY.OFFICER]: “Sorry, what?”                 
            [SUPERINTENDENT]: “BE A HERO! REPORT VIOLATORS!” 
            [COMM.DUTY.OFFICER]: “Oh, come on… ”                 
            [SUPERINTENDENT]: “METROPOLITAN EMER–!”                 
            [COMM.DUTY.OFFICER]: “Listen. We have a report of core data corruption.”                 
            [COMM.DUTY.OFFICER]: “I need you to upload your–”                 
            [SUPERINTENDENT]: “PARDON OUR DUST!”                 
            [SUPERINTENDENT]: “YOUR TAX DOLLARS AT WORK!”                 
            [COMM.DUTY.OFFICER] “–logs for the last twenty-four hours!”                 
            [SUPERINTENDENT]: “KEEP IT CLEAN!”                 
            [SUPERINTENDENT]: “KEEP IT CLEAN!”                 
            [SUPERINTENDENT]: “KEEP IT CLEAN!”                 
            [COMM.DUTY.OFFICER]: [UNINTELLIGIBLE > PROFANITY (?)]                 
            [COMM.DUTY.OFFICER]: “We’re sending a team, alright?”                 
            [COMM.DUTY.OFFICER]: “Until they arrive, all additional comm needs to route through me.”                 
            [COMM.DUTY.OFFICER]: “Repeat and acknowledge.”                 
            [SUPERINTENDENT]: “OBEY POSTED LIMITS!”                 
            [SUPERINTENDENT]: “YIELD TO UPHILL TRAFFIC!”                 
            [COMM.DUTY.OFFICER]: “I’ll take that as a ‘yes’…”                 
            [SUPERINTENDENT]: “PLEASE REMAIN CALM!”  

\ ~ QUERY COMPLETE

\ ARCHIVE CLOSED \>\


Now that you’ve read that, certain key things can be drawn out from it. Rumors have been circulating that Bungie would show their next game/project at TGS (Tokyo Game Show).

\ RECEPIENT: PROWLER “TOKYO RULES” [COMM.DUTY.OFFICER]

As you can see, the rumors must be true.


[COMM.DUTY.OFFICER]: “We’re sending a team, alright?”  

As in the Bungie Team to show off their new project?


<\\> UNSC OFFICE OF NAVAL INTELLIGENCE

This alone is the most interesting. UNSC only exists in the HALO universe. If Bungie is truly going to announce their next game at TGS, it would have to be a part of the Halo franchise.


jake108


Edited by: Jonathan London (who can’t make heads or tails of any of this… noob)


Tip # 1 – GET YOUR GUNS


Sniper Rifle


Rockets

Battle Rifle


Needler


Shotgun


TIP #2 – A VIEW FROM THE TOP

Isolation’s surface is fairly small. You can almost see the entire surface from just one point of the map. This would be on top of the roof that houses the Shotgun.

While equipped with a Battle Rifle, Sniper Rifle, Needler, or Rockets, this is the place to be. Though someone can have the advantage on you by shooting you first, be fast and have a power weapon handy so that even if they do score that advantage, you still have the drop on them. While at this position, you have every chance to be equipped for a great game of Knifey-Spooney. Just make sure you have a Knifey.

Note: Oppenents usually spawn on two sides of the map.

Here:

and here:

Those two opposite sides? Fairly symmetrical, so please keep that in mind while you’re penetrating their base. We have no comment on that last sentence. Move on. 


TIP # 3 – BUTTHOLES AND CURVES

Using a map to your advantage is crucial. It is very important that you know you’re surroundings – that way if you need to get out of a hot spot, you know where to go.

This one’s easy:

While you’re up by Shotgun spawn, and feel like you need to get out of there in a jiffy, drop down the “anus,” and lob some nades just in case they follow you. The “anus” starts at spot at the top (“A View From the Top) above Shotgun spawn, in the indentation in the wall. If you look down you will see a place to drop. Give that thing an enema and throw grenades into the colon when you see it opening back up to make sure all the poop is gone…Jeeeeeesus. 

By the spawn points, there are curved walls. Hide behind them if you’re being chased. Be sure to throw a couple of nades so that the enemy walks right on into them. This is a great place to recharge your (brooke) shields, but not to camp. 

If you’re being chased and are cornered into the same spot as above, you could also take the risk of jumping to the lower level.


While there, just make sure not to be near or around the opening at the bottom of the ramp. You will be a sitting duck for nades and Rockets. Always keep moving, like your girlfriend does to get away from you.


TIP # 4 – ENERGIZER IT UP

Below are a few hiding places worth noting for recharging your shields to do some killin’:

Keebler It Up:


 Blair Witch It Up:


 Batman It Up:


Things to Remember


  • Always keep moving
  • Use your surroundings to hide and recharge. Running will get you killed. Camping is never a good idea.
  • Work on your Battle Rifle game or else always have a Power Weapon with you during battle
  • Know Your Weapon Spawns, Weapon choices are extremely important on this map
  • Do NOT use the Mongoose for any reason – no matter how “sweet” your friend thinks it would be.


This week’s Teabag Prevention article was written by:


This week’s Teabag Prevention article was edited by:


For any comments, suggestions, or inquiries please email us at:

TeabagPrevention@gmail.com

Join our Facebook Group!

Watch matches and clips at gamevee.com

And don’t forget to add us on myspace at:

www.myspace.com/teabag_prevention

Tell your friends about us!


TIP #1 – GET YOUR GUNS

Sniper Rifle – You know…

Spartan Laser – Good for hallways.

The Missle Pod – This weapon is included mainly because of its one-shot kill. Though there are no vehicles in this map, camp with the missle pod in an open spot and you know that people are bound to come across.

Sword – Short-ranged combat – do. not. rush. with. a. sword.

TIP #2 – OPENSIDE SANDWICH

A good place to stay while in the lead would be the open side of the map. For those of you who don’t know what open side is, it’s the side with the ramp that leads down to the second floor.

The reason why this is a good place to be is mainly because of the space you control. The spaces here are commonly used by most players. You are bound to run into someone to kill. You have the yellow lift, Sniper spawn, and the top of the purple lifts (two on each symmetrical side) leading to the open side.


TIP #3 – THE YELLOW LIFT IS A DEATH TRAP

As mentioned in Tip 2, the yellow lift can be easily controlled. It is imparative that you understand that you cannot use that yellow lift, or any lift, unless you are absolutely sure that no one is waiting for you.

Throwing a Power Drainer or Grenades is usless because then you’re just setting yourself up to get your kill stolen. Throwing grenades never really works. Maybe once in every few dozen times, and that is IF there are enough people there for your chances of a kill to increase. Take the scenic route up these lifts – use the ramps – because if you can control them, you can control the game. This lift is most easily controlled by standing in the hallways with a Battle Rifle and doing the good ‘ol one grenade and headshot combo.  Do this until someone foils your evil (and very often used) plan. Yellow lift is king. Control that one and control the game, but watch your back. Watch your effing back, son. 


TIP #4 – FEEL UP THE BATTLE RIFLE

Your chances of winning the next match on Construct are greatly improved if you take good aim with the Battle Rifle. Many of the battles on this map are usually fought in the medium-range catagory.

If you’re not familiar with the weapon at all, read back. Equip this weapon in this map at all times. It is your best friend here. Get to know it, buy it dinner, but don’t step over the line. You raunchy bastard. 

TIP #5 – MAUL RATS

Other than the sword, Maulers are what you want if you’re going to take the battle up close. If you’re not familiar with it, see our Mauler article. Do not use this in mid range fights, but if you are going to choose any short range weapon on this map – this is your guy. 

The Mauler sure beats the Assault Rifle out, but when you encounter someone with the Mauler, just stay as far away as you can while spraying bullets. Give ’em the ol spray and pray. 

The Sword does not have its own article simply because its basic use of the B button and R trigger. When you’re charging someone and they start nading you, crouch jump.


Not only will you survive the explosion, but you’ll catch the opponent off guard. You’ll also get pushed into lunging range. Which means you get to slice and dice. 

NOTE: To crouch jump, jump then continously crouch while in the air (for a default controller that should mean you are pressing down your left joystick). Doing this gives you an extra boost of air, explosion or not.

Things to Remember:

  • Learn the Crouch Jump.
  • Keep a BR handy for medium-ranged fights.
  • Maulers are for close range.
  • Open-side is the important side.
  • Yellow Lift is king of the lifts. 


This week’s Teabag Prevention article was written by:


This week’s Teabag Prevention article was edited by:


For any comments, suggestions, or inquiries please email us at:

TeabagPrevention@gmail.com

Join our Facebook Group!

Watch matches and clips at (Jake showing off) gamevee.com

And don’t forget to add us on myspace at:

www.myspace.com/teabag_prevention

Tell your friends about us!


The Halo community are not particularly fond of this map. It has a snowy surface catches your grenades like a catcher’s mitt. Its turrets (“The Guardians”) prevent you from hiding outside the map. Fuck you, The Guardians. We can go wherever we want. Anyway, here is how to be the Wanpa of this Hoth-like map…


THIS WEEK *SIGH*: SNOWBOUND.

TIP #1 – FIND YOUR TOOLS (HO HO HO HO HO)

Things you might want to look out for are:

Overshield & Ghost


Active Camo


Needler

Brute Shot

Shotgun 

One of the best ways to control Snowbound’s exterior is simply putting the Overshield and Ghost together. An even better way to ensure your chances of surviving your oppenents ganging up on you would be to take hold of the Spartan Laser located here:

To combat the person in the Ghost, nothing is more staifying than when you cause the enemy with the Overshield to burst into a pink explosion.

It works best if the person is not in the Ghost. If you need to get the enemy out of the vehicle, the Brute Shot will do the job.


TIP #2 – THE SHOTGUN NINJA

Underneath the outside of the map lies a Gladiator-esque pit. It’s daker in these parts. This is where Active Camo plays a key role. Be a ninja. Keep in mind, the main ninja killer down there would be the shotgun. Grab it before they do and wreak havoc as the players try and figure out where that “death” you served up cold came from. The shotgun spawns right where you see my ninja ass in this picture.

The Shotgun Ninja: when you spawn, you start out somewhere either impossibly far or conveniently close to the shotgun. Get here first. If the Active Camo is on the way, then get that first. Otherwise, do the shotgun first. Camo comes second. Since this is very much a short-range map, the shotgun will be your best friend. Once you have this deadly combo (hopefully in the first 30 seconds of the game, otherwise they will be gone and you will be shotgunned), keep to the underground (like your parents told you when they saw your face), and you can probably squeeze in a Killing Spree before the first two minutes of the game. Never camp, always keep moving, and make people wonder where you are, for by the time they figure it out they’ll already be dead. 


TIP #3 – ALWAYS CHECK YOUR SNIPING SPOTS

The Beam Rifle is located under Red Base. The Beam Rifle is basically the Elite Sniper Rifle. 

Sniping locations are obvious, but they work. The rocks behind red base are a good place to start. 

Just make sure you don’t try anything silly, like no-scoping underground. Brian always does and it works for him sometimes, but most of the time I show him what’s what – why? Because it’s a bad idea. Anytime you see someone doing that, just throw a grenade and throw their orientation off.

TIP #4 – SET YOUR LASERS TO “CLOSE-RANGE LASER-TOTING PSYCHOPATH”

Now, the Spartan Laser doesn’t really belong on this map. It seems as if its only purpose is to destroy the Ghost. But fear not! Since many people prefer to fight in the gladiator’s pit, a giant Laser filling up the passage ways is a sure way to gather up some kills.


Tip #5 – HIDING PLACES (THE PANSY NURSERY)


Things to Remember:

  • Many fight below the surface. If you see the score going up, but the party’s not at your place. Go to the underground.
  • Use short range weapons. Feel free to use the long range ones outside, but for the beginning to intermediate player, short range weapons are ideal. 
  • Ghosts can be a powerhouse here as long as people stay outside. 
  • Brute Shots work best against Ghosts (the vehicle, not those using Active Camo). 
  • The Shotgun Ninja is the best way to rack up your score early on in the game. Make sure you get to those spawns first. 


This week’s Teabag Prevention article was written by:


This week’s Teabag Prevention article, as always, was edited by:


For any comments, suggestions, or inquiries please email us at:

TeabagPrevention@gmail.com

Join our Facebook Group!

Watch matches and clips of us playing each other (Brian getting raped…at Halo) at gamevee.com

And don’t forget to add us on myspace at:

www.myspace.com/teabag_prevention

Tell your friends about us!


High Ground is not a favorite among the population of Halo 3 Multiplayer players – especially in Lone Wolves. This is also one of the larger maps existing in Lone Wolves and this means more power weaons and power-ups. So like it or not, here is how to make High Ground your Kill Ground. Wow…we can do better than that…


THIS WEEK: HIGH GROUND

TIP #1 – POWER WEAPONS

The Power Weapons on this map are easy to identify.

The Sniper Rifle 

Spartan Laser 

Rocket Launcher 


Which one is the strongest you might ask? Well that depends on you and your playing style. Those who use the Rocket Launcher may find it easy to adapt to the Spartan Laser, the only difference in shooting there would be the be timing the shot and not going for as much splash damage as you usually would. These are the places to get your power weapons and start out your rampage.


TIP #2 – WORSE SPAWNING THAN MACFARLANE

Camping is best on a map like this. I say “a map like this” because of the terrible spawn system going on here. For example: If you’re sniping by the beach, but are not close enough to its waves, chances are that enemies are going to spawn behind you.

Good camping spots include the the missile silos at spawn opposite the beach. Even though the spot may not provide a good outlook, you’ll know that no one will spawn behind you. Pitch a tent there, because a lot of killing is about to go on (best if you pick up a sniper rifle).

Another good spot would be the pipe entrance at the gate. The spot provides a great view of the map. The downfall? NOT BEING ABLE TO MOVE FAST ENOUGH. 


TIP #3 –  KEEP YOUR SHOTTY SHORTY

The Shotgun is located outside under a tree. Right about there. You see it? It’s right there.

Outside, the Shotgun is useless. Inside, it’s as deadly as ever. In places such as the bunker or on top of the gate, there’s not that much room to move around making the Shotgun a valuable tool. Behind the gate and inside are the places to really use this weapon. Do NOT use it outside on the beach side of the gate or you’re going to get sniped, BR’d or Lasered.


TIP #4 – GO NINJA GO

Active Camo

Like always, Active Camo should be used Ninja style. This means actually going indoors and getting your kills (perhaps with a shotgun?! *Doctor Evil pinky*).


Overshield


Overshield should be used in the open battlefield. Just about any weapon can accompany you on you quest.


Bubble Shield


The Bubble Shield’s spawn and an example of its usage is pictured above.


Power Drainer

The Power Drainer can be deployed at any time. There’s really no bad way to use it other than if you’re hurting yourself. Which would make you ‘tarded.


TIP #5 – SPIDER-SPARTAN

Pictured below are a few jumps that you might find helpful.


 Things to Remember:

  • Watch them spawn points.
  • Overshields outside, Camo inside. 
  • A good camping spot always has a downfall.
  • Shotguns indoors, kids.
  • Find your power weapons and kill people in the open.


This week’s Teabag Prevention article was written by:


This week’s Teabag Prevention article, as always, was edited by:


For any comments, suggestions, or inquiries please email us at:

TeabagPrevention@gmail.com

Join our Facebook Group!

Watch matches and clips of us playing each other (Brian getting raped) at gamevee.com

And don’t forget to add us on myspace at:

www.myspace.com/teabag_prevention

Tell your friends about us!


Narrows can be considered to be a simple map. With only two oppisite sides and a quick way to get from one point to another, Narrows is one of the easier maps to learn. But be watch your ass – Narrows also houses many dark places and combinations.

THIS WEEK – NARROWS

Tip #1 – I Don’t Need Any Wings…

Narrows is an interesting map mainly because of its Man-Cannons. It’s the fastest way to get to the oppisite side of the map. It’s also the most dangerous . Not only do you have no cover, but you can bump into someone in midair – killing you both. Throwing Power Drainers before you enter the Man-Cannon can help reduce this risk. It can also make the enemy easier to kill.

When going off a mancannon, and expecting to find a baddie or two waiting for you, the best weapon to have would be The Rocket Launcher (spawning in the middle of the map on top of the divider). Since that is a more rare weapon, you’ll have to settle for a Needler or the classic BR-Grenade combo.


Tip #2 – Quick Thinking For Slow Thinkers

Bubble shields play a big role on this map because of rockets, snipers, and grenades. Since the bridge has a curve to it, it’s important for these people who want kills to be on the high ground. So, when walking across be weary of your enviroment. See them first then deploy your bubble shield. When inisde, think about your next move.


Tip #3 – Sneak Attack (Not Like That)

Usually when a sniper is doing his job, they’re scoped in and too busy to see anyone thats not in the direction they’re looking at. Throw a power drainer on them and take the kill. This works too when fighting more than one person.


Tip #4 – Tom Clancy’s Halo

Learning the jumps on this map is a lifesaver. The most commonly used one is pictured below. Though it’s easy to perform, you’re vulnerable when in the air. When you see others in this stage of flight, kill ’em. Be that trash man. Get up at four in the morning and get your brother that looks nothing like you, and take out the trash. 


Being stealthy is a big plus. Finding the right spots is even better. Below are some hiding spots to rack up the kills.


 Use them and put your enemies in the dumpster.

Tip #5 – Rambo That S#!*, Motherf^@%&*!

To take control of the map, you’re going to need the right ingredients. Power weapons are key. Rockets and BR’s should quench your thirst for blood. Don’t just camp either. You need to move around.

This means risking getting shot in the back or by other angles. Using Active Camo or the Overshield makes a great impact on your murderous adventures.

…Murderous Adventures?


Things to Remember:

  • Narrows has many hiding places.
  • Be a ninja and use your surroundings.
  • If you want to power whore, use rockets and overshield.
  • Always have a BR by your side.
  • Murderous adventures must be had.


This week’s Teabag Prevention article was written by:


This week’s Teabag Prevention article was enhanced and edited by: 

and


For any comments, suggestions, or inquiries please email us at:

TeabagPrevention@gmail.com

Join our Facebook Group!

Watch matches and clips at gamevee.com

And don’t forget to add us on myspace at:

www.myspace.com/teabag_prevention

Tell your friends about us!


Epitaph is a Gravesite. It is a place of death and it is a place of slaughter. You’re about to take it to a whole new level. This one.

THIS WEEK – EPITAPH

There are a couple of major ways of going about owning people in this gravesite level.

You can be the power hungry bitch:


The stealthy assassin:


Or you can be a little bit of everything:


TIP #1- STEALTHY ASSASSIN

Epitah offers up two power-ups: The Active Camo and the Overshield. both are located somewhat oppisite of each other and both have their perks after you pick ’em up. For the Active Camo, once you pick it up, the shotgun isn’t far. Waltz across the dance floor,

through the shield door, and out side. Take a right and you’re there.

It’s recomended that you pick the shotgun up first that way your Active Camo doesn’t run out. Since you’re invisible, go run around and get some do whatever you’d do if you were actually invisible – if you had a shotgun. In Halo. The point is you’re going to eff people up pretty hard until you run out of shells – keep it close range, though. The shotty will not help you out in the middle of the floor. Keep moving and keep it short.

TIP #2- POWER HUNGRY BITCH

After you grab the Overshield, you have two choices:

Go for the Rocket laucher up above


Or go pick up the Gravity Hammer on the same coordinates, but below the rockets.

With the Gravity Hammer, you can creep around the corner and wait for someone to make the fatal turn around the corner. Usually that works well because of Epitaph’s many hallways, doors, and walls. Use it like you would the shotgun – keep it close and short. Never charge or go out into the dance floor. You’ll get shot before you get halfway to your opponent.


With the Rocket, you can perch yourself somewhere higher up on the map and wait for two enemies to engage each other. Double Kills or even Triple Kills will be as easy as that point. Hide and explode. Apocalypse time.

Notice how those two tips involved camping. Now if you don’t have these weapons and you don’t see anyone walking around with them, be weary.


Tip #3 – GUUUUAAAK WAHK WAHK WAHK WAHK!

Active Camo can give you a major advantage if you use it right. Combined with the corridors and corners of the map, sticking to the walls while invisible is the way to go. With so much fighting going on around the map, some don’t take heed to their motion tracker right away or at all. This makes everyone an easy target. Why need active camo you ask?


….wait for it…BAM!


That’s why.


Epitaph has two floors that lead to the external part of the map too. If you are spotted on the motion tracker, and the enemy turns around and doesnt see you, you’re easily given a second chance. There are some instances when you can sit right in front of your enemies and they won’t see you. You’re now the motherfucking Predator – get ready to explode the world and laugh your fucking ass off.


TIP #4 –

Spikers play a hidden role in this map. Dual wield them, and they become power weapons. You can pick two up right before you use the smaller of the two lifts on either side of the map:

That being said, whenever you’re short of a shotty or rocket launcher, pick up these two goodies and you’re good to go. I find it most satisfying when I take out the bastard trying to kill me with a shotty. If they mess up with a shotgun, you have every right to audibly laugh at them before they respawn so they can hear it.


Tip #5 – The Needler…

The Needler is located oppisite of the small lift.


One of the best ways of using this fine weapon is using it at a higher distance than your target. This could be while going off lifts, while on the second floor, or on the platform on in the center of the map (where the Rockets spawn). Use the Needler well and you’ll be sure to rack up some kills during the match (for tips on this weapon, please read our Needler article).

This should get you to dominate on Epitaph. Go out and eat your enemy’s family raw.


Things to Remember:

  • Another way to put Spikers to good use would be to combine your ambush with a quick toss of a power drainer.
  • Be mindful of the many places to hide.
  • Small weapons can turn into power weapons when dual-wielded.
  • Keep it close-range when using the shotgun.
  • Stealth is incredibly easy in this map, so use it to your advantage. 


This week’s Teabag Prevention article was written by:


This week’s Teabag Prevention article was edited by:


For any comments, suggestions, or inquiries please email us at:

TeabagPrevention@gmail.com

Join our Facebook Group!

Watch matches and clips at geevee.com

And don’t forget to add us on myspace at:

www.myspace.com/teabag_prevention

Tell your friends about us!


Following the return of jake108’s hiatus, the Teabag Prevention team has started out fresh with a new series designed to show the not-so-talented Halo adventruee how to navigate in all the maps they’re getting ball-faced in. For a map that’s used for many games, it shouldn’t need much indroduction. Well, fine: introducing…

THIS WEEK: GUARDIAN


TIP #1 – GET YOUR GUN


Guardian has four gravity lifts, two floors, hallways, ramps, and hiding places. It’s a map that anyone could easily play on. An easy way of controlling the map would have to be with the Battle Rifle. The Battle Rifles are located on the top floor of gold gravity lift spawn


and Carbines located on the second floor of the Sniper tower. Keeping these weapons that do massive damage at medium to long range oppenants might allow you to gain the lead and progress to victory.


TIP #2 – BOOMSTICK

Shotguns can be a useful weapon in this case. The shotgun spwans on the bottom floor under the blue room.


Hallways are a great way to put this weapon into action. Camping may be an only option when faced with multiple oppenents. In this case, just stay ready to jump out when that enemy turns the corner.

Note: Shotguns are by far the best short range weapon. Always keep moving when you have a shotgun, because people will often respawn and go back to your camping point. Be ready for them by always keeping them guessing – keep moving. You’re a lone warrior on this map with a shotgun, and you don’t want to stop until all those shells are gone. Congratulations, you are now a maniac. Use that to your advantage and never stop moving, you crazy son of a bitch. Shoot ’em up.

TIP #3 – CASPER THE FRIENDLY MURDERING PSYCHOPATH


In a dark map like Guardian, something like Active Camo can greatly improve your chances when encountering an opponent or two or three. It’s on YOU whether you can get the job done right. When you get Active Camo, hide in corners. Wait until your enemies turn their backs on you so that you may score a stealthy kill. There are plenty of places to hide here. Use them wisely.

Active Camo and being equipped with a Sniper Rifle can also rake in the kills. Crouch for invisibility and become a sniping ghost.

Caution: The Sniper spawn (directly to the left of the picture above) has barrels that will blow up if shot. Get ride of those before you decide to camp there.


TIP #4 – THE SHIELD


Overshields should not be taken for granted.

Even though they do have a great advantage on everyone else on the map, when there is combined fire put on them, the sheild that protects them depletes rather quickly. During an FFA, you whore that overshield like you’ve whored nothing else. Remember that the first few seconds of picking it up, you can’t get hurt. Use this to your advantage. But don’t get cocky: “you’re not Superman, you know”.


TIP #5 – CAMPING GROUNDS

In FFA, keeping control of a place where you can target the most enemies is the best way to go about it. This place is the Sniper Tower. You may go to the top,

go to the mid-section,


and drop down the bottOm to get the rats below. 

This lower level is great for sniping people going up the “yellow” lift. The top is good for people dumb enough to be walking through the middle of the map with that “no no no, I can make it!” sense about them. If there were any a spot to camp in this map, this would be it.

When on the bottom level, you can see people coming for you from above very easily. Always get away from the opening, back up, wait for them to come down, toss a grenade and hit them with a headshot with a BR and you’re done. Next!

This is the best camping spot in the map. Use it wisely and not like a retard (standing in one spot with your scope up waiting for people from far away while some undeserving fool gets you with an assassination).


This week’s Teabag Prevention article was written by:


This week’s Teabag Prevention article was edited by:


For any comments, suggestions, or inquiries please email us at:

TeabagPrevention@gmail.com

And don’t forget to add us on myspace at:

www.myspace.com/teabag_prevention

Tell your friends about us!


Team Slayer Series #1

The Pit is usually favored and used for Team Slayer and Capture the Flag games. MLG fanatics adore this map. It’s been accepted fairly well into Halo’s community. It rarely gets vetoed, and players tend to play games on it more than other maps. I won my fair shares of matches and I’m here to share my secrets on how to succeed on the pit during a Team Game. This is assuming you’re going for MVP in every game, cause if you’re not. Get the hell out.

THIS WEEK – THE PIT: TEAM GAMES


TIP #1 – GET IT ON!

Every player on the team should have a primary objective in the beginning of the game. This means that instead of wandering around aimlessly at the beginning of a match, you start out with a purpose. Objectives are key to obtain success. Here are four objectives you should complete while starting a match in The Pit.

People should start out getting one of the following four weapons or equipment with which to really hand some ass over. What decides who gets what is who is closest to which spawn. Team management is important here, so if everyone has a different job, all is well. Team work is paramount. Four Objectives (for four respective players):

Overshield

Rockets


Active Camo


and lastly the Sniper Rifle.


Tip #2 – GET PROTECTION FROM THE UNDERGROUND

During Team matches, one player should head to the oversheild while the player who picks up the sniper rifle covers him.


During Slayer, the oversheid respawns every 3 minutes; so you might want to keep your eye on that timer for when you can get it again. This piece of equipment is very important in this map, as it caters very well to snipers picking you off from afar. Be wary of those who might try the same thing. Especially if the other person has a sniper rifle. When it comes down to it, he who carries the Sniper Rifle should be the victor of that long range battle.


Tip #3 – KING SNIPER

After assisting the player who went for overshield, the sniper should immediately head to the sword room. You can pick the Sword up as a secondary close range weapon to repel the sneaky bastards that try to attack you from the rear.


The snipers’ prime objective should be getting rid of the opposites team sniper and, if possible, recover their ammo.

If your teammates are watching your ass, you should now be able to control their sniper tower.

Tip #4 – I MISS MY WIFE…IN FACT IT’S COLD AS HELL

The third player should head for the Rockets. You should start out by picking up the battle rifle next to your spawn as you advance,


tossing your frag grenades along the wall to injure the enemies opposite of your position picking up the kills with your Battle rifle as you claim your prize. Rockets respawn every 3 minutes. Keep your eye on that clock.


Tip #5 – GHOST SPARTAN!

The last player on the team, the ninja, should go get the active camo. To get the early start, you can jump from flat to your green box,

throwing grenades into the camo spawn to insure your safety as you now merge with the walls. You should also try to push through and pick up the kills that player 3 has assisted with if not you are already done getting your ninja on.

These Beginning Objectives are a starting point for your matches, and if executed correctly can give your team the upper hand for the rest of the game. Good luck out there, and remember, unlike when you’re in Lone Wolves (and in life) – during Team Matches, you are not alone.


Things to Remember:

  • Active camo respawns every 3 minutes.
  • Sniper respawns every 2:04 minutes.
  • Rockets respawn every 3 minutes.
  • Above all, Teamwork is king. Without it, you won’t have a team, you’ll have three liabilities and a lone wolf.


This week’s Teabag Prevention article was written by:


Relax, it’s a new account for FallenChaosEm. If you want to challenge him, feel free to add him.

-jake108


This week’s Teabag Prevention article, as always, was edited by:


For any comments, suggestions, or inquiries please email us at:

TeabagPrevention@gmail.com

And don’t forget to add us on myspace at:

www.myspace.com/teabag_prevention

Also, join our new Facebook Group!


Day One

On Monday, the hearts of Xbox 360 owners everywhere became filled with overjoyment and a feeling of sucess as they stood by, watching the Final Fantasy XIII trailer play at this years Mircosoft Press Conferance. That was the good news..

While Microsoft’s E3 Press Conference went on, things began to stirr over at www.bungie.net. At 10:30 am (Pacific time), Bungie’s home page, a countdown was implanted.

The countdown was set to end at 7:07 am on Wednesday morning, July 16th. This began all rumors and speculation that Bungie would annouce their next title on the final day of E3 2008.

That was Day 1.

The Hype Machine

Rumors swirled as the hype machine took full swing. Bungie was set to make some kind of debut, and it was set to make it soon. This new Bungie ARG (Alternate Reality Game) was taking full effect on Bungie fans worldwide.

On Bungie’s site, things like the light-up map featured here, dropped subtle hints. The pupose of the map is to show the location of people who have singed onto Xbox Live to play Halo 3. Among the first of this hints was the unusal activity in East Africa.

For those of you who have played through Halo 2 & 3’s campaign, you’ll know that East Africa plays a vital role in the story, specifically, Zanzibar. With these lights lit up, some make it out to be the Superintendent logo.

Other hints include certain countries missing, bigger gaps between land masses, and unusual activity in the middle of the ocean.

As the climax approached, the Bungie forums were, and probably still are, a mess. All this ceased for a moment when at 7:00 pm, July 15, this message appeared on Bungie’s front page:

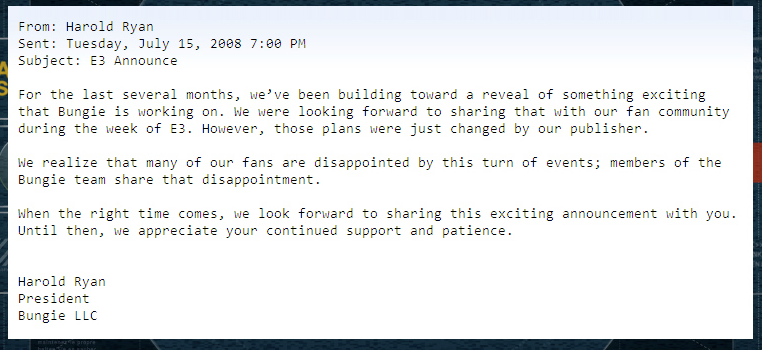
“Our Publisher is Microsoft.”

The Bungie forums went into an uproar, just like every Bungie fan’s heart. The dagger of betrayal cut into many, but it did not run deeper than those who worked hard to make this annoucement possible.

As time went by, posts by Luke Smith surfaced:


So as it appears, this is no hoax. Bungie has indeed been put on hold. The Teabag Prevention Team will keep you updated as ths goes along. You can also keep up with fellow forum members here.

Confirmation

At 3:13 am, an article regarding a new halo game was posted here. According to the article, there are now three Halo titles in the works: Halo Wars, Bungie’s Halo, and lets not forget Peter Jackson’s take on the franchise.

At 3:32 am, the Xbox forums joined the mess as “Thesomeone” confirmed that his is no joke:

“As I’m sure all of you know, in recent weeks Bungie has been getting ready to make a rather large announcement. There were countless rumors as to what it was, but no one can say for sure. Regardless, it’s apparent at this time that the announcement, scheduled for Wednesday morning, has been delayed with no new date given. There is abundant speculation that this is a joke or a way to increase hype, and the announcement will be coming, but those claims are untrue. The announcement has been delayed. It’s a huge bummer, but it’s the truth. Bungie’s community lead, Sketch, has confirmed this on the HBO forums, Luke Smith has confirmed it on NeoGAF, and other official sources attest to its legitimacy. Sorry guys.

I’m leaving this pinned for a short time until the speculation dies down. If you wish to discuss the Superintendent, which had a large role in the cancelled announcement, I suggest the dedicated discussion.”

The Morning After

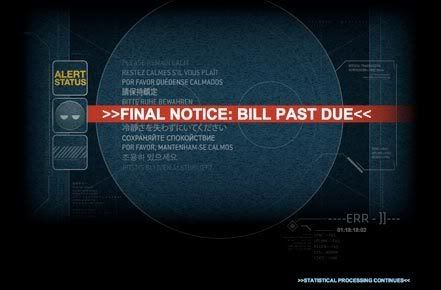
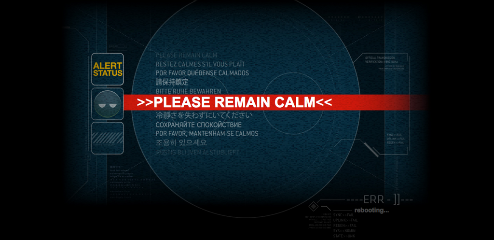
Even though news of the cancelation spread far and wide, dedicated fans just had to wake up at 7 am to see if anything happened. Sure enough, nothing did. The only noticeable change appears to be where the countdown clock should be. Now, it’s rebooting.

You can find that page here.

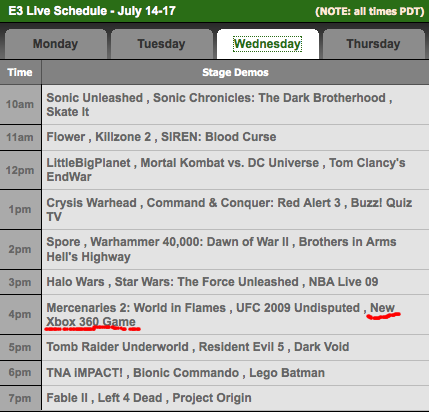
Even though the cancelation is a reality, Microsoft has yet to cancel their announcement of a “New Xbox 360 Game” schedualed at 4 p.m. Could it be Bungie’s Halo game? Or Peter Jackson’s Halo title?

Bungie’s message has been up for some time now, yet they haven’t put their home page back up.


Calm Before the Storm

It appears that hype is building up over this 4 p.m. announcement. People on the Bungie forums are still filled with doubt over whether the letter is part of the plan. In a thread devoted to the theroy that the letter was a planned event, a Bungie Overlord said this:

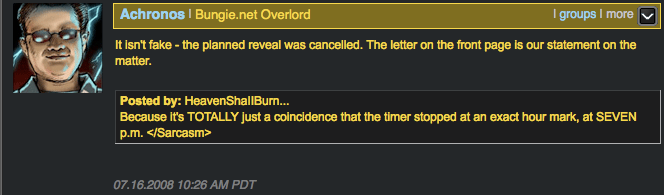
Not exactly sure of what to make of this? Neither do I.

At approximately 10:45 a.m. Pacific time, the Bungie home page reappeared.


Auguest 7, 2008

Not sure what to make of this. More info when it becomes available.


Bungie’s Statement

“As upset and frustrated as we know folks are, we hope it’s at least a small comfort that our fans know we share their disappointment. A metric ton of man hours went into getting something ready to show and it’s disappointing to not be able to share it. But, the upside is that it’s all stuff you’ll still see further down the road.

As much as fans wanted to believe otherwise, this is in fact, the truth and not a cruel hoax or prank. E3 is winding down and there are no plans to make a surprise announcement later this week.

Top Questions we’ve received on this matter:

1. OMG! The announce was posted at 7! This is all part of the plan.

The news was broken to us shortly before 7 p.m. and we decided to keep with tradition to make a clean break.

2. Why leave the splash page up if it’s not happening?

We left the splash page up for the folks who didn’t see the message or were planning on tuning in the following morning before the news vanished into Bungie.net’s ether.

3. But Harold Ryan is only a TESTER this has to be fake!

Harold was a tester, but assumed the position of President a while ago. Crazy Wiki’s and their misinformation.

A couple of far lower priority side effects of us not making our announcement are that the Podcast we recorded and the E3: Livin’ the Dream mockumentary Sketch and I were filming have hit some snags. The Podcast will be filed away in the “archives” and will be anachronistically released at a later date. The video experience, E3: Livin’ the Dream, cannot be salvaged at this time.”

-Lukems (Luke Smith)

So, it appears that it’s all over.


A Last Minute Veto, For a Better Tomorrow


Thanks to our fellow ‘scapist, Shu, it was brought to my attention that Bungie’s announcement was pulled so that Microsoft could save it for a Bungie-dedicated event. Not a very smart way to do it. If only you could load the last saved checkpoint…

Read more about it here.

LA Times reports:

“Turns out that Bungie’s latest Halo project was originally part of the program for Microsoft’s press conference on Monday, but it was taken out of the lineup at the last minute. Don Mattrick, senior vice president of Microsoft’s Xbox games business, said the company decided to pull Halo …

… to help trim its E3 presentation to under 90 minutes, from 2 1/2 hours, to accommodate attention-challenged reporters. “We had an embarrassment of riches,” Mattrick said. “We felt we could do this game more justice with a more dedicated event.””


This special edition of Teabag Prevention was written by:


This special edition of Teabag Prevention was edited by:


For any comments, suggestions, or inquiries please email us at:

TeabagPrevention@gmail.com

And don’t forget to add us on myspace at:

www.myspace.com/teabag_prevention

Also, join our new Facebook Group!


This week, we continue with the Equipment Series with the Gravity Lift and the Power Drainer.


GRAV LIFT(Duration – 30 Seconds)


Tip #1 – MAXIMUM OVERDRIVE

The Gravity Lift is a lifesaver of many flavors. One of its flavors tastes like the ability to divert a fast-moving vehicle before it’s too late.

When being pursued by an enemy vehicle you can quickly use the gravity lift to make the enemy fly over your head as if they were a banshee. This will leave your opponent feeling like they’ve just been roofied, which gives you plenty of chance to take advantage of their vulnerability. Fire away my friend. Fire away. We regret that refererence wholeheartedly.


Obviously, this tactic will only work with vehicles that don’t already fly. Once used, you turn what someone thought was going to be a hit-n-run into a fly-n-die.


Tip #2 – THE TRAP

The Gravity Lift may also do trap and disorient an enemy on foot. iIn order to either trap them or throw off their accuracy, here’s what to do:

When you’re in a room with a low ceiling and an enemy is heading towards you, quickly deploy a Grav Lift and soon enough you’ll see your very own Marry-Poppins. Kill Marry Poppins.

This also works outside, as a Grav Lift is unexpected from your enemy as a defensive tactic and it will throw off their accuracy during a chase or a battle.

If you are ever dumb enough to be caught in these traps, simply use a grenade to destroy the Grav Lift. Throw it down and it should be taken care of.

Note: Use a Frag Grenade. Using a Plasma Grenade is very risky, because many have been known to just give themselves homemade, ‘splodin butt plugs.


Tip #3 – GET ‘EM HIGH

So obviously the Grav Lift can lift you to higher places and get to mom’s cookie jar. Also, try using the Grav Lift to get a vehicle to a higher area to reach a goal or a shooting spot.


Doing this with a vehicle does take a higher level of skill, so if you are under intense heat just use the lift for a getaway – or use it to find a better sniping position that you wouldn’t normally be able to get to.


Power Drainer (8 to 10 Seconds)

Tip # 4 – I’VE GOT THE POWER!

Ah, the Power Drainer. How Annoying is this weapon? This isn’t something you want to become friends with unless you are the perfected user. It takes out an enemys shield just about instantly so fire away at them or use a combination of a grenade so that the life-sucking aura around the drainer is destroyed as well as the enemy. Be careful not to get caught in it yourself – otherwise you may end up the person with the life sucked out of you. Insert ex-girlfriend joke here.


Tip #5 – PEE ON EVERYTHING THAT’S YOURS

You can also use the Power Drain to mark your territory. If you want to get to a certain spot, but can’t do so before some of your enemies. Set up a Power Drainer so that if they want to get to it, they’ll have to deal with metal through their skulls.

Let’s say you’re gunnin’ for a brand new Sniper Rifle: throw a Power Drain in the direction of the weapon to divert the opponent away from it. Throw a grenade at the Drainer to destroy it instantly and then gingerly walk over and grab your prize.


Tip #6 – DRAIN YOU

Furthermore, the Power drainer is superbly effective against all vehicles. It stops them for five seconds as well as taking away your enemy’s shield. So as soon as you disable a vehicle with a Power Drainer you should fire away at the vehicle. You may then make your getaway in their vehicle and go off to kill some bitches. See? Who needs GTA IV?

Warning: the weapons system still works on vehicles even when they are disable by a Power Drainer, so make sure those using the weapons on the vehicles (for example, the guy using the turret on a Warthog) are taken out first because obviously the driver isnt going anywhere.


Things to Remember:

1. The Grav Lift can be used for more than just getting high. To high. Places. You know.

2. The Grav Lift can divert all ground-based vehicles, but that doesn’t mean you can challenge tank with a Grav Lift. Unless you’re having a bad day. If that’s the case, go for it, Champ.

3. The Power Drainer stops any vehicle and makes anyone an easy target, including you.

4. The explosion that follows the Power Drainer’s release can kill. Watch it.

5. Use the Power Drain to mark your territory, or to set up a mini holocaust.


This week’s Teabag Prevention article was written by:


This week’s Teabag Prevention article, as always, was edited by:


For any comments, suggestions, or inquiries please email us at:

TeabagPrevention@gmail.com

And don’t forget to add us on myspace at:

www.myspace.com/teabag_prevention

Setting your mind close to seven years ago can be a tough thing to do. You may have been a God at Halo: Combat Evolved, but are you a God at Halo 3? We here at Teabag Prevention believe it is our duty to help you walk on water again in this gift that the Bungie team is giving us on this very sunny and glorious Bungie Day – the reimagining of the Halo: Combat Evolved map Chill Out.

Back in the LAN party days, gamers were able to play without the lag, actually talk face to face, and sharing a tv was a must. Chill Out is a pretty small map which is recomended by bungie to be played by 2-8 players. “Screen-cheaters” would have had it easy.

Fast-forward to July 7, 2008. Have things changed? Xbox Live brings on a new generation and a new way of playing. The map may be similar, but will the startegys stay the same?

THIS BUNGIE DAY: HOW TO NAVIGATE COLD STORAGE

Tip #1- Know Thy Surroundings

If you’re not careful, it’s pretty easy to get lost in Cold Storage during your first games. Use distinct landmarks such as: teleporters, weapon spawns, and places around the map that catch your attention. A few things that WILL catch your attention are:


Tip #2 – The Spawns

For instance, if you remember Chill Out fairly well, then you’ll be happy to hear that the Overshield, Active Camo, Rocket, Frag Grenade, Plasma Grenade, Shotgun, Plasma Rifle, and Assualt Rifle kept their spawning locations. New to the roster are the Equipment spawns and the Battle Rifle spawn.

The Needler is located on the oppisite platform as it would be on Chill Out. Not a major difference, but one that can decide life or death.


The Bubble Shield is located just above the center of the map.


The Regenerator is found just below the Plasma Rifle spawn.


The Power Drainer can be picked up not too far from the Frag Grenade spawn by the Flood in the tube.


The Battle Rifle spawn can be found a few paces south (toawrd the center of the map) of the Bubble Shield spawn.


The Overshield is located not too far from the Shotgun spawn.


The Active Camo is located in the same room as the Sniper Rifle.


Tip #3 – Use that Needler!

Since Cold Storage is a fairly small map, using a Needler can be key to being on top of the scoreboard. There is a hallway leading up to the needler spawn point that can be used as cover from enemies below.

Be weary of greades for they are deadly in close quarters. If they don’t know you’re up there, and you’re sitting up there giving deadly pika-boo to your enemies, you have full rights to laugh your ass off at them.


Tip #4 – Teleporters

You may end up behind one or more unsuspecting enemies if you use the teleporters correctly. An example of using the teleporter system strategically would be using the teleporter behind the Plasma Rifle spawn. This puts you in the same location as the Active Camo and the Sniper Rifle.

Just try to make sure no one else is waiting on the other side. Only then will your plans for slaughter be successful.


Tip #5 – Cheek to Cheek

Cold Storage is a close-quarter map. The Sniper Rifle should not be used frequently unless you’re decent at no-scoping (see Teabag Prevention article #1). Weapons such as Rockets and Shotguns fit the map perfectly.

During a Free-For-All match, getting to the Rocket Laucher first can be key at achieving victory – at first.

Shotguns play an important role too. They kill at close range, are the easiest weapon to use in the game, and they disable an enemy’s shield with one shot. If you’re going up against someone with a Battle Rifle or Assualt Rifle, you should be able to win – if you’re close enough.

If you can’t get your hands on these weapons, it might be best to just stick to your Assault Rifle. Use Equipment to change the field of battle also. There are many ways of going into battle, but there are many mistakes. Here’s one:


Equipment can be very dangerous here, because the map is so close-quarters that you may very well use them against yourself accidentally. Be careful of this, Happy Bungie Day, and have fun!

Things to Remember:

  • You WILL lose if you don’t utilize your sorroundings.
  • Close-quarter combat is a must. Equip the necessary weapons.
  • Equipment can change the field of battle.
  • Know your weapon spawns.


This special edition of Teabag Prevention was written by:


This special edition of Teabag Prevention as always, was edited by:


For any comments, suggestions, or inquiries please email us at:

TeabagPrevention@gmail.com

And don’t forget to add us on myspace at:

www.myspace.com/teabag_prevention 

Also, join our new Facebook Group!


Happy Fourth of July, Scapists. We never rest here at Teabag Prevention because neither does the enemy. We’ve decided that a lot of you probably don’t go outside for anything, even if your parents tell you to. You’re rebels like that. So we’ve been kind enough to make this second part of the Equipment Mini-Series explosion-based to commemorate our country’s independence, happiness, and affinity for exploding the other team.


THIS WEEK: THE TRIP MINE (85 Seconds it detonates if not already exploded)

Tip #1 – HAVE A NICE MINE!

The trip mine is the only Equipment item that directly kills opponents or vehicles. So take extreme advantage of this and also be very wary of its capabilites. When you hear a beeping and see an orange light, pay attention and be more attentive – you’ve got some ‘splodin to do. When playing in teams, always make sure to let your teammates know that it is around – otherwise you may get an accidental triple betrayal. There’s no achievement for that, no matter how cool it sounds.


Tip #2 I’LL TENDERIZE ‘IM!!!

When in a situation tighter than your sister’s jacket, the mine can take out enemy vehicles instantly. The vehicles might need a little tenderizing first, but once you lay that mine, a kill is in reach. Be sure to stay away from the vehicle, when doing this, because even though the blast should kill it and its passenger, you may also get caught up in that explosion.

TIP #3 DO IT AROUND PEOPLE

The Trip Mine can also be used to your best advantage in Flag/Bomb/or Big Team Battle games. Here’s how: plant your Trip Mine right at the base of your Flag or Bomb and make it so that an unsuspecting enemy goes for the victory Flag journey or for the Bomb arming and he ends up getting ‘sploded instead. That’s right. ‘Sploded

TIP #4 LISTEN ALL Y’ALL IT’S A SABOTAGE!

In Big Team Battle maps such as Valhalla you can sabotage the vehicles, or even items, using Trip Mines before anyone ever gets to them. You’re setting a booby trap. We said trap.

Here’s one: throw the Trip Mine under a vehicle so that the beeping and orange light are muffled and relatively unnoticeable. Once someone turns on the engine, it doesnt purr anymore. It will ‘splode

TIP #5 EXPLODE FROM WHEREST YOU CAME, MONSTER!

The simplest option with the Trip Mine is to lay the mine exactly where it is spawned. Anyone in a rush, at the beginning of a match, trying to go around the map picking up their favorite weapons before going out and Slaying might accidentally pick it up and do some ‘splodin. You’re really counting on someone’s stupidity here. Luckily, it won’t let you down.

TIP #6 BUBBLE TRAP
Combine the Trip Mine with a Bubble Shield. Here are two ways in which this can be effective:

1. When someone is in it just throw a mine during battle or while they are chasing you and it’ll explode with the full force of the Lord inside the Shield while you are perfectly unharmed. Just like in last week when we combined grenades and bubble shields.

2. Smarten up and in a congested battle situation, where most people will be running around like headless chickens and looking for safety from vehicles or crossfire, lay down your Trip Mine in a deployed Bubble Shield. Someone is bound to need the cover and accidentally step into their own private Michael Bay-level explosion. Warning: make sure you, or your teammates, don’t need the cover first.

TIP #7 NOT SO HARD TO KILL

 Now that you know exactly how gruesome, how dangerous, and how unbelievably risky laying down this important and amazing piece of equipment is you’re probably thinking “it’s too powerful…it’ll become sentient…it’ll destroy us all!” Well, don’t worry my Skynet fearing friend, you can destroy a trip mine by doing the following:

1. Shooting it a little bit.

2. Throwing a grenade at it.

3. Convincing a suicidal Spartan that it’s a good idea.

Note: You may also use these ways to kill (and therefore detonate) the Trip Mine to set traps from afar. When someone is near it and thinks they are safe, you may be on the other side of the map, waiting to shoot it and detonate their face. You may also use this trick with vehicles.


Things to Remember

1. Trip Mines take a very long time to detonate unless tripped – 85 seconds to be exact.

2. These things force you to be smart. Set traps, don’t throw them around yourself or you’ll seem more suicidal than Sean Kingston.

3. Make the Trip Mine’s disadvantages your advantages. Kind of like when you’re in a relationship.


Please tune in Next Week for the end of the Three-Part Equipment Mini-Series where we finish you off…er…give you tips on Grav Lifts and Power Drains. Same Bag time, Same Bag channel. Now go to your barbeque and tell girls that don’t care what you’ve learned today.

This week’s Teabag Prevention article was written by:


This week’s Teabag Prevention article, as always, was edited by:


For any comments, suggestions, or inquiries please email us at:

TeabagPrevention@gmail.com

And don’t forget to add us on myspace at:

www.myspace.com/teabag_prevention


In the months before Halo 3’s beta release, the mysterious “X button” fuction plagued the interwebs. Ridiculous rumors were spread far and wide. Once it was even believed that its function was to steal an oppenent’s weapon while it was attached to their back.

Then, we were told that this new function would change the way Halo is played. This left many wondering if a 3rd person camera view was open to a push of a button. After videos of leaked footage emerged, we soon found out what the answer was.

On May 16, 2007, Halo players were giddy to use this…


THIS WEEK – EQUIPMENT

BUBBLE SHIELD

Tip #1 APARTMENTS FROM THE FUTURE!…

Use the Bubble Shield as a means of getting closer to your opponents or to your most prized weapon. When you’re in an area that’s hot like mama’s freshly baked cookies and you want to get there, use the Bubble Shield as a ways to extend your safety. Toss it away from yourself and as far forward to your objective as possible. To do this, look up into the sky and toss it into the air. Once you’ve deployed it, and reached it safely, you will be nice and cozy in your new temporary home.


Tip #2 – …THEY ALSO COME WITH LIFE INSURANCE POLICIES!

When you’re low on shields and being chased by the man it is always a good idea to deploy a Bubble Shield to or near your destination, just like the above tip. The difference here is that once you see your opponent approaching you’re going to toss a grenade of any sort inside your own shield…

Jump out once your opponent is in in. You are now on the offense. The shield will explode, along with their face. You have now handed out some Exploding-flavored pain to them while you remain completely unharmed. Your next move is to then jump back into the fight and finish the yorb since they are now completely helpless – if they’re not already dead, that is.

Tip #3 – BITE OFF WHAT YOU CAN CHEW

Bubble shields do not stop road rage so DO NOT use them for protection against mobile objects themselves. DO use them against a vehicle’s weaponry. When under heavy fire from a vehicle you should toss a shield, while avoiding the vehicle of course, and either “stick em” or raid their vehicle. It is protection against the vehicle’s fire power, not the vehicle itself. Don’t just stand there, shoot the bitches.

And hope for the best…


Note: The Bubble Shield lasts for a total of 20 seconds.

REGENERATOR

Tip #4 – A SNIPER’S BEST FRIEND

This handy tool gets put to good use in long-range combat situations. Let’s say you end up without any protection and all you have is a sniper rifle. This will keep your shields in tact and provide extra support under fire so that you are very powerful (but not invulnerable) when taking out your enemies from afar.

Also when things become close range, you can still use the sniper to get a no scope and melee. Whenever in a hand-to-hand fight in a regenerator, you have the higher advantage of defeating the opponent if you fire at them first and then whack. Fire then whack. Fire. Then whack. Or just two consecutive whacks. Just make sure you keep your whacking high, otherwise you’re done for…what?

Tip #5 – EXPLOSIVE, BUT DEADLY…

Unfortunately the regenerator doesnt have the speed to heal you when you are hit by explosives, so the more explosive weapons like Rockets, Grenades, and The Brute Shot are more capable of killing you while you’re in a regenerator. Be wary of that.

High powered or high rated firing weapons, such as the Machine Gun Turrent or Needler, are also capable of killing you in the regenerator. These must be used to their full potential, though. Here’s an example of me using a grenade to its fullest potential…

Not so safe now, are you?


Notes:

Using the regenerator as an added element of surprise in long-range battles works great. So does staying with a teammate and actually using the regenerator selflessly to heal.

You can still die under fire by BR’s and/or Carbines. Needlers are the quickest and most effective weapons when playing against someone in a Regenerator.

The Regenerator also lasts a total of 20 seconds.


Teabag Prevention Bonus Tip!…THE FLARE

FLARE

Tip #6 – OH TAKE A LOOK AT ME NOOOOOOOOOOW!

Much like Phil Collins, The Flare is taken out of basically all of matchmaking – so this tip will be mostly for you custom matches fanatics. We see too many people misusing these, so here’s how to be smart about The Flare.
The Flare obviously takes out your vision. That is its only function. What you’re left with after you deploy or are faced with a Flare is that it does not take out your radar and your reticule or crosshair. The crosshairs will still turn red when an enemy is in them. Take advantage of this when under the Flare’s warming light. Stop looking in front of you and use only your radar and crosshair. This is the best defensive tactic in a Flare situation aside from just leaving the affected area.


Tip #7 -DON’T LOOK AT ME WHILE I’M SHOOTING YOU

When you have a short ranged weapon or uber powerful one, use the Flare to disorient your opponent, but pay attention to where they are or where they are heading because you will be slighlty blinded yourself. So once the Flare is in effect, blast away my friend.

The Flare is also very effective in large groups or flag/bomb games. See a bunch of people guarding the flag? Throw the flare down. By the time the Flare’s gone, their flag is too. Just make sure to divert your own eyes – the Flare will blind the player who throws it, too (we can’t stress this enough).

Things to Remember

1. Your Bubble Shield will help you get places unharmed. Not camp out.

2. Bubble Shields will protect against vehicles’ weapons, not the vehicles themselves. Use this to defeat vehicles.

3. Whack off inside a Regenerator.

4. Needlers will kill people in Regenerators. So will Rockets. And Sniping. And well-thrown Grenades.

5. Flares will blind you too, so make sure you’re looking at the right stuff – Your Radar and Your Crosshair.


This week’s Teabag Prevention article was written by:


This week’s Teabag Prevention article, as always, was edited by:


For any comments, suggestions, or inquiries please email us at:

TeabagPrevention@gmail.com

And don’t forget to add us on myspace at:

www.myspace.com/teabag_prevention

Week 10 already? My God it’s seemed like longer. We here at Teabag Prevention would like to say thank you for reading Weeks 1-10 (and if you haven’t, then this is a not-so-subtle hint telling you to do so, asshole) of Teabag Prevention. This is not the end (well, it is the end of this chapter), but the beginning – as this is only the first chapter in how not to get some Spartan balls in your face.

We’re going to end it the way you start out most games. Not with a whisper, not with a bang, but with an Assault Rifle.


THIS WEEK: THE ASSAULT RIFLE


TIP #1 SHORT BURSTS OF LOVE

The Assualt Rifle is most accurate when being shot in short burts of fire. Holding the trigger down is going to provide you with more misses than hits. When shooting an Assault Rifle at mid-range (for lack of having a better weapon in your possession *ahem*!), you are going to have to shoot in short bursts.


TIP #2 OVERCOMPENSATE FOR YOUR INADEQUATE ACCURACY

Due to the inaccuracy of the weapon, you may run out of bullets before your opponent is dead. If you run out of bullets completely your clip will automatically reload. If you are 100% sure that your clip will not kill your opponent, then the best choice you can make is your reloading time. If it seems like your opponent is not going to kill you with their clip, then you are very lucky. If this is the case, please reload before your oppoenent starts reloading. This will give you the split-second head start that will make the entire difference in a shoot out. Unless they have a Battle Rifle – in which case you’re dead.

Really, if you’re lucky enough to get the second chance to kill your enemy, don’t waste it.


TIP #3 HIT IT OR QUIT IT

An important thing to remember is when to melee. Too many gamers out there either melee too early or too late. It’s a common mistake. It’s also very important to know when your opponent’s shield is low enough to conduct a melee.

It takes about half an Assault Rifle clip to lower their shield…

…enough so that one melee can finish the job. Pimp slap that bitch. Hard. She gone done you wrong.


TIP #4 SPRAY THE PREMATURE HITTER! SPRAAAAAAAAAY!

If you see your opponent seemingly following the tip above, you can either continue with tip #3’s strategy, if you feel comfortable with pulling a Romeo + Juliet with him/her,

or you can take a step back and continue firing and finish your opponent off with the remainder of your clip.

Then snicker at their failure. Early meleeing will be the death of a lot of intermediate players. Take advantage of this.


Tip #5 …BUT I DID-NOT SHOOT-THE VEE-HI-CLE!

The Assualt Rifle doesn’t have an effect on vehicles unless the person(s) occupying them has their shields depleted or near depleated. For example, If a enemy Banshee is flying over you with low shields,you can try your short round burts, or, depending on how close the enemy is, you can go all out. You have the ability to kill whoever’s occupying that vehicle – BUT don’t be dumb enough to think it’s going to kill the vehicle itself. Slim to none, my friend, slim to none.


Another example is enemy in a Ghost. If the person’s shields are depleted, and driving away from you, SHOOT THEM!!!


Things to remember:

  • Like all projectile weapons, a grenade-projectile combo is always good. So, throw a grenade, lower their shields, and unload half a clip in ’em. That should do it!
  • Shoot in small bursts of fire
  • Reload strategically and compensate for the weapon’s inaccuracy.
  • Spray the shit out of early meleeers.
  • Works on vehicles only if thier occupants shields are low

Once again, thank you for reading the Weapons Series. This concludes your broadcast day on weapons. You should be able to kill all bitches with anything you see lying on the ground now. Go outside. Pick something up. Kill someone. Take it from us, it is perfectly acceptable!*


*Note: It is completely unacceptable to kill any human person. By outside we meant Valhalla. Go there. It’s pretty…
Indian Thing

This week’s Teabag Prevention article was written by:


This week’s Teabag Prevention article, as always, was edited by:


For any comments, suggestions, or inquiries please email us at:

TeabagPrevention@gmail.com

And don’t forget to add us on myspace at:

www.myspace.com/teabag_prevention


Finding multiple dual wieldable weapons in the same area is like choosing between two blondes and two red heads. It’s ok to experiment, but if you choose the wrong combo you’ll fail miserably. Some combinations that may work for certain people can be disastrous for others. The following are just some examples of the different combinations you can choose from.

Note: you’re going to hear a lot about Plasma Rifles and Plasma Pistols. The reason why they don’t get their own tips is because of how common they in the grand scheme of combinations. Also, they are reffered to as: Shield disablers – aka the obvious choice.

THIS WEEK – DUAL WIELDABLE WEAPONS

Tip #1 – OPPOSITES ATTRACT


Dual wielding two of the same weapon MAY NOT be as good as a combination of two weapons. For example: If you pick up a Plasma Rifle and an SMG, you’ll be sure to take out anyone else holding two Plasma Rifles or two SMG’s. The reason? A Plasma Rifle’s purpose in life is to disable one’s shields

An SMG’s purpose in life is to simply penetrate you…as in your skin. Anyway, combine the two and you get a penetrating-shield-disabling combination of a kill.

Look how cute they look together!


Tip #2 – MAUL RATS


The Mauler can be the most annoying weapon in the game. One shot and one melee is all it takes to send you to Spartans (or Elite)Hell…and to possibly dine there as well (I’m sorry, we know how crappy that movie is..but it was there…it was late….)

So aside from it being annoying (or a window for annoying references), a Mauler can also rbe combined with other weapons for maximum effect. The Mauler is one of the “penetrating types” (as opposed to the “shield disablers”). Sure, it lowers your shield, but it acts like a small Shotgun. Combining this weapon with a Plasma Rife or a Plasma Pistol will give you the upper hand on disabling your enemy’s shield…

…it will also give you a straight shot at them. In this case, dual wielding Maulers can be a good thing, but only if you’re at close range. It’s usually not the best idea, though.


TIP #3 PISTOL P.I.


Ahh, the pistol…errr…um…I mean Magnum, you have evolved over the course of six years and seven months. Since the disabling of the zoom function, the Magnum has become a dual wieldable weapon. Though it looks bad-ass holding two Magnums, (even more so in Halo 2 because they’re jet black),


They aren’t very effective unless you get spot-on headshots. Even then, it can be difficult to score a kill.

To make it easier, pick up a Plasma Pistol up and use its charging capabilities to disable your opponent’s shield.

Once you’ve got that done, it’s pretty much a one-shot kill.


Tip #4 – I LIKE SPIKE


Spikers are part of the “penetrating type” family (that sounds horrible…), and yes it would hurt to be penetrated by a spike. Using this weapon with a Plasma Rifle or Plasma Pistol is a great combination to use.

Like the Maulers, two Spikers can be effective at close range. This weapon is a good one to use in any combination. It can go to medium range if needed, but keep in mind that the spikes have a slight arc.


So if you do go medium-range on someone’s ass, make sure you aim at their mid to lower back, like so:


And then, enjoy the results.


Things to remember:

  • A good map to test all these variations out would be: The Pit
  • One combination might not always work. Experiment with what you have.
  • Shield disablers + penetraition = WIN!
  • Shield disablers + Sheild disablers = LOSS
  • Double Penetration = Everyone Wins…


This week’s Teabag Prevention article was written and edited by:


For any comments, suggestions, or inquiries please email us at:

TeabagPrevention@gmail.com

And don’t forget to add us on myspace at:
www.myspace.com/teabag_prevention


Isn’t it funny when someone takes a laser pointer to a concert and makes it look like Tinkerbell is dancing on the lead singer’s junk? This is the one I wish someone would take to an American Idol taping. The Spartan laser is hell in a bottle. Get ready to start pouring it out all over your dead homeboys.

The Spartan laser, or “Splaser” as it is called by the biggest of dorks, has a few quirks to it that you need to get used to before you can dole out the damage. Here are some tips that will make it easier for you to make your friends inclined to call you a cheater.


This week in Teabag Prevention: The Spartan Laser

Tip #1: THEY CHARGE YOU BY THE HOUR

Much like Brian Gilmore’s average sexual encounters, the laser has a three second charge time that is required before every shot. Get used to it. If you somehow get into a cross map game of laser tag, knowing this three seconds deep down in your bones will keep you alive.


Tip #2: NO FREE REFILLS

The laser doesn’t use “ammo” like most weapons, but instead has a battery. A battery is full at 100 with each shot taking 20 away for a total of FIVE shots per laser. Keep track of these not only for your own laser, but also be sure to let your teammates know if you get taken out with the opponent’s. If you die via laser, then the opposing team can have no more than 4 shots left. Be sure to play on the conservative side until you know it’s safe for your team to start with the razzle-dazzle.

Another way to piss off the enemy with the laser would be to toss up a bubble shield. On maps like Sandtrap, it may be difficult for the other enemy to see the bubble shield from far away. Also, this may require Jedi reflexes:


Tip #3: USE A TRIPOD

The best way to use the laser is to plant your feet and follow your enemy. There is no need to “lead”, or shoot where your opponent is GOING to be, because it’s a fucking LASER right? Speed of light anyone? Anyone? Bueller? While this can be true, if you can anticipate where your opponent will be as opposed to where they are you won’t give them much chance to hide. While someone is “painted” (the laser is aimed at them and charging) they hear a distinct high pitch tone. Let them find out as opposed to telling them in advance. Here’s an example on my file share. I was pinned down by a fully loaded warthog, but anticipated their path and added two notches to my bedpost:

http://www.bungie.net/forums/posts.aspx?h3fileid=18056634

TIP #4 UNLEASH THE FURY

The same shot that you used to kill one enemy on foot could have been used to kill four people at once, blow up two vehicles, stop a bomb carrier, and get a killing spree. The laser is a POWER weapon, but only as powerful as you allow it to be. This is a clip of a friend of mine doing all of the above:

http://www.bungie.net/forums/posts.aspx?h3fileid=18066886


TIP #5 ABUSE PREDICATBILITY

Say you’re in a smaller map map, such as Construct, the laser isnt as good as a weapon as it would be if you were out in an open map such as Vallhalla or Avalance…or is it?

Walkng around with the laser, charging it even before you see the enemy, can be helpful. In the screenshot below, notice how the arrow is pointing to the midsection of the outer circle.


When they’re running out, you’ll have your laser charged by then.

Then…..

…they’ll have no choice but to walk into the light.


Things to Remember:

1. 3-second Rule: The laser takes three seconds to shoot. Plan accordingly.

2. The Laser has limited ammo, so use accordingly.

3. I’ve got the power! Make sure you realize you can stand still and aim accordingly (mostly on big maps).

4. Plan your kills accordingly. Use the laser to its maximum potential.

5. Anticipate your opponents’ trajectory. They’ll never know what hit them…until you do.


This week’s Teabag Prevention article was written by:

jake108 


Edited by:

Brian Gilmore


For any comments, suggestions, or inquiries please email us at:

TeabagPrevention@gmail.com

And don’t forget to add us on myspace at:


http://www.myspace.com/teabag_prevention


The needler is a small, dangerous, pink and sticky weapon. Don’t let the size of it fool you, because it is not the size that matters – it’s what you do with it. On this week’s Teabag Prevention, we teach you how to stick your pink in the right places.

THIS WEEK: THE NEEDLER


TIP #1 PINK ISN’T THE NEW ANYTHING. BLACK RULES.


Nobody likes to wear pink. Well, unless they’re a douche, nobody likes to wear pink. Don’t be “that guy”.

During a needler face-off the most important part of the battle is knowing how to dodge the sharp needles being thrust into your body.


if your enemy has The Needler as well, you need to either get

a) Closer to them, or

b) Farther away.

Doesn’t sound helpful? Here’s what we mean:

a) If you don’t move, you’re an easy target. This weapon is very deadly at medium to close range. Your best bet here, as their needles will follow your body everywhere, is to get to him before he kills you. You both probably started firing at the same time. Both of you will most likely die. It only takes a little over half a clip to kill you. Once it is – you’re toast; but so is he. You don’t want to tie up the score; you want to win. The best thing you can do in a N vs. N is to approach them until you can hit them. If you’re not dead yet and he doesn’t hit you back, then you will most likely survive. Otherwise, be ready to become the Juliet to his Romeo.

.

Note: When dodging at close range, dont run straight into it. It only takes about seven insertions to create a large explosive stink.


b) If you’re any father away than medium range, you’re going to want to move backwards. More importantly, though, you’re going to want to hit your opponent with everything you’ve got (simultaneously). Make sure to strafe left and right and maybe to even jump (just don’t hurt yourself by going off any ledges). By doing that, the needles will have less of a chance at hitting you (which is good).

If you don’t…

…you will die.

Note: Remember it only takes about half a clip to kill you. It’s not really important to tell you how many consecutive needles would kill you, because come on – who the hell’s counting those


TIP #2 WE ARE.


It is important to know your spawns in Halo, but it is almost equally important to know (approximately) how much ammo it takes to kill with each weapon and how much each weapon holds.


We already know that The Needler can kill you in a little over half of clip’s worth of shooting. The Needler itself can run out of ammo fairly quickly because of how fast it releases its bullets. The Needler magazine holds only 19 needles, so the maximum amount of ammunition consists of 95 needles. The needler is only effective when it you can empty about half your load into someone else. An under-loaded Needler is like a guy with E.D. – useless when it matters and in need of some serious medical attention.


TIP #3 SHERLOCK HOMING


The Needler has a slight homing ability, but it needs a little bit of guidance – this is where you come in. In order to use the needler efficiently, you need to predict your opponent’s dodges. For example, if they start strafing to the left or right, shoot ahead of them. If they start getting creative, try and “guesstimate” their trajectory and shoot there.


TIP #4 QUANTITY IS QUALITY


At medium range, empty your load quick and get out. It takes a lot of practice, but once you master getting as much of your clip into a person as possible while dodging their attacks, you will win battles against battle rifles, carbines and other mid-ranged weapons. The needler, if used correctly, can win any mid-range battle (might a little hard against rockets, though).


Note: Don’t try facing off against a sword with a needler at closer range at home…for now.

TIP #5 THAT MOVIE WAS HORRIBLE. DON’T REMIND US OF IT.


DO NOT USE THE NEEDLER ON A VEHICLE. HOLY CRAP. IT CANNOT BE STRESSED ENOUGH THAT THE ONLY RESULT YOU WILL GET FROM FIRING NEEDLES AT A VEHICLE IS MAKING IT LOOK LIKE A CHARACTER FROM THAT HORRIBLE SUPER MARIO BROS. MOVIE FROM THE 90’S.

Things to Remember:

1. Dodging is half the battle. Make sure you can dodge in a way your enemy won’t be able to predict.

2. Count on bad dodgers to plan their trajectory and pump them full of needles before they can kill you.

3. Keep your Needler fully loaded.

4. Keep dodging – The Needler is a great mid-range weapon.

5. Don’t make vehicles look like the pads on the Legion of Doom.

Get out there and use your Needler responsibly. Wow. That was hard to get through without making any immature penis jokes revolving around the color of the bullets and the fact that they stay inside your opponent. Let’s breathe.


This week’s Teabag Prevention was written by:

Edited by:


For any comments, suggestions, or inquiries please email us at TeabagPrevention@gmail.com And don’t forget to add us on myspace at:

myspace.com/teabag_prevention


Rockets no doubt cause explosions that leave those unfortunate to be near them massive damage, if not death, in their faces. The first and unspoken (yet not un-written) rule of Rockets is that splash damage (the damage caused by being near a rocket explosion – as opposed to a direct hit) is key to taking out just about anything with the Rocket Launcher. Sure, it’s always better to have a direct hit, but sometimes, that may not be possible – so you’ll have to enjoy that show next time. Thinking of a cheap semen joke? Neither are we. Welcome to Teabag Prevention: How to Suck Less at Halo Week #6

THIS WEEK: THE ROCKET LAUNCHER


Tip #1 – WATCH THEM SHOWER

If you have one of these fine pieces of weaponry during a team slayer match, your chances of getting an overkill or an extermination increase four-fold. One of the best things to do to the other team is to stalk them. We know what you’re thinking “Finally! This is legal!”. Well get ready for the stalk of your life because now that you have the rockets, you are a hunter. A stealthy ninja. You are not the 8ft. tall monster that you feel like. You need to use strategy and your cunning wit. You need to stalk your prey in order to get the possible best shot. There is a chance that your time to kill all of them at once may never come. But if it does, aim your crossair to the center of the huddle/squabble and hear that wonderful man’s voice say (at the very least) “Double Kill!”.

Remember: Splash Damage. Right in the middle.

It may not kill them, but that’s why you have two rockets before you have to reload. “Extermination”. Music to our ears.


Tip #2 – ROCKETS AGAINST THE MACHINE

Splash damage also works on vehicles that are light to medium in weight. These vehicles include: Mongoose, Warthog, Chopper, and Ghost. All of the above vehicles travel at a fast enough rate so that it can be hard to score a direct hit with a rocket launcher. This is why you should aim at the path ahead of the vehicle. Doing so will surely flip the vehicle or cause it to veer of its intended course.

Also, by doing this, you have a good chance at defeating the vehicle altogether.

Note: A mongoose may fly away and you may actually be saving this person from your wrath if your shot isn’t executed directly enough. To ensure death, make sure to shoot the person on the mongoose a little before unleashing your rockets on them.

Tip #3 PRE-EMPTIVE ‘SPLODIN

Take their important and potentially devastaing vehicles to the abortion clinic. Rockets have a use other than killing in Halo. In games where vehicles are very important and may give your opponents the upper hand, specifically in “Objective” games found in Big Team Battle, disabling the enemy’s vehicles will not only piss them off; it will instantly give your team the upper hand. Get rid of the vehicles before they’re even used.


Tip #4 BE PSYCHIC

Flying vehicles may be the hardest target for the rocket launcher. If you’re just crazy enough to try it because you’re a rogue spartan and your plan to foil the evil flying vehicle may be just crazy enough to work, then the best thing to do is to put your plan into perspective:

Imangine you actually go outside occassionally and that you’re a quarterback for a football team. Imagine there are no women involved. We know, We know. Bare with us. You’re a quarterback. The Banshee is your dumb-ass, yet more attractive and over-appreciated, reciever. You don’t know which way it’s going to turn. You think you know, but it may decide otherwise. In this case you’ve got to use your animal instincts (what A.I. should stand for) to make sure it makes that catch. Shoot in front of your target, but make sure you shoot at the place where you think the it’ll intercept – this may not necessarily be its obvious trajectory.

Once you think you’ve got ’em, zoom out and watch the fireworks.

Only then can you celebrate and feel good about yourself. This is extremely difficult to do – like your grandmother. And also like your doin’ sweet ol’ granny, the wait and the effort put into the end result will be well worth it. Ok that’s just disgusting.

Tip #5 TANK YOU VERY MUCH

Like step-children, tanks and wraiths can be difficult to deal with. They have tough armor and can probably kill you faster than you can kill them. The trick here is the same as with any other vehicle, aim at the path they’re going in. Luckily, wraits and tanks are much slower, so you’ll have to adjust your measuring. This should be extremely easy.

Be presistent. With enough direct hits, you CAN win – just make sure you stay out of its way and keep your distance. Apply Tip #1 and use your ninja skillz to shoot from a safe place. From Wraiths to Tanks, this should do the trick.


THINGS TO REMEMBER:

– Be stealthy. Plan your hits.

– Don’t go for direct hits on people – go for Splash Damage on people.

– Direct hits are for vehicles.

– Use this weapon against vehicles – and if you’re in an objective game, use it against vehicles even if they’re not moving.


This week’s Teabag Prevention was written by:


Edited by:


And for those of you who wondering if you should be working towards killing Mr. Gilmore, don’t worry you probably already can. He can kick your ass in “real life”, though -unless you’ve reached the national average height for men.


For any comments, suggestions, or inquiries please email us at TeabagPrevention@gmail.com And don’t forget to add us on myspace at:

www.myspace.com/teabag_prevention


It was introduced to us in Halo 2. It has claimed many Warthogs and even more lives of the ones who wield them. Calm down, back off, don’t kill yourself with that thing, make sure you’re being safe while using it and make sure it’s completely full before you waste its load. We’re talking about The Brute Shot and its best – and most practical uses- during this week’s Teabag Prevention!


THIS WEEK: THE BRUTE SHOT


Tip #1 – FASTER BRUTEYSHOT, KILL! KILL!

If you’re looking for a quick and squishy-sound-making kill, then look no further. The Brute shot has many advantages; one being a quick and dirty kill. This one’s easy and is only to be used when in close combat. It’s a one-two punch.

First, if you know you’re going to run into an enemy around the corner, get ready to kill that bitch.


Shoot once,


then melee.


That’s all it takes.


Tip #2 PLANES, BRUTESHOTS, AND AUTOMOBILES

Brute shots can be used for more than just the straight kill. The rounds that fire out of the Brute Shot are powereful enough to overturn a light to medium weight vehicle such as a Warthog or a Ghost. However, they are rather useless against Wraiths, Scorpions, Banshees, and Hornets.

If you’re playing an objective game on a large map, a Brute Shot may help with the many ground vehicles that you may come into contact with. But remember, it takes well placed shots to take down a Warthog.

A Warthog, for example, is farily easy to flip if you manage to land some shots under the Warthog.


Watch it flip and…..


Stare into their eyes like a betrayed lover in their last few seconds of this life, then….

…with a few well-placed shots, it should go up in flames faster than my last relationship!


Tip # 3 BEWARE OF THE HEAVIER ONES: THEY ARE A WASTE OF YOUR TIME. MOVE ON! NO…D-DON’T…GOD DAMMIT…

It’s not a good idea to charge heavy vehicles with a Brute Shot. Sure, it may do some damage, but they’ll kill you faster than you can kill them. Things not to try to kill are:

Banshees

Hornets

Wraiths

Scorpions

Choose your battles wisely. It’s like when you choose to not correct your girlfriend’s malapropisms during a fight. It’s not worth it and you can win, and live, more effectively by moving on.

As you can see here, you can try your best to escape the inevitable,


But they’ll most likely always win. And even if they don’t, you shouldn’t be going into fights you know you can’

…deal with it.


Tip # 4 YOU CALL THAT A KNIFE?

Things are a little differnt when it comes to meleeing with a Brute Shot. For those of you who didnt notice the large blade on the weapon, proceed to notice it now. It’s huge. Seriously. Look at it. You didn’t notice that? Come on now.

For a regular weapon, it takes a couple of melees to do the job. With a Brute Shot, a jump and a melee at the same time will knock out an enemies shields rendering them one-shot kills.


If you’re playing a Team game, this can turn into a great assist. If not, it’s your choice on how to finish the job. You can hit them with your body or give them a quick shot to the body or face.


Tip #5 TOTALLY STRAIGHT. SWEAR TO GOD.

Unlike most other weapons in the game, The Brute Shot does not fire at an arch. Once you aim the crosshair at something, it’s not going to fall short or drift off into another direction. It’s going to go where you are pointing. This makes the Brute Shot a great medium-ranged weapon.

As seen here, all you have to do is keep the crosshair on your oppenent, wait for it to turn red, and you’ll be in for a kill.

Tip #6 TAKE THE BOTTOM

Now, its importnat to keep your crosshair on your targeted enemy at all times, even when they’re jumping around like kangaroos – which works great in Halo, but will make you look like a jack ass in most other games; or in real life. This ties in with Tip #4 simply because the fact that the Brute Shot does not have an arch comes into play. When firing at an enemy thats jumping from a position higher than you, you may want to aim below that person so that the grenade will hit them.

With persistent hits (about 3 dead-on shots or 4-5 general hits), you will eventually kill them.


s

Things to Rememer:

-The Brute Shot has no arch to it

-It proves to be a tide-turner when in combat with ground based vehicles other than tanks

-Has a melee advantage (the huge blade that makes up most of the weapon)

-Pick on something you know you can destroy.

Now that you know more about how to not kill yourself with this weapon, go out and use it. It really is an extremely straight-forward weapon. Don’t you wish girls (or men, whatever you dig) came with instructions this easy? Thanks for reading! See you next week.


This week’s Teabag Prevention was brought to you by:


For any comments, suggestions, or inquiries please email us at TeabagPrevention@gmail.com And don’t forget to add us on myspace at:

www.myspace.com/teabag_prevention

Halo 3 presents you with a palette covered in paints. Most of them naturally draw the human eye. The brilliant hues of the Spartan Laser and the calming shades of the Energy Sword make for very elaborate and fanciful works of art. While you use these paints to astonish your friends there are those of us who prefer using the other end of the color spectrum and, while these colors may be perceived as bland, we view them as beautiful. As much as many deny it, grenades are without a doubt one of the most devastating weapons in any Spartan’s arsenal (I emphasize Spartan, because if you use the elite model you should take your copy of Halo 3 and throw it straight into the garbage. Seriously). There can be no light without dark, and we think any true Halo artist must appreciate the contributions made by grenades. It’s time to stop thinking about your individual paintings and start concentrating on your entire body of work. Hopefully this little guide will help you start churning out explosive masterpieces time and time again…

The remainder of this article will be totally without art metaphors. In fact, to ensure our masculinity remains intact, here’s a hot babe:

Now, before we can give tips on how to effectively use grenades, it’s important to know the various types that are offered in the game. We will do just that in this week’s Teabag Prevention.


THIS WEEK: GRENADES!


Frag Grenades


Nothing fancy here. If it explodes near you your shield will go bye-bye. Interestingly enough, the same thing will happen to your opponents. A well placed frag works just as well as a body shot with a sniper rifle, leaving opponents essentially naked and lubed up for one good burst from your battle rifle.

Tip #1 – EXPLODILE DYSFUNCTION

There is a slight delay that is triggered once the grenade makes contact with the ground. Walls, ledges, and ceilings don’t count so be sure to toss a few of these around a corner to clear out an area before you go charging in.

Once you get the timing down you’ll be leaving a trail of dust between you and those dead people behind you.


Tip #2 – BOUNCING BABY BOMB

As you just learned: frag grenades bounce. This is very important. Practice this and use it in every which way imaginable. Get creative with your angles and you’ll see amazing results. They’re also a valuable tool in disabling your enemy’s shield before they disable yours. This tip is closely related to last weeks Tip #1. In cased you missed it, here it is (the main difference is the bounce…practice your bounce, learn your geometry and dominate your bitches before they even see it coming):

http://geekscape.net/features/view.php?featureID=199fdff52dc40ac7d8a12f5a02e9b91e


Plasma Grenades

Soo pretty!


Quite possibly the best weapon in the game. What else can blow up an entire vehicle and kill everything inside it? Quite a few things, actually, but THIS one lets you do it with style. Unlike its human cousin the frag grenade, the plasma, or “sticky” actually has the capacity to guarantee a kill. The explosion is more powerful than the frag, and splash damage alone can do the job. The real fun comes in how the sticky got its name. If it comes into contact with an enemy it makes instant friends with him, but quickly realizes that guy took naked pictures of his sister and explodes in anger. The problem with this, however, is that anyone who gets stuck instantly becomes a suicide bomber. Know that using these may actually result in a kill for BOTH teams if you’re not careful. There’s a three second timer that starts the moment it’s activated. That’s all the time you have to prevent that jerkoff on the other team from becoming a martyr.

Tip #3 – THE ‘OL STICK OR FLIP

So you’re rushing the Spartan Laser spawn on Valhalla. A Warthog is barraling at you at full speed. You have two options:

Throw a grenade into the path of the Warthog, which will make it flip, and make the occupants easy targtes.


or

Go out with a bang. Simply stick the Warthog,

ideally the driver, but you might not survive it.


Spike Grenades


I’m not crying, I just got something in my eye.


A very close relative of the Plasma grenade, the Spike can also guarantee a kill if your opponent gets stuck. Unlike the others, though, the Spike will stick to any surface it comes into contact with. Learn to use this as you run around corners to drain off a pursuing opponent’s shield. There are few things more satisfying in the entire Halo universe than the squishy thud you hear that says “Nice Spike throw buddy. Now sit back and watch that guy blow up.”

Tip #4 – LUCY! YOU GOT SOME ‘SPLODIN TO DO!

The spike grenade blows out the top, therefore, to kill people effectively, throw it on a wall behind them. The nade will blow out the top, straight at the target. Also, throw a nade at the opposite wall of a doorway if you’re being chased. (Courtesy of Nick)

Also, it’s actually heavier than the others, so you’ll need to aim higher than normal to land a direct hit. You’ll need to level your crosshair slightly above or enemy like so:

Also make sure you throw it into the direction they’re heading.

This will ensure an accurate hit and will adequately account for the relative weight of the grenade itself versus what you are used to.


Fire Bomb Grenades


It’s a grenade that makes fire – much like a molotov cocktail – but don’t bother. Bungie toyed with our emotions when they put this in the game. As of right now, it’s not available at all in matchmaking. The only time you’ll see one of these is in a custom game. If you WERE to come across it, know that you can use it to trap enemies in an area or to stop their pursuit of you. Once it comes into contact with anything it sends out a patch of fire that will take down pretty much anyone who is unfortunate enough to be near it.

Tip #5 – SPARTAN’S INFERNO

Firebomb grenades can be used for a variety of things that, sometimes, aren’t meant to kill. When playing an objective game, such as Oddball for example, you can use this grenade to set up a barrier made of fire. All you have to do is toss it to the ground.

Once that’s done, you can either make a getaway like so:


or

stay to see if your enemy will charge through the fire. If they do charge, they may or may not catch on fire themselvs, but they will get hurt. Either way, they’re going to be yours, because you have funneled them into a path that you have chosen for them. Since this was your choice, use it to your advantage to hit these jerks hard and kill them before they can even see the fire fading from their faces.

So practice your bouncing, sticking, and height adjustments enough to dominate those guys who throw their grenades behind you instead of in front of you. After you perfect these steps you’ll be eating everyone you play with for breakfast, well-done.


This week’s Teabag Prevention tips were brought to you by:


For comments, suggestions and inquiries please email us at TeabagPrevention@gmail.com


Hello folks. Are those bastards kicking your ass every time they pick up the Battle Rifle during a Slayer match? Are you on the losing end of most fights involving a Battle Rifle? Don’t blame the weapon; she loves you. This is your fault. It’s ok, though. That’s why we’re here. This week, the Teabag Prevention team brings you some marriage counseling to enhance your rocky relationship with the most commonly used weapon in the game.


THIS WEEK: THE BATTLE RIFLE


Tip #1: THE BOOM-BOOM SHOOT

This is an important and incredibly basic strategy you might use while carrying this wonderfully reliable weapon during any match. It may have a slight learning curve, but the speed of the kill will make up for it.

Step One: Throw a grenade near your enemy; preferably right at their feet. Serve them the morning paper.

Step Two: Once they’ve received the morning edition of The Exploding Grenade, it’ll leave them with no shield. Watch them suffer for an entire half second (probably the longest you should ever let yourself rest during a match).

Step Three: This will leave your enemy open for the killing. You may choose their poison. The easiest kill would be one shot from your Battle Rifle or an easy melee kill. Depending on how far away you are. Try and depend on the Battle Rifle because even though a melee is a very powerful weapon, it leaves you extremely vulnerable to getting “stickied” or to having them melee you back. Using your BR will prevent you from getting too close to your enemy, as well as cutting the time in which they die in half. Now they’re your bitch.


Tip #2: SMACK YOUR BITCH UP


When locked in a firefight with an enemy that also pocesses a Battle Rifle, take either body or headshots while running towards them.


By the time you get to them a simple melee should get you a kill. Observe me laying the smacketh down on somebody’s face:


Smack dat bitch. If you are too far away to try and smack dat bitch, always aim for the head. Once you disable their shields one headshot should be all it takes. An enemy can take more than one body shot when they have no shields and this time could be the difference between life and death; so please practice your headshots. For tips on how to work on your headshots, please refer to nowcasting.com. If you want to kill people by shooting them in the head better, then please refer to the No-Scoping 101 section of last week’s Sniper Rifle article found here. The same tactics can be applied to using the Battle Rifle.

Tip #3: GET SOME HEAD


It’s always possible to get locked into a Battle Rifle fight in which both oppenents have a BR. During these epic battles of who-can-aim-for-the-head-better, your lack of no-scoping skills comes back to bite you in the ass and takes a huge chunk with it.

The most important thing to do, if at all possible, is to disable your enemy’s shield. Once you disable their shields one headshot should be all it takes. An enemy can take more than one body shot when they have no shields and this time could be the difference between life and death; so please practice your headshots. For tips on how to work on your headshots, please refer to nowcasting.com. If you want to kill people by shooting them in the head better, then please refer to the No-Scoping 101 section of last week’s Sniper Rifle article found here. The same tactics can be applied to using the Battle Rifle.


If your potential bitch has the same idea, you may notice that both of you are now running towards each other to end this fight with a quick smack to the face. This is a lot of people’s first impulse. When this happens, it’s important to have fast reflexes and shoot immediately. Shoot before they either figure out that they need to be doing that as well, or before they have a chance to melee you. The quickest and best way to ensure their death, once again, is to shoot them in the head. Practice makes perfect (and that is the closest we’ll come to acknowledging the name of this tip, thank you very much).

So remember: Go for the head instead of using your hands. It’s always the best, quickest and smartest idea. Anyone can use their hands; but someone who is good at the head will always come out on top (we totally lied).


Tip #4: Them long-ranged shots…

During a Big Team Battle game, or any other large scaled-map game, you might encounter enemies that are pretty far away. Killing them may be difficult if you don’t know how to do it right. Here’s how to do it right:

Learn from henchmen with machine guns from shitty action movies in which the protagonist evades a small army simply by running; move the crosshair in front of your enemy.

By doing this, you make the enemy run into your bullets. It also gets you easy headshots. Just a few shots (usually three if you do it right) and you will have yourself a cross-map kill. This is often a proud moment. You can even show it to your friends as proof that it happened; unlike that perfect blonde chick “you spent the weekend with” in Canada – yeah right, Brandon.

Note: This is effective on medium sized maps as well.


Tip #6: GET MORE HEAD. EVERY DAY. ALL THE TIME.

The Battle Rifle in Halo 3 takes more shots to kill someone than it does in Halo 2. This can be problematic, but can be solved by one thing: practice. We can’t reiterate enough how much you should be practicing your headshots with the Battle Rifle. When practicing, please remember:

1. When you are in a Battle Rifle duel – or any duel, for that matter – start shooting FIRST.


2. Keep your crosshair level with their head and strafe back and forth like you learned last week.


3. Don’t switch to grenades, don’t switch to a weapon that “shoots more bullets”. The more shots to the face you land, the better off you’ll be than with any weapon that can fire even twice as many bullets at a time. Much like we told your mom last night: quantity isn’t what counts – it’s all about quality. Just keep shooting accurately, and if you’ve practiced your headshots, this should equal a kill.


Things to Remember


– Shoot first.

– Level your crosshair onto the enemy’s head.

– At far distances, shoot ahead.

– Use the tactic that is easiest for you.

– Practice your head shots. A lot.


Now that you’ve learned what you need to do to make the most popular weapon in the game work for you, remember to use it. Don’t stick to the Assault Rifle you’re so comfortalbe with, or even the Spiker that you’ve come to love so much. Use. The. Battle Rifle. Honestly. Do it. Because if you don’t use it, you will definitely lose it.


This week’s Teabag tips were brought to you by


For any inquiries, comments, or questions about this week’s Teabag Prenetion article, please email TeabagPrevention@gmail.com.

Since the dawn of the new millennium, the First Person Shooter has generally had a weapon called the Sniper Rifle. This weapon has strong ties with the catch phrase “one shot, one kill.” Not for you? Then, unfortunately, you’re the one dying, you’re the hearing the boasting of the enemy, and you’re the one who seeks vengeance. Many have mastered the sniper rifle, but most have not come even close. These people are called “target practice”. This breed of inferior human beings who haven’t mastered the sniper rifle often camp out with it – like a real life sniper would. But this ain’t real life, THIS IS TEABAG PREVENTION WEEK #2!

THIS WEEK: THE SNIPER RIFLE

The sniper rifle has evolved from the last two Halo games with only some minor tweaks – nothing too serious. So if you’re familiar with both previous games, you shouldn’t have had a problem picking one up at the beginning of your Halo 3 career. That is, of course, if you were good at it in both previous games. If not, you’re one of the reasons why Teabag prevention exists.

Long Range Tips

TIP #1: SLOW AND STEADY GETS THE KILL…

 
It’s always important to adjust your sensitivity. For some, its important for it to be as low as possible, others may want it higher up. It depends on the player. If you find yourself spending 4-8 rounds of a sniper rifle on one player, you may want to lower your sensitivity. If you find that you frequently tend to shoot behind an opponent in your games, then you may want to heighten your sensitivity. Try every level of sensitivity if you have to.

Here are the Pro’s to changing your sensitivity:

a) Some of the best players do this.

b) It’ll be easier for you overall.

c) You’ll have less anger toward yourself (regarding Halo).


To adjust your sesitivity, simply:

-Press start while in the pre-game lobby

-Switch over to “Settings”

-Highlight “Game Controls” and press “A”

-Scroll down to “Look Sensitivity”.

-Then make your adjustments. 10 being the highest responsive setting and 1 being the lowest responsive setting. Lower usually means easier accuracy, but it will mean slower reaction. Gauge your priorities and come to a happy medium. Happy adjusting!

Mid Range Tips

TIP #2: “ZOMFG! DiD aNyonez C dat?!?!”

 
It’s when you’re running, R trigger held down, screaming your battle cry, hoping you’ll get him or her with your Assault Rifle, then…you’re dead. As your body falls, you hear the sniper yell, “WOOOOO No-Scope!!!!!”
Those who use the Sniper Rifle more than the average player are usually relying heavily on no-scopes. They can be difficult to achieve. A lot of the time, these “no-scopes” are pure luck – but a certain type of luck we like to call Planned Luck. You gauge your chances and you take the shot even though someone is unloading an entire clip into you. Planned Luck. It’s like counting cards while gambling, the better you are at it, the less luck is involved and the more skill comes into play. There are tricks to No-Scoping, and with practice, it should become as easy as your sister.

NO-SCOPING 101

· First things first: level the crosshair with the enemy’s head by moving the right stick up and down.


· Wait for the enemy to come into sights.

· When that happens, if you didn’t have time to shoot, or if you missed, move the left stick slightly to the left or right to strafe. Strafing will make it easier to keep your sights level and to hit your target without disorienting yourself.

· The trick here is leveling your crosshair with their head and having an easy and reliable point from which to execute your shots. While aiming at an opponent’s head from medium or long range, it is not recommended for beginners to use both sticks at the same time, as it will just frustrate the beginner and he will miss and die. In real life.
· If you NEED to try both (strafing AND using the right stick to aim), then the best idea is to learn to do both separately – preferably while not moving, at first. You may then work your way up to using both. Then you may use both during combat and you’ll be nigh unstoppable.

Close Range Escape Plans and Tips

Tip # 3: I’VE GOT TO GET AWAY(YEAH YEAH YEAH YEAH YEAH)!

 
Sometimes when you’re sniping, the enemy will bring the battle to you – kind of like when you’re staring at a Persian guy’s hot Persian girlfriend at a bar. In both of these situations, you need to bail out right away.

If you are playing a team slayer match, you may have one of your teammates give you a ride in a Mongoose. Should you get on this Mongoose AND use that rifle? Of course! The first step is to use the no-scoping skills that we granted you earlier in the article. With this in mind:

· If you miss their head on the first try, no problem. Remember that two body shots with the sniper rifle equal a kill. A headshot is preferred, but not necessary.

· Don’t get over-excited either. You want to focus and make sure you get that perfect shot. The patience and the focus are worth it.

TIP #4 CLOSE-RANGE NO-SCOPING

Say you’re camping with a sniper rifle and you start to get shot from behind (<—the joke here was way too easy to take). You don’t have enough time to switch to your secondary weapon (if you have one) so what do you do? You do the following:

Keep your cool. Try to go for two body shots, or one body shot then melee, and if you’re feeling lucky, try aiming for their head. Your choice.

No-Scoping from up close is risky, and takes a lot of practice.

There’s also a posiblity that this enemy might jump around a little. Pay close attention to your motion tracker if this happens and you’ll find your enemy (below).

TIP #5 ONLY SUCKA BEGINNERS NO-SCOPE AT CLOSE RANGE


If you are a beginniner with the Sniper Rifle, never use it at close range when you know you have an easier way of killing your enemy. If it comes to the time when you know it’s too late to switch weapons and you’re stuck with just your sniper rifle, refer to the Close-Range No-Scoping tips above. If you are out of ammo on your Sniper Rifle, and cannot switch weapons, use your grenades and try to get to safety long enough to switch weapons.

Example: On this screen below, if this person were out of ammo, they best idea would be to try and stick the opponent while running away or use a power drainer while jumping back and throwing a grenades.

Well, now that you are well-versed in the Sniper Rifle, make sure you get out there and practice before you try the closer no-scopes. Get confident with the weapon before you use it. Remember, even though it is the hardest weapon to excel with, it is arguably the most powerful one in the game.


If you maggots have any comments, suggestions, or further questions on the advice given on this week’s Teabag Prevention, please email TeabagPrevention@gmail.com

This week’s Teabag is brought to you by:


Halo isn’t a video game. It is a sport. It is a way of life. It is the best console FPS multiplayer out there right now. Don’t like it? It’s cause you suck at it. Welcome to Teabag Prevention: the weekly column on geekscape.net that will solve that Halo sucking problem you’ve been having – as well as that problem known as “your social life”. Get ready to stop contributing productively to society with the rest of us.


This Week: The Legendary Map Pack

Blackout

Blackout

As geeks, we spend disgusting amounts of money on a lot of crap we don’t need. We get screwed into collector’s editions, box sets, variant editions, anniversary packs, and new maps for our favorite FPS’s. On April 15th, 2008, the Legendary Map Pack came out for the Halo 3 multiplayer on XBox Live. This map pack made “this was not a waste of money” something more than a mantra you say to yourself as you’re reading your credit card statement – it delivered. Solidly. Here’s how to make these maps your new breeding grounds for pain.


Blackout’s setting is what appears to be an oil rig set up in the middle of an artic ocean on an alien planet. Its darkened skies and awesome moon set up a much darker side of Halo’s multiplayer maps and as we all know, Blackout is a remake from the famous Halo 2 map, Lockout.

TIP #1: MIND YOUR GRAV LIFTS!

Always take note of a Gravit Lift in any map. In Blackout, there is one lift that will take you to the surface of the map. Say you’re running close behind someone, they go up the lift, what do you do? There are multiple ways of getting the job done in the next moment or so. 

a) Throw two grenades at the lift which will follow your enemy all the way up and explode near him or even kill him.


b) If you are sure you know where they will be standing, you can follow them up (waiting for your grenades to explode) and shoot your enemy dead in just a few shots – their shields should be down at this point.


TIP #2 SPAWN WITH THE WIND

One of the most important things to know when going into any map is where each weapon spawns (where the weapon is placed in the map, in default settings mode, at the beginning of any non-custom match). Get to one of these points as fast as you can. The most easily accessible and important spawns in Blackout are the Sniper Rifle Spawn and the Sword Spawn.

The Sniper Rifle spawns at this tower (directly across from the tower with the Battle Rifle).

Things to do when retrieving the Sniper Rifle at this spawn:

a) Mind the explosive canister. Either shoot it yourself from a safe distance, or grab the Sniper Rifle and run. The explosion from this will most likely kill you instantly.

b) Do not camp out here. It is an easily accessible and directly shootable spot. Use some of the other rooftops and high points located throughout the map.

The Sword Spawns in the lower part of the map. If you are where the Battle Rifle spawns, then this room will be just a jump away – to your left.

The shotgun spawn is located just under the lift room pictured here:

Walk down the hallway as pictured here:

And you’ve got yourself a shotgun.


After you have the most imporant weapons in the game, the sneak-attack nature of this map should be no problem for you to handle…unless you’re completly awful in which case it’s a good thing you’re reading this.

Remember:

1. Know where the power weapons are such as the sword, shotgun, and sniper rifle.

2. The Battle Rifle is a fine killing tool.

3. Pay close attention to your motion tracker.

Avalanche

Honestly, we were excited about Blackout, but the idea of Hornets in the sky doing battle with Wraiths and Scorpions on a large scale, Hoth-like, remake of Sidewinder was just too overpowering. Such explosions and cross-map laser shots brings us into giggling school girls as we write this.

Avalanche is awesome.

Whenever we spawn into this map, our first instinct is to rush the Hornet. You may have noticed that it’s severely dubbed down. Missiles are disabled and the machine gun does less damage, can it be used efficiently now that it’s finally in Matchmaking?

Tip #3: GET IN THE CHOPPA! (Actually…Get in the Hornet – It’s called a Hornet)

In Objective gametypes, Hornets can be easily used to transport flag carriers, bomb carriers, or just some friends to help take over an enemy base. The enemy base will always be on the opposite end of the map from where you first spawn. This Hornet can be your best friend.

Look how awesome you look carrying that flag. Clear sailing, right?

but beware, a single shot with a Spartan Laser could take you down.

Tip #4: CANNON IN D (FOR DEATH)

Man Cannons – Grav Lifts that launch a man forward. A grav lift carries you somewhere – a MAN CANNON shoots you there.

On avalanche, these Man Cannons are the easiest way to get around the map on foot. This is especially helpful during objective games when every vehicle is either being used or on fire somewhere on the map. During these games, time is of the essence! Use them while on foot.

At spawn point, though, you may be thinking to yourself “Ooo! Man cannon! Easy transport!”. You’re wrong.

If you want to get to the middle of the map as fast as you can: instead of flying off the first one you see, try going to the teleporter either to your right or left, depending which base you’re at.


Not only will you be teleported to a Man Cannon that will get you to the other side of the map much faster, but you’ll also be treated with a Machine Gun Turret, and Rockets.

TIP #5: KNOW THY SNIPER SPAWN

The Sniper Rifle spawns right outside the “middle” divide between both bases. Look for them at the oppisite location of the overshields here:

and here:

TIP #6 CAN YOU SEE ME NOW? GOOD.

Your Active Camo (the thingy that turns you inivisible) spawns behind this icicle a stone’s throw away from your base’s Man Cannon. In this map, not being seen will be important. Why? There will be vehicles on a rampage during any Slayer match, that will hunt you down on your way to infiltrating any enemy base and taking them out from the ground up. If they can’t see you, your mission will go as planned. Here are the two respective Active Camo spawns.


a) By the rock, oppistie of your spawn point.


b) Just under the tree in in the towards the oppisite side of your spwan point.

TIP #7 USE PROTECTION

With the amount of power weapons and vehicles wreaking havoc during any Slayer match on Avalanche, your best chance of staying alive (other than not being seen) is having twice the amount of shield than everyone else on the field. Here is where to get that kind of protection (it’ll make you “feel” less):


The Overshields spawn right across from where the Sniper Rifle does – right outside the middle divide between each base.

a) This overshield is up the hill, towards the middle of map. This one should be on your left red team.


b) Again, up the hill, towards the middle up the map. This one should be on your right blue team.

Aside from that, the most obvious tips for this map are:


1. Get down below and share a vehicle with a team mate. They are right below where you spawn at the base of your…base

2. Don’t run around without protection or cover. There are too many vehicles for that.

3. Make sure you use the teleports to your advantage

Have fun in the biggest and most extreme map in the Legendary pack. Don’t get killed.

GHOST TOWN

This time, we are given a jungle on the GROUND, not in the AIR. Ghost Town is an abandoned water station where just about everything except barrels of water is destroyed. I guess maybe the Brutes had plans for export? Not only is this map asymmetrical, but it also features a safe zone, you know, so you and I can spawn safely…unlike CoD 4. Moving right along…

Ghost Town may be the least favorite map among the masses (as asserted with the amount of times it’s been called “gay” during pre-game lobby talks), but it’s certainly not a bad map. At the start of any game on this map, it’s important to grab a weapon that will do damage at a medium-range, such as: a Battle Rifle, Needler, or Brute Shots.


A) A Needler can be found above the Mongoose at Blue base.


B) A battle rifle can be found in the same base as the Needler, just a little behind you to the right.

Tip #8: You can teach a few puppies old tricks…..

When protecting something like a flag, base, or a VIP, you might want to carry the “Shotty Sniper” combo (Screenshots of spawn points for both the shotgun and sniper rifle. , that way you can kill baddies from afar,

and if they step into your personal space….

“oH noes!!11”

BAM!!!

Tip #9 FLIP THAT THANG

Say someone steals your flag and an expert Mongoose driver makes it through the map, and is about to pick his friend up,

A Brute Shot isn’t necessarily powerful enough to kill someone right away, but if you aim towards the tires of a Mongoose, you’ll have a very good chance of flipping it,

and killing those who tried to escape…


1. Ghost Town can be enjoyable, with the right weapons. If you’re constantly running into someone who has a superior weapon, you may want to rethink your strategy and weapon choice before going into battle.

2. Crouching can play a big role on smaller maps such as this one.

3. Equipment can change the course of the battle.

Now get off your ass, go to wherever your XBox360 is and get back on your ass and get that ass in these new maps. We’ll see you next week for the beginning of our Weapons series here on Teabag Prevention.

To send questions, comments, or advice inquiries to Teabag Prevention, please email us at TeabagPrevention@gmail.com.

This week’s Teabag written by:


Halo 3 Service Record