Halo 3 presents you with a palette covered in paints. Most of them naturally draw the human eye. The brilliant hues of the Spartan Laser and the calming shades of the Energy Sword make for very elaborate and fanciful works of art. While you use these paints to astonish your friends there are those of us who prefer using the other end of the color spectrum and, while these colors may be perceived as bland, we view them as beautiful. As much as many deny it, grenades are without a doubt one of the most devastating weapons in any Spartan’s arsenal (I emphasize Spartan, because if you use the elite model you should take your copy of Halo 3 and throw it straight into the garbage. Seriously). There can be no light without dark, and we think any true Halo artist must appreciate the contributions made by grenades. It’s time to stop thinking about your individual paintings and start concentrating on your entire body of work. Hopefully this little guide will help you start churning out explosive masterpieces time and time again…

The remainder of this article will be totally without art metaphors. In fact, to ensure our masculinity remains intact, here’s a hot babe:

Now, before we can give tips on how to effectively use grenades, it’s important to know the various types that are offered in the game. We will do just that in this week’s Teabag Prevention.


THIS WEEK: GRENADES!


Frag Grenades


Nothing fancy here. If it explodes near you your shield will go bye-bye. Interestingly enough, the same thing will happen to your opponents. A well placed frag works just as well as a body shot with a sniper rifle, leaving opponents essentially naked and lubed up for one good burst from your battle rifle.

Tip #1 – EXPLODILE DYSFUNCTION

There is a slight delay that is triggered once the grenade makes contact with the ground. Walls, ledges, and ceilings don’t count so be sure to toss a few of these around a corner to clear out an area before you go charging in.

Once you get the timing down you’ll be leaving a trail of dust between you and those dead people behind you.


Tip #2 – BOUNCING BABY BOMB

As you just learned: frag grenades bounce. This is very important. Practice this and use it in every which way imaginable. Get creative with your angles and you’ll see amazing results. They’re also a valuable tool in disabling your enemy’s shield before they disable yours. This tip is closely related to last weeks Tip #1. In cased you missed it, here it is (the main difference is the bounce…practice your bounce, learn your geometry and dominate your bitches before they even see it coming):

http://geekscape.net/features/view.php?featureID=199fdff52dc40ac7d8a12f5a02e9b91e


Plasma Grenades

Soo pretty!


Quite possibly the best weapon in the game. What else can blow up an entire vehicle and kill everything inside it? Quite a few things, actually, but THIS one lets you do it with style. Unlike its human cousin the frag grenade, the plasma, or “sticky” actually has the capacity to guarantee a kill. The explosion is more powerful than the frag, and splash damage alone can do the job. The real fun comes in how the sticky got its name. If it comes into contact with an enemy it makes instant friends with him, but quickly realizes that guy took naked pictures of his sister and explodes in anger. The problem with this, however, is that anyone who gets stuck instantly becomes a suicide bomber. Know that using these may actually result in a kill for BOTH teams if you’re not careful. There’s a three second timer that starts the moment it’s activated. That’s all the time you have to prevent that jerkoff on the other team from becoming a martyr.

Tip #3 – THE ‘OL STICK OR FLIP

So you’re rushing the Spartan Laser spawn on Valhalla. A Warthog is barraling at you at full speed. You have two options:

Throw a grenade into the path of the Warthog, which will make it flip, and make the occupants easy targtes.


or

Go out with a bang. Simply stick the Warthog,

ideally the driver, but you might not survive it.


Spike Grenades


I’m not crying, I just got something in my eye.


A very close relative of the Plasma grenade, the Spike can also guarantee a kill if your opponent gets stuck. Unlike the others, though, the Spike will stick to any surface it comes into contact with. Learn to use this as you run around corners to drain off a pursuing opponent’s shield. There are few things more satisfying in the entire Halo universe than the squishy thud you hear that says “Nice Spike throw buddy. Now sit back and watch that guy blow up.”

Tip #4 – LUCY! YOU GOT SOME ‘SPLODIN TO DO!

The spike grenade blows out the top, therefore, to kill people effectively, throw it on a wall behind them. The nade will blow out the top, straight at the target. Also, throw a nade at the opposite wall of a doorway if you’re being chased. (Courtesy of Nick)

Also, it’s actually heavier than the others, so you’ll need to aim higher than normal to land a direct hit. You’ll need to level your crosshair slightly above or enemy like so:

Also make sure you throw it into the direction they’re heading.

This will ensure an accurate hit and will adequately account for the relative weight of the grenade itself versus what you are used to.


Fire Bomb Grenades


It’s a grenade that makes fire – much like a molotov cocktail – but don’t bother. Bungie toyed with our emotions when they put this in the game. As of right now, it’s not available at all in matchmaking. The only time you’ll see one of these is in a custom game. If you WERE to come across it, know that you can use it to trap enemies in an area or to stop their pursuit of you. Once it comes into contact with anything it sends out a patch of fire that will take down pretty much anyone who is unfortunate enough to be near it.

Tip #5 – SPARTAN’S INFERNO

Firebomb grenades can be used for a variety of things that, sometimes, aren’t meant to kill. When playing an objective game, such as Oddball for example, you can use this grenade to set up a barrier made of fire. All you have to do is toss it to the ground.

Once that’s done, you can either make a getaway like so:


or

stay to see if your enemy will charge through the fire. If they do charge, they may or may not catch on fire themselvs, but they will get hurt. Either way, they’re going to be yours, because you have funneled them into a path that you have chosen for them. Since this was your choice, use it to your advantage to hit these jerks hard and kill them before they can even see the fire fading from their faces.

So practice your bouncing, sticking, and height adjustments enough to dominate those guys who throw their grenades behind you instead of in front of you. After you perfect these steps you’ll be eating everyone you play with for breakfast, well-done.


This week’s Teabag Prevention tips were brought to you by:


For comments, suggestions and inquiries please email us at TeabagPrevention@gmail.com


Hello folks. Are those bastards kicking your ass every time they pick up the Battle Rifle during a Slayer match? Are you on the losing end of most fights involving a Battle Rifle? Don’t blame the weapon; she loves you. This is your fault. It’s ok, though. That’s why we’re here. This week, the Teabag Prevention team brings you some marriage counseling to enhance your rocky relationship with the most commonly used weapon in the game.


THIS WEEK: THE BATTLE RIFLE


Tip #1: THE BOOM-BOOM SHOOT

This is an important and incredibly basic strategy you might use while carrying this wonderfully reliable weapon during any match. It may have a slight learning curve, but the speed of the kill will make up for it.

Step One: Throw a grenade near your enemy; preferably right at their feet. Serve them the morning paper.

Step Two: Once they’ve received the morning edition of The Exploding Grenade, it’ll leave them with no shield. Watch them suffer for an entire half second (probably the longest you should ever let yourself rest during a match).

Step Three: This will leave your enemy open for the killing. You may choose their poison. The easiest kill would be one shot from your Battle Rifle or an easy melee kill. Depending on how far away you are. Try and depend on the Battle Rifle because even though a melee is a very powerful weapon, it leaves you extremely vulnerable to getting “stickied” or to having them melee you back. Using your BR will prevent you from getting too close to your enemy, as well as cutting the time in which they die in half. Now they’re your bitch.


Tip #2: SMACK YOUR BITCH UP


When locked in a firefight with an enemy that also pocesses a Battle Rifle, take either body or headshots while running towards them.


By the time you get to them a simple melee should get you a kill. Observe me laying the smacketh down on somebody’s face:


Smack dat bitch. If you are too far away to try and smack dat bitch, always aim for the head. Once you disable their shields one headshot should be all it takes. An enemy can take more than one body shot when they have no shields and this time could be the difference between life and death; so please practice your headshots. For tips on how to work on your headshots, please refer to nowcasting.com. If you want to kill people by shooting them in the head better, then please refer to the No-Scoping 101 section of last week’s Sniper Rifle article found here. The same tactics can be applied to using the Battle Rifle.

Tip #3: GET SOME HEAD


It’s always possible to get locked into a Battle Rifle fight in which both oppenents have a BR. During these epic battles of who-can-aim-for-the-head-better, your lack of no-scoping skills comes back to bite you in the ass and takes a huge chunk with it.

The most important thing to do, if at all possible, is to disable your enemy’s shield. Once you disable their shields one headshot should be all it takes. An enemy can take more than one body shot when they have no shields and this time could be the difference between life and death; so please practice your headshots. For tips on how to work on your headshots, please refer to nowcasting.com. If you want to kill people by shooting them in the head better, then please refer to the No-Scoping 101 section of last week’s Sniper Rifle article found here. The same tactics can be applied to using the Battle Rifle.


If your potential bitch has the same idea, you may notice that both of you are now running towards each other to end this fight with a quick smack to the face. This is a lot of people’s first impulse. When this happens, it’s important to have fast reflexes and shoot immediately. Shoot before they either figure out that they need to be doing that as well, or before they have a chance to melee you. The quickest and best way to ensure their death, once again, is to shoot them in the head. Practice makes perfect (and that is the closest we’ll come to acknowledging the name of this tip, thank you very much).

So remember: Go for the head instead of using your hands. It’s always the best, quickest and smartest idea. Anyone can use their hands; but someone who is good at the head will always come out on top (we totally lied).


Tip #4: Them long-ranged shots…

During a Big Team Battle game, or any other large scaled-map game, you might encounter enemies that are pretty far away. Killing them may be difficult if you don’t know how to do it right. Here’s how to do it right:

Learn from henchmen with machine guns from shitty action movies in which the protagonist evades a small army simply by running; move the crosshair in front of your enemy.

By doing this, you make the enemy run into your bullets. It also gets you easy headshots. Just a few shots (usually three if you do it right) and you will have yourself a cross-map kill. This is often a proud moment. You can even show it to your friends as proof that it happened; unlike that perfect blonde chick “you spent the weekend with” in Canada – yeah right, Brandon.

Note: This is effective on medium sized maps as well.


Tip #6: GET MORE HEAD. EVERY DAY. ALL THE TIME.

The Battle Rifle in Halo 3 takes more shots to kill someone than it does in Halo 2. This can be problematic, but can be solved by one thing: practice. We can’t reiterate enough how much you should be practicing your headshots with the Battle Rifle. When practicing, please remember:

1. When you are in a Battle Rifle duel – or any duel, for that matter – start shooting FIRST.


2. Keep your crosshair level with their head and strafe back and forth like you learned last week.


3. Don’t switch to grenades, don’t switch to a weapon that “shoots more bullets”. The more shots to the face you land, the better off you’ll be than with any weapon that can fire even twice as many bullets at a time. Much like we told your mom last night: quantity isn’t what counts – it’s all about quality. Just keep shooting accurately, and if you’ve practiced your headshots, this should equal a kill.


Things to Remember


– Shoot first.

– Level your crosshair onto the enemy’s head.

– At far distances, shoot ahead.

– Use the tactic that is easiest for you.

– Practice your head shots. A lot.


Now that you’ve learned what you need to do to make the most popular weapon in the game work for you, remember to use it. Don’t stick to the Assault Rifle you’re so comfortalbe with, or even the Spiker that you’ve come to love so much. Use. The. Battle Rifle. Honestly. Do it. Because if you don’t use it, you will definitely lose it.


This week’s Teabag tips were brought to you by


For any inquiries, comments, or questions about this week’s Teabag Prenetion article, please email TeabagPrevention@gmail.com.

Since the dawn of the new millennium, the First Person Shooter has generally had a weapon called the Sniper Rifle. This weapon has strong ties with the catch phrase “one shot, one kill.” Not for you? Then, unfortunately, you’re the one dying, you’re the hearing the boasting of the enemy, and you’re the one who seeks vengeance. Many have mastered the sniper rifle, but most have not come even close. These people are called “target practice”. This breed of inferior human beings who haven’t mastered the sniper rifle often camp out with it – like a real life sniper would. But this ain’t real life, THIS IS TEABAG PREVENTION WEEK #2!

THIS WEEK: THE SNIPER RIFLE

The sniper rifle has evolved from the last two Halo games with only some minor tweaks – nothing too serious. So if you’re familiar with both previous games, you shouldn’t have had a problem picking one up at the beginning of your Halo 3 career. That is, of course, if you were good at it in both previous games. If not, you’re one of the reasons why Teabag prevention exists.

Long Range Tips

TIP #1: SLOW AND STEADY GETS THE KILL…

 
It’s always important to adjust your sensitivity. For some, its important for it to be as low as possible, others may want it higher up. It depends on the player. If you find yourself spending 4-8 rounds of a sniper rifle on one player, you may want to lower your sensitivity. If you find that you frequently tend to shoot behind an opponent in your games, then you may want to heighten your sensitivity. Try every level of sensitivity if you have to.

Here are the Pro’s to changing your sensitivity:

a) Some of the best players do this.

b) It’ll be easier for you overall.

c) You’ll have less anger toward yourself (regarding Halo).


To adjust your sesitivity, simply:

-Press start while in the pre-game lobby

-Switch over to “Settings”

-Highlight “Game Controls” and press “A”

-Scroll down to “Look Sensitivity”.

-Then make your adjustments. 10 being the highest responsive setting and 1 being the lowest responsive setting. Lower usually means easier accuracy, but it will mean slower reaction. Gauge your priorities and come to a happy medium. Happy adjusting!

Mid Range Tips

TIP #2: “ZOMFG! DiD aNyonez C dat?!?!”

 
It’s when you’re running, R trigger held down, screaming your battle cry, hoping you’ll get him or her with your Assault Rifle, then…you’re dead. As your body falls, you hear the sniper yell, “WOOOOO No-Scope!!!!!”
Those who use the Sniper Rifle more than the average player are usually relying heavily on no-scopes. They can be difficult to achieve. A lot of the time, these “no-scopes” are pure luck – but a certain type of luck we like to call Planned Luck. You gauge your chances and you take the shot even though someone is unloading an entire clip into you. Planned Luck. It’s like counting cards while gambling, the better you are at it, the less luck is involved and the more skill comes into play. There are tricks to No-Scoping, and with practice, it should become as easy as your sister.

NO-SCOPING 101

· First things first: level the crosshair with the enemy’s head by moving the right stick up and down.
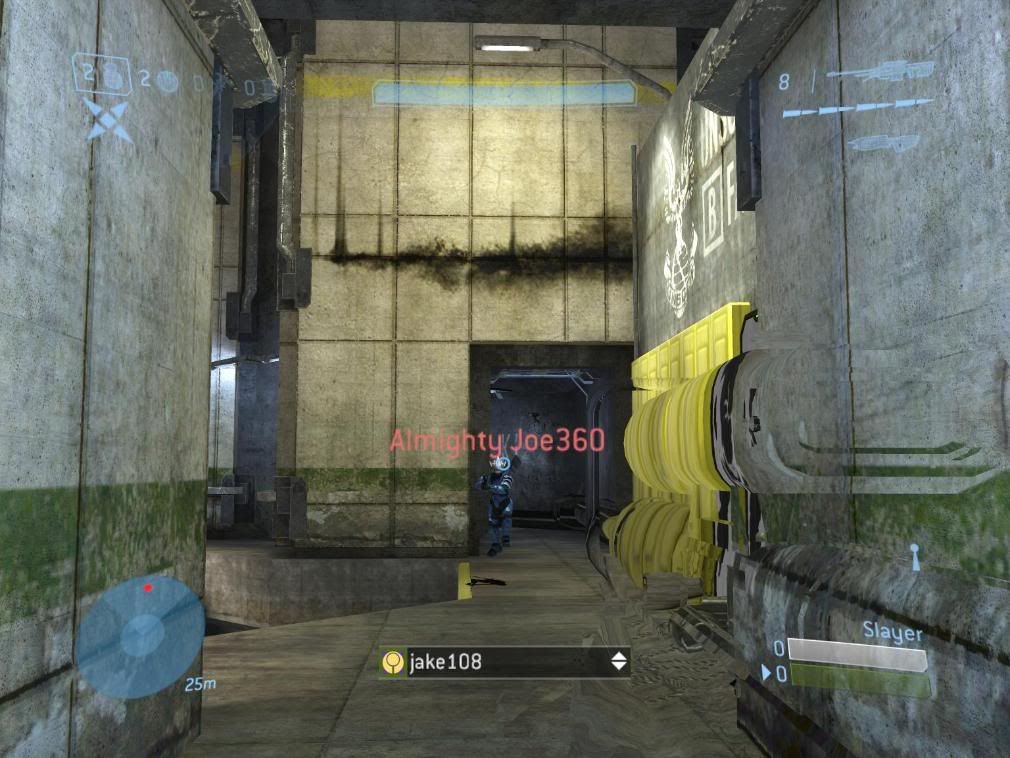
 

· Wait for the enemy to come into sights.

· When that happens, if you didn’t have time to shoot, or if you missed, move the left stick slightly to the left or right to strafe. Strafing will make it easier to keep your sights level and to hit your target without disorienting yourself.
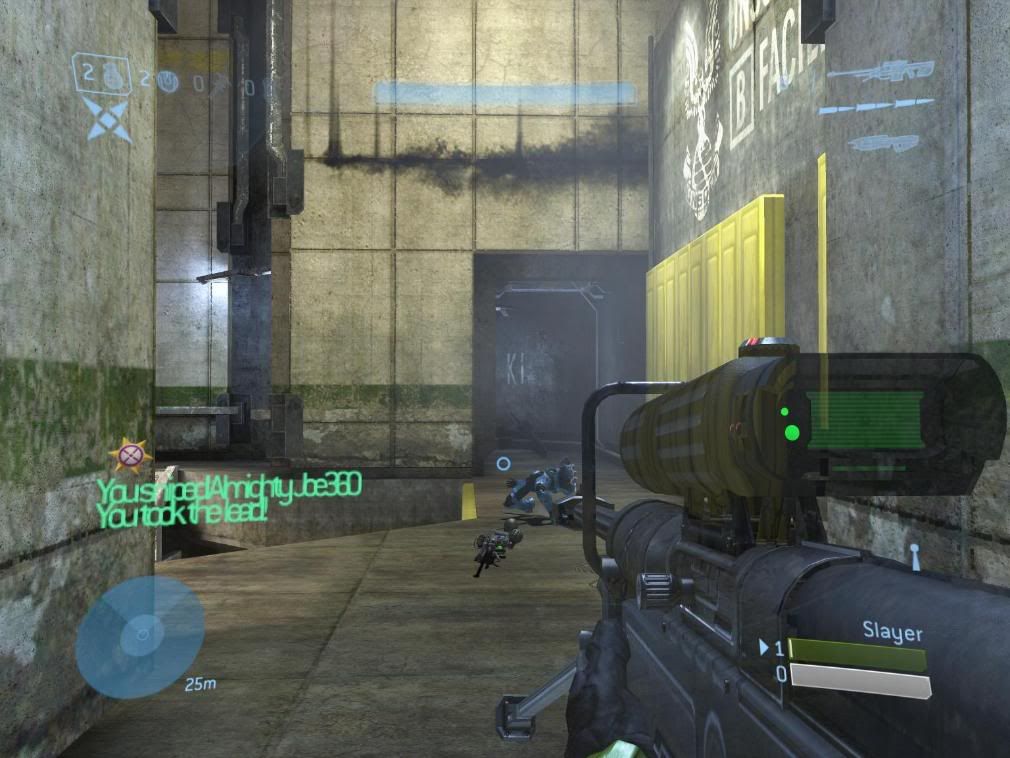
· The trick here is leveling your crosshair with their head and having an easy and reliable point from which to execute your shots. While aiming at an opponent’s head from medium or long range, it is not recommended for beginners to use both sticks at the same time, as it will just frustrate the beginner and he will miss and die. In real life.
· If you NEED to try both (strafing AND using the right stick to aim), then the best idea is to learn to do both separately – preferably while not moving, at first. You may then work your way up to using both. Then you may use both during combat and you’ll be nigh unstoppable.

Close Range Escape Plans and Tips

Tip # 3: I’VE GOT TO GET AWAY(YEAH YEAH YEAH YEAH YEAH)!

 
Sometimes when you’re sniping, the enemy will bring the battle to you – kind of like when you’re staring at a Persian guy’s hot Persian girlfriend at a bar. In both of these situations, you need to bail out right away.

If you are playing a team slayer match, you may have one of your teammates give you a ride in a Mongoose. Should you get on this Mongoose AND use that rifle? Of course! The first step is to use the no-scoping skills that we granted you earlier in the article. With this in mind:

· If you miss their head on the first try, no problem. Remember that two body shots with the sniper rifle equal a kill. A headshot is preferred, but not necessary.
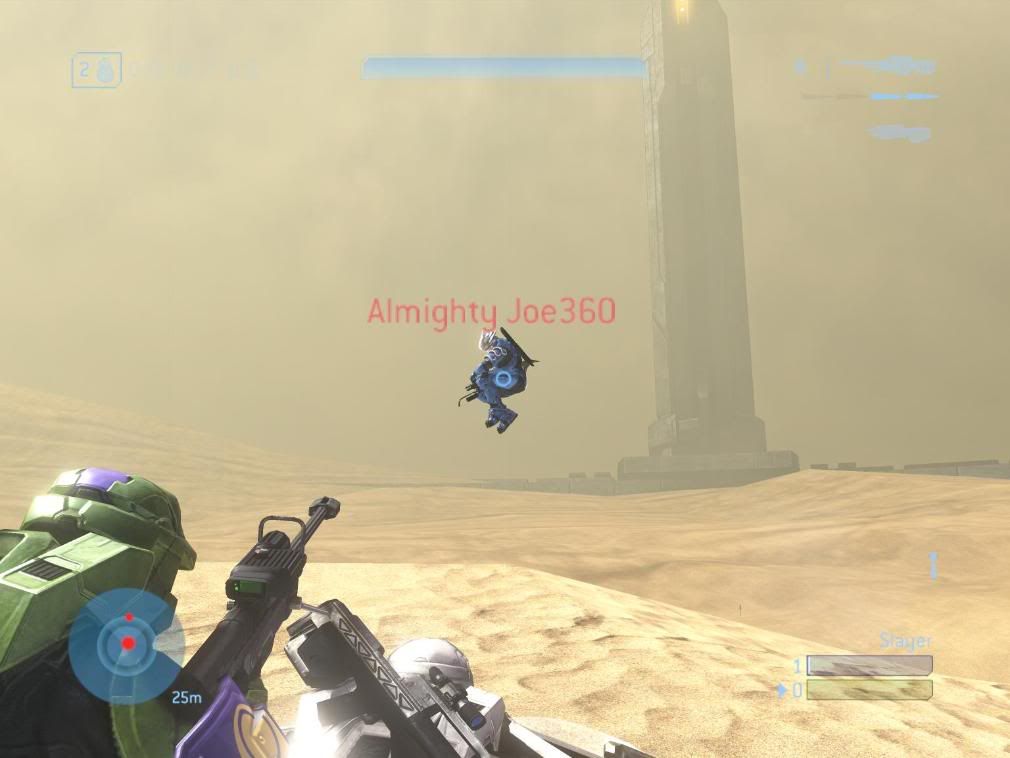
· Don’t get over-excited either. You want to focus and make sure you get that perfect shot. The patience and the focus are worth it.

TIP #4 CLOSE-RANGE NO-SCOPING

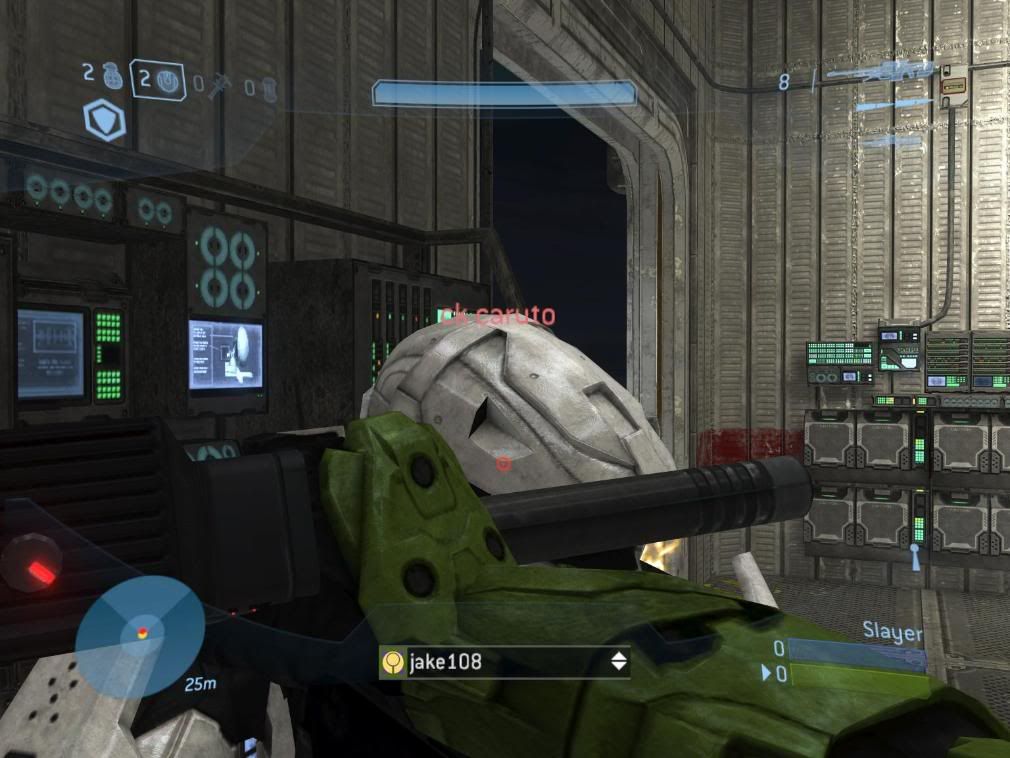
Say you’re camping with a sniper rifle and you start to get shot from behind (<—the joke here was way too easy to take). You don’t have enough time to switch to your secondary weapon (if you have one) so what do you do? You do the following:

Keep your cool. Try to go for two body shots, or one body shot then melee, and if you’re feeling lucky, try aiming for their head. Your choice.

No-Scoping from up close is risky, and takes a lot of practice.
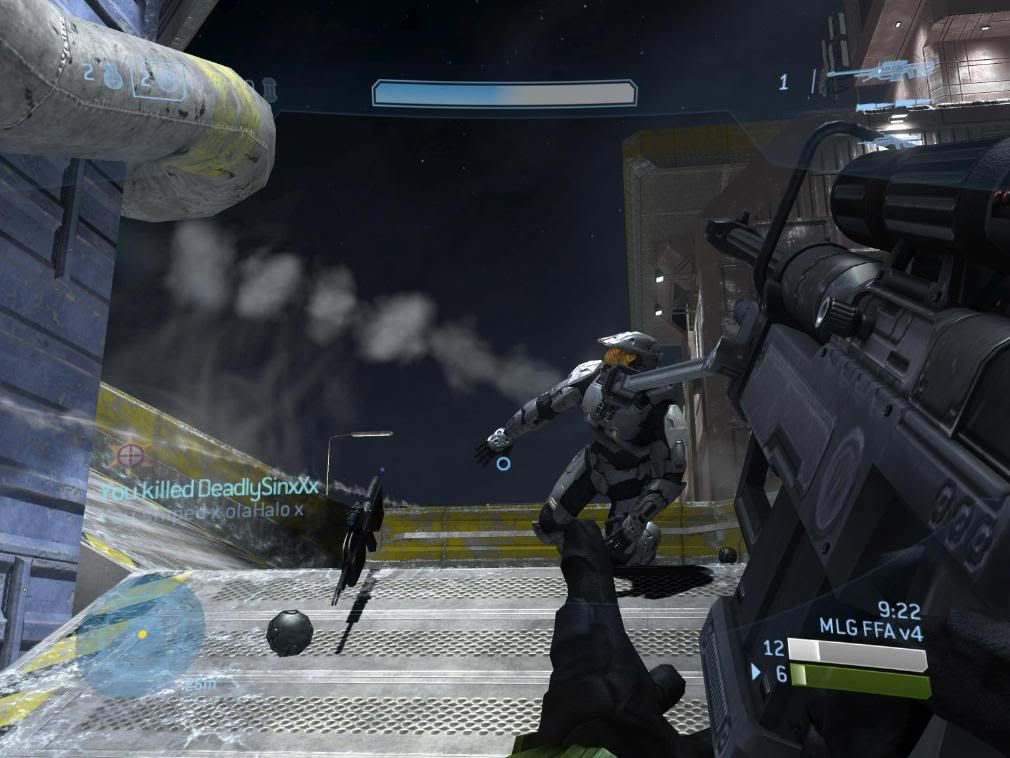
There’s also a posiblity that this enemy might jump around a little. Pay close attention to your motion tracker if this happens and you’ll find your enemy (below).
TIP #5 ONLY SUCKA BEGINNERS NO-SCOPE AT CLOSE RANGE


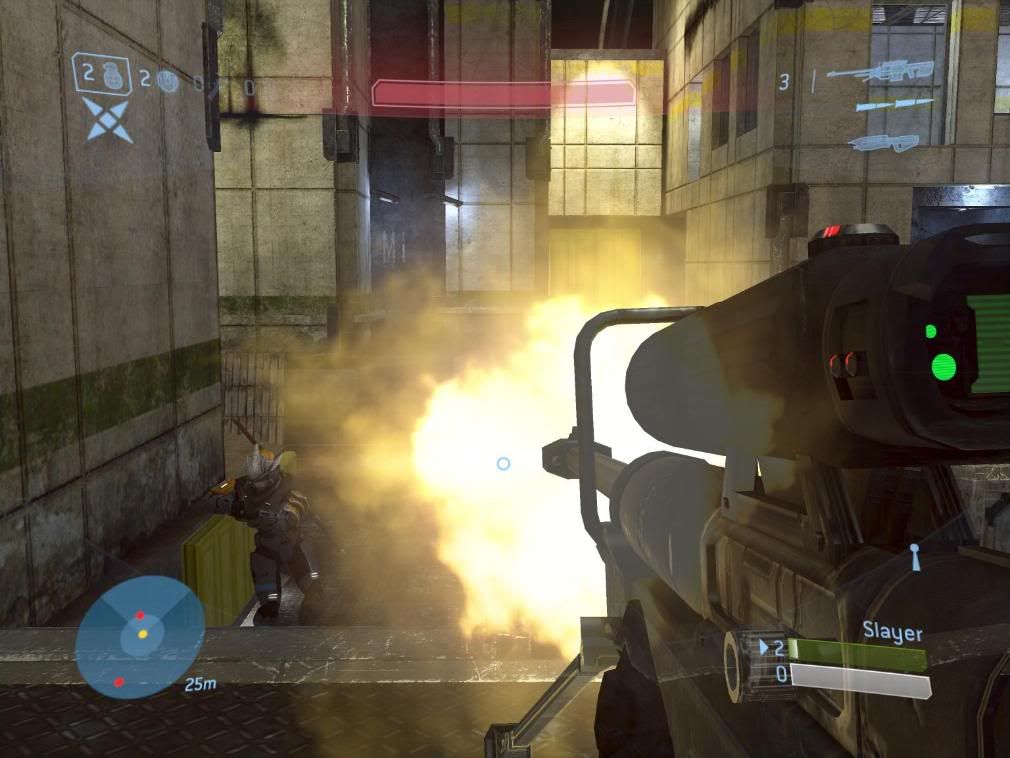
If you are a beginniner with the Sniper Rifle, never use it at close range when you know you have an easier way of killing your enemy. If it comes to the time when you know it’s too late to switch weapons and you’re stuck with just your sniper rifle, refer to the Close-Range No-Scoping tips above. If you are out of ammo on your Sniper Rifle, and cannot switch weapons, use your grenades and try to get to safety long enough to switch weapons.

Example: On this screen below, if this person were out of ammo, they best idea would be to try and stick the opponent while running away or use a power drainer while jumping back and throwing a grenades.
Well, now that you are well-versed in the Sniper Rifle, make sure you get out there and practice before you try the closer no-scopes. Get confident with the weapon before you use it. Remember, even though it is the hardest weapon to excel with, it is arguably the most powerful one in the game.


If you maggots have any comments, suggestions, or further questions on the advice given on this week’s Teabag Prevention, please email TeabagPrevention@gmail.com

This week’s Teabag is brought to you by:


Halo isn’t a video game. It is a sport. It is a way of life. It is the best console FPS multiplayer out there right now. Don’t like it? It’s cause you suck at it. Welcome to Teabag Prevention: the weekly column on geekscape.net that will solve that Halo sucking problem you’ve been having – as well as that problem known as “your social life”. Get ready to stop contributing productively to society with the rest of us.


This Week: The Legendary Map Pack

Blackout

Blackout

As geeks, we spend disgusting amounts of money on a lot of crap we don’t need. We get screwed into collector’s editions, box sets, variant editions, anniversary packs, and new maps for our favorite FPS’s. On April 15th, 2008, the Legendary Map Pack came out for the Halo 3 multiplayer on XBox Live. This map pack made “this was not a waste of money” something more than a mantra you say to yourself as you’re reading your credit card statement – it delivered. Solidly. Here’s how to make these maps your new breeding grounds for pain.


Blackout’s setting is what appears to be an oil rig set up in the middle of an artic ocean on an alien planet. Its darkened skies and awesome moon set up a much darker side of Halo’s multiplayer maps and as we all know, Blackout is a remake from the famous Halo 2 map, Lockout.

TIP #1: MIND YOUR GRAV LIFTS!

Always take note of a Gravit Lift in any map. In Blackout, there is one lift that will take you to the surface of the map. Say you’re running close behind someone, they go up the lift, what do you do? There are multiple ways of getting the job done in the next moment or so. 

a) Throw two grenades at the lift which will follow your enemy all the way up and explode near him or even kill him.


b) If you are sure you know where they will be standing, you can follow them up (waiting for your grenades to explode) and shoot your enemy dead in just a few shots – their shields should be down at this point.


TIP #2 SPAWN WITH THE WIND

One of the most important things to know when going into any map is where each weapon spawns (where the weapon is placed in the map, in default settings mode, at the beginning of any non-custom match). Get to one of these points as fast as you can. The most easily accessible and important spawns in Blackout are the Sniper Rifle Spawn and the Sword Spawn.

The Sniper Rifle spawns at this tower (directly across from the tower with the Battle Rifle).

Things to do when retrieving the Sniper Rifle at this spawn:

a) Mind the explosive canister. Either shoot it yourself from a safe distance, or grab the Sniper Rifle and run. The explosion from this will most likely kill you instantly.

b) Do not camp out here. It is an easily accessible and directly shootable spot. Use some of the other rooftops and high points located throughout the map.

The Sword Spawns in the lower part of the map. If you are where the Battle Rifle spawns, then this room will be just a jump away – to your left.

The shotgun spawn is located just under the lift room pictured here:

Walk down the hallway as pictured here:

And you’ve got yourself a shotgun.


After you have the most imporant weapons in the game, the sneak-attack nature of this map should be no problem for you to handle…unless you’re completly awful in which case it’s a good thing you’re reading this.

Remember:

1. Know where the power weapons are such as the sword, shotgun, and sniper rifle.

2. The Battle Rifle is a fine killing tool.

3. Pay close attention to your motion tracker.

Avalanche

Honestly, we were excited about Blackout, but the idea of Hornets in the sky doing battle with Wraiths and Scorpions on a large scale, Hoth-like, remake of Sidewinder was just too overpowering. Such explosions and cross-map laser shots brings us into giggling school girls as we write this.

Avalanche is awesome.

Whenever we spawn into this map, our first instinct is to rush the Hornet. You may have noticed that it’s severely dubbed down. Missiles are disabled and the machine gun does less damage, can it be used efficiently now that it’s finally in Matchmaking?

Tip #3: GET IN THE CHOPPA! (Actually…Get in the Hornet – It’s called a Hornet)

In Objective gametypes, Hornets can be easily used to transport flag carriers, bomb carriers, or just some friends to help take over an enemy base. The enemy base will always be on the opposite end of the map from where you first spawn. This Hornet can be your best friend.

Look how awesome you look carrying that flag. Clear sailing, right?

but beware, a single shot with a Spartan Laser could take you down.

Tip #4: CANNON IN D (FOR DEATH)

Man Cannons – Grav Lifts that launch a man forward. A grav lift carries you somewhere – a MAN CANNON shoots you there.

On avalanche, these Man Cannons are the easiest way to get around the map on foot. This is especially helpful during objective games when every vehicle is either being used or on fire somewhere on the map. During these games, time is of the essence! Use them while on foot.

At spawn point, though, you may be thinking to yourself “Ooo! Man cannon! Easy transport!”. You’re wrong.

If you want to get to the middle of the map as fast as you can: instead of flying off the first one you see, try going to the teleporter either to your right or left, depending which base you’re at.


Not only will you be teleported to a Man Cannon that will get you to the other side of the map much faster, but you’ll also be treated with a Machine Gun Turret, and Rockets.

TIP #5: KNOW THY SNIPER SPAWN

The Sniper Rifle spawns right outside the “middle” divide between both bases. Look for them at the oppisite location of the overshields here:

and here:

TIP #6 CAN YOU SEE ME NOW? GOOD.

Your Active Camo (the thingy that turns you inivisible) spawns behind this icicle a stone’s throw away from your base’s Man Cannon. In this map, not being seen will be important. Why? There will be vehicles on a rampage during any Slayer match, that will hunt you down on your way to infiltrating any enemy base and taking them out from the ground up. If they can’t see you, your mission will go as planned. Here are the two respective Active Camo spawns.


a) By the rock, oppistie of your spawn point.


b) Just under the tree in in the towards the oppisite side of your spwan point.

TIP #7 USE PROTECTION

With the amount of power weapons and vehicles wreaking havoc during any Slayer match on Avalanche, your best chance of staying alive (other than not being seen) is having twice the amount of shield than everyone else on the field. Here is where to get that kind of protection (it’ll make you “feel” less):


The Overshields spawn right across from where the Sniper Rifle does – right outside the middle divide between each base.

a) This overshield is up the hill, towards the middle of map. This one should be on your left red team.


b) Again, up the hill, towards the middle up the map. This one should be on your right blue team.

Aside from that, the most obvious tips for this map are:


1. Get down below and share a vehicle with a team mate. They are right below where you spawn at the base of your…base

2. Don’t run around without protection or cover. There are too many vehicles for that.

3. Make sure you use the teleports to your advantage

Have fun in the biggest and most extreme map in the Legendary pack. Don’t get killed.

GHOST TOWN

This time, we are given a jungle on the GROUND, not in the AIR. Ghost Town is an abandoned water station where just about everything except barrels of water is destroyed. I guess maybe the Brutes had plans for export? Not only is this map asymmetrical, but it also features a safe zone, you know, so you and I can spawn safely…unlike CoD 4. Moving right along…

Ghost Town may be the least favorite map among the masses (as asserted with the amount of times it’s been called “gay” during pre-game lobby talks), but it’s certainly not a bad map. At the start of any game on this map, it’s important to grab a weapon that will do damage at a medium-range, such as: a Battle Rifle, Needler, or Brute Shots.


A) A Needler can be found above the Mongoose at Blue base.


B) A battle rifle can be found in the same base as the Needler, just a little behind you to the right.

Tip #8: You can teach a few puppies old tricks…..

When protecting something like a flag, base, or a VIP, you might want to carry the “Shotty Sniper” combo (Screenshots of spawn points for both the shotgun and sniper rifle. , that way you can kill baddies from afar,

and if they step into your personal space….

“oH noes!!11”

BAM!!!

Tip #9 FLIP THAT THANG

Say someone steals your flag and an expert Mongoose driver makes it through the map, and is about to pick his friend up,

A Brute Shot isn’t necessarily powerful enough to kill someone right away, but if you aim towards the tires of a Mongoose, you’ll have a very good chance of flipping it,

and killing those who tried to escape…


1. Ghost Town can be enjoyable, with the right weapons. If you’re constantly running into someone who has a superior weapon, you may want to rethink your strategy and weapon choice before going into battle.

2. Crouching can play a big role on smaller maps such as this one.

3. Equipment can change the course of the battle.

Now get off your ass, go to wherever your XBox360 is and get back on your ass and get that ass in these new maps. We’ll see you next week for the beginning of our Weapons series here on Teabag Prevention.

To send questions, comments, or advice inquiries to Teabag Prevention, please email us at TeabagPrevention@gmail.com.

This week’s Teabag written by:


Halo 3 Service Record