Campaign

Gears of War, for me, had a great campaign. There. I said it. Who could forget the first time you fought a Berserker? Or the first time you ran into real Boomers? And let’s not forget one of the most awesome TV Spots made for a video game:


Then came Gears of War 2. What do I have to say about this title? “IT’S A GIANT WOOOOORRRM!”

Yeah, that’s about it. It felt like there was little to no sense of individualism between the characters in Gears of War. As far as I knew, they were all happy dudes, pre-Locust invasion, now they’ve lost everything and are literally fighting for their existence. Sure, we have Cole Train who was a thrashball superstar before Emergence Day, and always threw in the occasional “Woo!”, but that’s about as far it went.


On Tuesday, you’ll find that Karen Traviss, writer of Gears of War 3, got each and every character 100% right. Without revealing spoilers, I’ll say the amount of story and emotion is apparent within the first five minutes of playtime in campaign. Yes, I’m still talking about Gears of War and not another video game. Yes, Gears of War 3 has a fantastic story, and yes, Gears of War 3 WILL have a strong presence in the list of nominations for Game of the Year. Mark these words.


Karen Traviss is able to individualize every character to the point where you actually start to care about them (sadly, for the first time). For everyone that played through Gears of War 2, the emotion hit its peak during the scene where Dominic Santiago found his wife. In Gears of War 3, this level of emotion, and speed of pace, is kept through each act and every chapter. The games sound, graphics, level design, and atmosphere almost make this feat seem easy, but you can tell they really did put a lot of effort into making this a compelling story this time around.


As many Gears fans know, there are collectibles you can find as you play through campaign. In Gears of War 3, some of these collectibles advance the story. For example, in an early part of the game, you come across the results of a psych-evaluation for Dominic Santiago. Flashbacks are also included. Now, these aren’t the kind of flashbacks where you sit back and watch a cutscene, and these aren’t the kind of flashbacks where it feels like a chore or tacked on level you have to get through to advance the story. The atmosphere changes dramatically. One way I can describe it is that the atmosphere changes in relation to how Arkham Asylum changed during every Scarecrow segment.


Atmosphere plays a pivotal role in Gears of War 3. The game does a great job on reflecting the dire situation humanity is set in on Sera. Crumbling buildings, dead humans on the street, empty restaurants and stores are all featured during the campaign.


I have to admit, players may feel a little lost as the events of Gears of War 3 take place two years after the events of Gears of War 2. Fans are able to bridge the gap by reading the Gears books (also written by Karen Traviss). Characters will sometimes reference events that happened during this gap. I don’t see this as downside to the story simply because a canonical universe that utilizes every piece of fiction and story makes the universe, and in this case the game, even more awesome to play.


If you get tired of the regular campaign, you can switch it up by going into Arcade mode, where players are able to put on Mutagens, which work similarly to Halo’s Skulls, but with different features. Mutagens have to be unlocked in order to be activated. This feature also adds to the replay value, not that it needed much convincing to give Gears of War 3 another run-through. There are plenty of explosions, great dialogue, and action sequences that can only be more fun with friends. Did I mention Gears of War 3 features 4-player co-op?


Horde

Horde 2.0 is just that. The ability to set up command posts, turrets, barriers, and even the ability to buy a giant mech suit known as the Silverback makes Horde a tremendous amount more fun than it was on Gears of War 2. Every 10 levels features a boss wave that contains anything from three Berskers at a time to two massive Brumaks storming your front. Players will also have the ability to level up as well as earn ribbons, medals, and your place on the leaderboards.


If you plan on getting to Wave 50, make sure you get a team together, because you’re not going to be able to do it alone. Also, don’t expect to put a couple of Boom Shields at the doorways and be safe. Locust can knock these down and Boomers can climb over them.


Beast Mode

Beast mode, as name, is hilarious. Say it. It’s amazing. It’s also pretty much the opposite of Horde. In this mode, you are the Locust and are trying to take down humans and stranded alike. “Heroes,” which are the likes of Marcus and Dom have to be executed in order to be killed.

As you kill humans, you earn money. This money in turn can be used to buy better Locust. There are only twelve waves in Beast Mode, which is a shame. Once you and you’re able to play as a Beserker, you’ll never want to stop.


Multiplayer 

Over the course of the last two years, I’d lost the excitement and joy of what was the Gears of War multiplayer experience. For me, Gears of War 2 was jagged and rough. The maps ran with shotgun shells, tagged grenades, and well, that was about it. The game’s most iconic weapon, the Lancer Assault Rifle, had lost its value.

When you put your copy of Gears of War 3 in your Xbox, and you WILL do this eventually, you will notice an immediate difference in the gameplay as a whole. Ribbons are given when you do special things during multiplayer matches. These things include highest amount of headshots, last one alive, most executions, etc. Doing tasks like these will also grant you medals that you can show off next to your gamertag in-game. You’ll notice that all of the old gametypes are back along with a couple of new ones. The variation of Team Deathmatch, which we all experienced in the Beta, is back along with classic Execution and Warzone gametypes. Gears of War 3’s multiplayer is defined, smooth, and fun.


First off, I’m happy to write that the Lancer has returned to its former glory of usefulness on the battlefield. In Gears of War 3, you are able to choose from three different assault rifles:

The Lancer – There’s nothing like a good hacking. Chainsawing opponents still rewards you with that awesome feeling of murderous gratification. The Lancer has the biggest clip of the three assault rifles, as well as the highest fire rate. Depending on who you are, you may find this rifle to be more accurate than its counterparts. It’s best used at mid-range, and even deadlier with an active reload. 


Retro Lancer – There’s nothing like jamming a bayonet into your opponent’s emergence hole (yes, emergence hole). Holding B with this rifle will only cause you to hold it down harder as you get closer to your target, ifyouknowwhatI’msayin. This short-ranged assault deals heavy damage to enemies as long as you fire in controlled bursts. Don’t try blind-firing, though, it’ll only force your camera to tilt up because of its recoil.


Hammerburst – For you marksmen and women out there, with the click of the stick, you are able to aim down the sights of this rifle, for absolutely no money down. With the ability to aim down the sights, the Hammerburst proves to be a rifle for all situations. Just remember its fire rate isn’t amazing.


Each of these assault rifles vary in value depending on the map, opponents, and situations. I often find myself switching my spawning weapons in between deaths and maps. In fact, I’m able to use the assault rifles so much that I have to sometimes worry about running out of ammo. As far as assault rifles vs. shotguns on multiplayer maps go, I’d have to say it’s pretty balanced. Still, I guarantee you will have those moments when you insist that Epic Games and the Gears of War Franchise hates you and doesn’t want you to die by anything other than a shotgun, every thirty seconds.

Just as you can choose your spawning weapon for you assault rife class, you are able to choose for you shotgun class as well. Players who participated in the Beta will remember being able to choose from the standard Gnasher and the Sawed-Off Shotgun. Just as the assault rifles and both shotguns have their perks.


The Gnasher offers a quicker rate of fire and reload time to drastic proportions when compared to the Sawed-Off. The Gnasher is still everything you remember from the first two installments. So why give the Sawed-Off a chance? The Sawed-Off shotgun provides a massive crosshair. That’s why. Learn it. If you are near your enemy, and point this shotgun in their direction, they will die. This comes at a price: Sawed-Off shotgun fires both shells in one blast per reload.


As far as the other weapons go, they’re a ton of fun to use when you become accustomed to them. Each player will have their favorite, but Epic did a hell of a job balancing the weapons in this installment. My favorite new additions include the Incendiary Grenade and the One-Shot. The Incendiary Grenade works much its counter-parts. When it lands, a splash of flame will engulf a small radius.


Smoke Grenades now serve a larger purpose than just providing low visibility. When enemies are near its detonation, they will be unable to fire for a few seconds as a result of being stunned. You can still roll away though. Ink Grenades on the other hand stun opponents in place, allowing them to become easy targets. The Gorgon Pistol is now full-auto rather than short bursts. Other weapons from the previous titles such as the Hammer of Dawn, Scorcher, and Boltok remain relatively the same.

Unlike the first two titles, characters in the multiplayer character roster are earned. Most are rewarded by ranking up while others are rewarded other various Gears of War related accomplishments. The same concept applies to weapon skins, though, some weapon skins can be bought for a price (I’m talking real money here, folks).

Personally, I didn’t enjoy much of the Gears of War 2 map line-up that was on-disc. Aside from the maps that appeared in the Beta, which I heavily played and have already grew slightly tired of, I enjoy every map in Gears of War 3 for different reasons. On some of the larger maps, weapon spawns are where they need to be. Multiplayer games sometimes suffer from routine-based combat that can make the game boring. In this case, Epic has done a good job at providing reasons to take an alternate route in the next round, be it for a weapon or competitive advantage. The maps we’re already familiar with, such as Trenches, Thrashball, and Checkout, all have minor changes for the better. Some maps easily outshine others in the beauty and creativity department.


Overpass is a map set in a sinking city. As the match progresses, the map will tilt as it slowly sinks.

My two major gripes with the game are the following:

The spawning system can use some tweaking. Nothing is more frustrating than having enemies spawn behind you and shoot you down and to have that as your first death of the match. The other is the lack of theater mode. I know it was confirmed a while ago that such of mode wouldn’t make it into the final release, but come on. If any game were to include the ability to record your bloody killing spree with a chainsaw, it should be Gears of War 3. I can’t tell you the bittersweet feeling I get when I do something tremendously gory and awesome, but am unable to share it with the world. I thought Epic Games was going in the direction of including a theater mode when the inclusion of screenshot capabilities was featured in Gears of War 2. Without a screenshot capability, and lack of theater mode alltogether, I can’t say Gears of War 3’s multiplayer experience is all that it could be.

Cliff, or anyone at Epic Games, if you’re reading this, including a theater mode wouldn’t have just appealed to your “hardcore” fans, it would have appealed to all fans of Gears of War. There are no casual Gears of War players, there are only Gearheads. For as long Gears of War 3 exists without a theater mode, there will be an empty spot in my Omen-Shaped heart.


Gears of War 3 is everything a AAA title should be. It appeases everything from hardcore fans to gamers who just want blow things to bits. You don’t need to read the books or have a degree in Coalition of Ordered Government history, but these things will only enhance the experience. With the amount of time they Epic had to polish this game, one playthrough will determine it was time well spent.  


This game is near perfect and earns a 9.5/10.


Want some more Gears of War? Check out our interview with Carlos Ferro, Voice of Dominic Santiago!

Written by:

Jacob Lopez

Follow me on Twitter!

Become a Fan!

Follow Teabag Prevention on Twitter!


Over the course of the last two years, I’d lost the excitement and joy of what was the Gears of War multiplayer experience. For me, Gears of War 2 was jagged and rough. The maps ran with shotgun shells, tagged grenades, and well, that was about it. The game’s most iconic weapon, the Lancer Assault Rifle, had lost its value.

When you put your copy of Gears of War 3 in your Xbox, and you WILL do this eventually, you will notice an immediate difference in the gameplay as a whole. You’ll notice that all of the old gametypes are back along with a couple of new ones. The variation of Team Deathmatch, which we all experienced in the Beta, is back along with classic Execution and Warzone gametypes. Gears of War 3’s multiplayer is defined, smooth, and fun.


First off, I’m happy to write that the Lancer has returned to its former glory of usefulness on the battlefield. In Gears of War 3, you are able to choose from three different assault rifles:

The Lancer – There’s nothing like a good hacking. Chainsawing opponents still rewards you with that awesome feeling of murderous gratification. The Lancer has the biggest clip of the three assault rifles, as well as the highest fire rate. Depending on who you are, you may find this rifle to be more accurate than its counterparts. It’s best used at mid-range, and even deadlier with an active reload. 


Retro Lancer – There’s nothing like jamming a bayonet into your opponent’s emergence hole (yes, emergence hole). Holding B with this rifle will only cause you to hold it down harder as you get closer to your target, ifyouknowwhatI’msayin. This short-ranged assault deals heavy damage to enemies as long as you fire in controlled bursts. Don’t try blind-firing, though, it’ll only force your camera to tilt up because of its recoil.


Hammerburst – For you marksmen and women out there, with the click of the stick, you are able to aim down the sights of this rifle, for absolutely no money down. With the ability to aim down the sights, the Hammerburst proves to be a rifle for all situations. Just remember its fire rate isn’t amazing.


Each of these assault rifles vary in value depending on the map, opponents, and situations. I often find myself switching my spawning weapons in between deaths and maps. In fact, I’m able to use the assault rifles so much that I have to sometimes worry about running out of ammo. As far as assault rifles vs. shotguns on multiplayer maps go, I’d have to say it’s pretty balanced. Still, I guarantee you will have those moments when you insist that Epic Games and the Gears of War Franchise hates you and doesn’t want you to die by anything other than a shotgun, every thirty seconds.

Just as you can choose your spawning weapon for you assault rife class, you are able to choose for you shotgun class as well. Players who participated in the Beta will remember being able to choose from the standard Gnasher and the Sawed-Off Shotgun. Just as the assault rifles and both shotguns have their perks.


The Gnasher offers a quicker rate of fire and reload time to drastic proportions when compared to the Sawed-Off. The Gnasher is still everything you remember from the first two installments. So why give the Sawed-Off a chance? The Sawed-Off shotgun provides a massive crosshair. That’s why. Learn it. If you are near your enemy, and point this shotgun in their direction, they will die. This comes at a price: Sawed-Off shotgun fires only one shell per reload.


As far as the other weapons go, they’re a ton of fun to use when you become accustomed to them. Each player will have their favorite, but Epic did a hell of a job balancing the weapons in this installment. My favorite new additions include the Incendiary Grenade and the One-Shot. The Incendiary Grenade works much its counter-parts. When it lands, a splash of flame will engulf a small radius.


Smoke Grenades now serve a larger purpose than just providing low visibility. When enemies are near its detonation, they will be unable to fire for a few seconds as a result of being stunned. You can still roll away though. Ink Grenades on the other hand stun opponents in place, allowing them to become easy targets. The Gorgon Pistol is now full-auto rather than short bursts. Other weapons from the previous titles such as the Hammer of Dawn, Scorcher, and Boltok remain relatively the same.

Unlike the first two titles, characters in the multiplayer character roster are earned. Most are rewarded by ranking up while others are rewarded other various Gears of War related accomplishments. The same concept applies to weapon skins, though, some weapon skins can be bought for a price (I’m talking real money here, folks).

Personally, I didn’t enjoy much of the Gears of War 2 map line-up that was on-disc. Aside from the maps that appeared in the Beta, which I heavily played and have already grew slightly tired of, I enjoy every map in Gears of War 3 for different reasons. On some of the larger maps, weapon spawns are where they need to be. Multiplayer games sometimes suffer from routine-based combat that can make the game boring. In this case, Epic has done a good job at providing reasons to take an alternate route in the next round, be it for a weapon or competitive advantage. The maps we’re already familiar with, such as Trenches, Thrashball, and Checkout, all have minor changes for the better. Some maps easily outshine others in the beauty and creativity department.


Overpass is a map set in a sinking city. As the match progresses, the map will tilt as it slowly sinks.

My two major gripes with the game are the following:

The spawning system can use some tweaking. Nothing is more frustrating than having enemies spawn behind you and shoot you down and to have that as your first death of the match. The other is the lack of theater mode. I know it was confirmed a while ago that such of mode wouldn’t make it into the final release, but come on. If any game were to include the ability to record your bloody killing spree with a chainsaw, it should be Gears of War 3. I can’t tell you the bittersweet feeling I get when I do something tremendously gory and awesome, but am unable to share it with the world. I thought Epic Games was going in the direction of including a theater mode when the inclusion of screenshot capabilities was featured in Gears of War 2. Without a screenshot capability, and lack of theater mode alltogether, I can’t say Gears of War 3’s multiplayer experience is all that it could be.

Cliff, or anyone at Epic Games, if you’re reading this, including a theater mode wouldn’t have just appealed to your “hardcore” fans, it would have appealed to all fans of Gears of War. There are no casual Gears of War players, there are only Gearheads. For as long Gears of War 3 exists without a theater mode, there will be an empty spot in my Omen-Shaped heart.


Gears of War 3 provides a solid multiplayer experience. With beautiful maps and new toys, Gears of War 3 Multiplayer earns a 9/10.


Reviews for Horde and Campaign will be released leading up to Gears of War 3’s midnight launch! If you can’t wait, check out our interview with Carlos Ferro, Voice of Dominic Santiago!

Written by:

Jacob Lopez

Follow me on Twitter!

Become a Fan!

Follow Teabag Prevention on Twitter!


I’m straying away from Halo this week to bring you my video game round-up from Comic-Con 2011. Below, you’ll find links to articles already written and videos regarding my ass being handed to me in Ultimate Marvel vs Capcom 3 that I’m sure Shu, Phenom, and other ‘scapists will enjoy. Let’s just start with the links:

Spider Man: Edge of Time


Prototype 2


Star Wars Kinect


An Interview with Carlos Ferro, the voice of Dominic Santiago from the Gears Franchise


X-Men: Destiny

X-Men Destiny may be unheard of by some, but it should definitely be added to your radar. What turned me to this title was the pitch that it would be an RPG in the X-Men Universe. This game wasn’t made to go toe-to-toe with DC Universe, which is a good thing. The game begins with you making the choice of which character you want to be. What separates them are their backgrounds and gender. There will be three characters to choose from.

A little later on, you’ll get the chance to pick your power sets, a primary and secondary primary set. The game plays like a brawler with the ability to use your powers in combos. As you progress through the game, you will have the chance to level your power sets up as you see fit. Think the leveling system in Marvel Ultimate Alliance 1 & 2.


Through the missions, you’ll encounter both the X-Men and The Brotherhood, as well as other characters. It is your choice to either help them, or fight them. In various scenarios, picking a side will obviously make the mission more difficult or easier. When you pick this game up, you’ll be able to have six different run-throughs with this game.


This title is set for a September 27, 2011 release.


Ultimate Marvel vs Capcom 3

As promised, below is a video of me playing Ultimate Marvel vs Capcom 3 and losing terribly. Also, you’ll find the character select screen.


The game played relatively the same as the regular Marvel vs Capcom. There’s a new layout as far as health bars and such that I’m sure most of you have already noticed. What was noticeably different was the X-Factor. When players enter X-Factor, they will glow red. In all, as a fan of the franchise, this will be a day 1 purchase. Do I feel a little cheated that Capcom is putting this out? A little. But with the new gameplay changes and characters, the lower price tag won’t weigh heavily on my wallet, especially since I’ll be putting in well over the amount of matches I care to admit.


Written by:

Jacob Lopez

Follow me on Twitter!

There’s no telling who’s around the corner when you’re at the San Diego International Comic-Con. In our case, a very lucky case I might add, Carlos Ferro was just around the corner. The name may not sound too familiar at first, but it damn well should be. Maybe you saw him in an episode of Star Trek: The Next Generation way back in 1994. No, that couldn’t be it.

Maybe you heard his voice in a couple of James Bond 007 video games. Not that either? Try Leonardo Da Vinci in Assassins Creed II and Brotherhood. If that hasn’t got your attention, then this will: You probably know Ferro the Great mainly from his work on the Gears of War franchise.

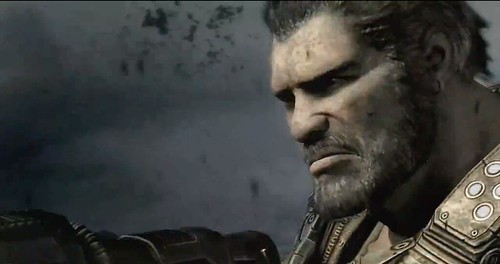
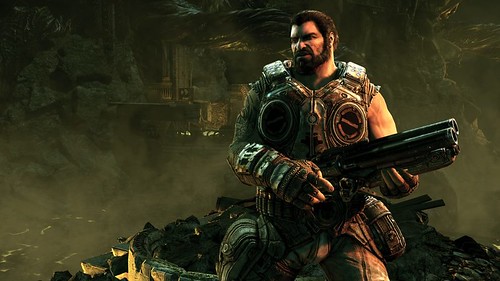
Carlos Ferro has been voicing Dom from Gears of War since 2006. I’d sit here and write down everything we thought he said during the interview, but thankfully we’re smarter than that. Below is the transcribed version in all it’s glory. Enjoy our meaningful interview with Carlos Ferro at Comic-Con 2011.


Kelsie: What’s your favorite line to deliver as the voice of Dom?

Carlos Ferro: *IN CHARACTER* “SUP, BITCHES?!”

Jake108: Do any kids talk trash to you on Xbox Live?

Carlos Ferro: My gamertag is private, but I have had guys not know that they’re playing with the voice of Dom. And I always play as Dom and they’ve noticed an unusual echo when they do talk trash. Like, *Whiny Voice* “Dom, man you keep dying! Fucking Dom!” And stuff like that. And I’m the first one that in Dom’s voice starts echoing maybe his sentiment while someone’s talking shit. But I’m never, never over the line, I mean they’re fans, they’re playing the game. I do it in good fun. But yeah, trash talking man, that’s the multiplayer experience!

Jake108: Do you ever mess around with any people online by talking in Dom’s voice over the mic?

Carlos Ferro: Only when they know, only when like two or three people on my squad know that I’m, you know, and there’s one person that doesn’t, I’ll have a little bit of fun with them. But eventually they’ll be like, “Are you guys hearing that?” And we’re like, “Yeah Dude, you’re playing with the voice of Dom.” And then they’re very happy, so it’s a good thing.

Jake108:
Do you know what rank you are in Gears 2?

Carlos Ferro: I do not know right now, I do not. I know what level I’m at. I know I haven’t got my wings yet, I’m not a hundred yet, no where near a hundred yet. I’m at like seventy-something. I don’t get to play no where near to play as much as I’d like.

Jake108: Do you prefer Gears 2 over Gears 1, mainly because of the Horde Mode?

Carlos Ferro: It’s not a preference. I just haven’t played Gears 1 since Gears 2 came out. I mean, I would go back, but Horde was a new thing when it came out, and I’m still addicted.

Jake108: Once Gears 3 comes out are you going to jump ship and play that?

Carlos Ferro: I don’t know about jumping ship man, I don’t know if I’m going to be that quick to jump ship. I like my horde. I ease into my games. You know, I’m a gamer, I play a lot of games, not just the ones I’m in you know what I mean? And I can imagine that I’ll probably get really good at Horde 2.0 before I jump ship and start playing with my friends. And I think all the experience that I built on [Gears] 2 will help.


Kelsie: Is there anything in Gears 3 that made you just go “Wow”?

Carlos Ferro: I played Horde 2.0 yesterday and the lighting- I don’t want to get too technical, but the lighting and the color pallet of the game is so different. You go into there and play the [Gears of War 3 Horde 2.0] demos that are there right now, the new tickers, when they explode that’s a wow, man. That is no bullshit. That was a bloody gory wow factor for sure.

Jake108: Have you play any beast mode?

Carlos Ferro: I played beast mode last year.

Jake108: What’s your favorite Locust to play as?

Carlos Ferro: I’m a big fan of the Kantus because it makes me laugh, it makes people faint. *Carlos Ferro does his best, most awesome Kantus screech, which happens to sound a little like a dying goat.* And it cracks me up. But yeah, last time I think I was playing as a Berserker, I can’t remember! But I was kicking ass and I was big, so probably a berserker. Beast mode, what I saw was amazing. Just seeing the teams die, it was weird to me to watch Dom get killed by a ticker. That’s odd! But fun and cool all the same time.

Jake108: When you are recording your lines of dialog is John Di Maggio there too?

Carlos Ferro: Yes.

Jake108: And you guys are basically talking to each other as the characters?

Carlos Ferro: Not always, but we try to do that as often as possible, especially for the campaign. There are so many scenes that I think it’s kinda vital that Marcus is interacting with Dom, and we have been really fortunate that Epic lets us.

Kelsie: How satisfied are you with the Gears 3 conclusion? Without spoiling anything.

Carlos Ferro: Without spoiling anything? Oh, I’ll spoil everything! I’ll tell you what happens!

Kelsie: That would be great for us!

Carlos Ferro: Oh I’m sure it would be. How satisfied? Totally. They did not screw around, the story is satisfying. They don’t shut down the universe, it doesn’t end with a bomb going off and there’s no more Gears universe. That’s ridiculous.  It’s not that, the big bang doesn’t happen and then it’s over. I mean ridiculous like that, I mean I’m going as stupid as possible. But every storyline, all the questions, they get answered. And that’s awesome.

Jake108: Is there any room to go forward or backward in the Gears timeline, such as the Pendulum Wars?

Carlos Ferro: In our industry, there’s room to go forward, backwards, up, down, sideways. It is a big expansive universe. They worked very hard since the beginning to create a universe that makes books, games, comics. There is a lot going on, man. I mean if you tried to read all the comic books, books and everything you’d have very little time to do anything else.

Carlos Ferro (to Kelsie): Is that him? Does he read everything?

Kelsie: I actually read everything.

Carlos Ferro: And he is like, “Will you finish Jacinto’s Remnant already?!”

Kelsie: Unfortunately he is more of a Halo guy, I’m more into Gears.

Carlos Ferro: Oh really? Well this interview is over then. Goodbye.

Kelsie: Nooooo!

Jake108: She’s a big Gears fan.

Carlos Ferro: I actually worked on the Halo: Reach trailer so I can only talk so much shit. I was the first guy that did the voice of Carter.  I’m alright with Halo. We’re down! We’re down. But I am an Assassin’s Creed guy too, I am the voice of Leonardo da Vinci.

Kelsie: Aside from Gears 3, what game are you most looking forward to?

Carlos Ferro: What am I waiting on? Actually this a good segway: Assassin’s Creed: Revelations, I really am looking forward to seeing what happens with Desmond and all these sorts of things. I can only speak about Leonardo Da Vinci, I can’t say if he’s in Revelations –

Jake108: I was just about to ask you that!

Carlos Ferro: Yeah, I can’t say, but as a fan, I’m really looking forward to seeing what happens. I don’t know everything.

Jake108: Do you read any other fiction into video game lore?

Carlos Ferro: I’ve read Assassin’s Creed: The Fall comics, the Gears comics, Aspho Fields, Jacinto’s Remnant. Quite Frankly, I do them for research. To be brutally honest, I don’t kickback and say, “I’m gonna read Aspho Fields.” I WANT to read the story of the Santiago family and want to know what’s going on. They named Carlos, his [Dominic Santiago] brother after me, so I had to read that shit. I wanted to know what happened. It was amazing and I think it did open the door for me to read more fiction. I was more a biography guy before.


Jake108: What book did you enjoy the most?

Carlos Ferro: Aspho Fields, without a doubt.

Jake108: What do you think is the most terrible thing that’s happened to Dominic Santiago?

Carlos Ferro: There’s no question, the death of Maria [Dominic Santiago’s wife, which we saw in Gears of War 2.]

Kelsie: Why does Dom have such bad luck?

Carlos Ferro: It’s not bad luck. It’s the military families man, it’s a metaphor. If they didn’t say it, I’m saying it. This is Carlos Ferro’s reasoning of how I act Dom. This is the secret to how I act. The heart of my character work on this is that he’s always been a metaphor to me for military families. Military families in this country, and globally, give everything to their cause, their country, to the revolution, and it can be any kind of fight. They give their sons, daughters, mothers, fathers, and horrible things happen in the name of the cause. And that cause is always hopefully a noble one, a good one, fighting the good fight, and helping people live better lives. For me, again, I’m not speaking for Epic or Microsoft, the Santiago family is the perfect metaphor for military families: What happened to Carlos, and what happened to the [Dom’s] kids, to Maria. The fiction in Gears of War is not really that far off of our planet. You can relate it to the Blitzkrieg in Europe. People do lose their kids and their wives go missing. People do have to watch their wives die and pull the plug because of a war. You lose your brother, your parents, or you get separated, and so for me, it’s not bad luck. It’s what happens when war happens, and when people don’t take passive positions. My responsibility was to bring that heart, that level of feeling to it, to tell the story. The Santiago family had a horrible time when E-Day happened and during the Pendulum Wars. The family has been hurting. Military families hurt. There’s my long-winded, heavy-duty answer. I’ve never said that to anybody. It was fun telling you guys that.


Unfortunately, Carlos Ferro didn’t have that much time to talk to us to begin with. Kelsie and I are grateful he gave us the ten minutes he had to have a conversation with us. 


Follow Carlos Ferro on Twitter!

Written & Transcribed by:

Kelsie Hernandez & Jacob Lopez

Follow Teabag Prevention on Twitter!

Few of you may have heard of this manga-inspired beat-’em-up. Rusty Hearts follows a group of characters  attempting to stop a villain who that threatens to destroy both their world and the world as we know it. Lord Vlad wants a perfect world where there are only pure-blooded vampires, even if that means wiping out both humans and half-vampires. As you play through, you will fight Lord Vlad’s armies of vampires until you face him yourself.

The main characters include:

o      Angela – a sassy witch specialist of elemental magic


o      Tude – a mysterious, monstrous past and a clear taste for close range melee weapons


o      Frantz – a half vampire with mid-range merlee weapons and dark magic


The gameplay follows a Marvel: Ultimate Alliance or X-Men Legends like formula with up to four players on screen. Each player has a special ability that they choose to rank up. Special abilities can’t be combined, like fusion powers in MUA: 2, but they still look cool nonetheless. It’s important to note that this is not a side-scroller. The developers note that their inspiration for gameplay came from Castle Crashers, Scott Pilgram vs The World, and Marvel vs. Capcom 3. Their inspiration for their anime-inspired universe came from Bleach, Full Metal Alchemist, Naruto, and Dragon Ball.


You and your friends will be exploring different dungeons, encountering more difficult dungeons as you progress through the game.There are a wide variety of bosses, each with a difficulty level between 1-4. Rusty Hearts also plays like a traditional MMORPG with the inclusion of loot and a variety of missions.


As you rank up, you will have the ability to upgrade your weapons. When you do this, not only will your weapon be stronger, it will undergo a physical appearance too. When you’re in-game, you don’t just simply tap your attack button, players are encouraged to explore different attacks to execute stylish combos.


Rusty Hearts features PvP combat with multiple game modes. You have the choice of using the keyboard to play or a gamepad. (I used an Xbox 360 conrtoller.)


Rusty Hearts is Free-to-Play and enters a closed Beta on July 27, 2011.

System Specs:

Minimum – Pentium 4 1.4 GHz, 1GB of RAM and a video card with 128 MB of RAM

Best Experience – Intel Core2 Duo 2.5 GHz, 2GB of RAM and a video card with 256MB of RAM


Written by:

Jacob Lopez


I had the pleasure of getting a hands-on run through of Elsword, the manga-inspired free-to-play role playing side-scroller by Kill3rCombo. While the game has been out commercially for a couple of months, players are eagerly anticipating the addition of new content and elements to the game. After a quick run through of one mission, I’m ready to tell you why Elsword is worth your time.


There are a variety of PC gamers who are witnessing the introduction to Free-to-Play games as well as their favorite MMO’s going the same route. While that alone is appealing, console gamers may see this as an opportunity to jump into the PC gaming world. Think of Elsword’s gameplay as fast paced as Castle Crashers, except with more combos of course. The character movement is fluid and the game features little to no learning curve. As of right now, there are four job classes with another two on the way. The new classes as well as characters will be releasing over the next three weeks.


As you progress through the game, you will progress through your chosen skill tree. Weapons, items, and wardrobe will also be unlocked. At level 15, players will get to choose subclasses, which you can also level up as you go. Elsword features dozens of maps for you and your party of up to three friends to conquer. Elsword manages to keep the strong elements of a MMORPG and incorporate them into this fast-paced action title that both serious MMORPG and combo-seeking gamers can enjoy.


Players will also have the opportunity to create, disassemble, enchant, and reinforce items.

Elsword marks the first game to have a North American Release by Kill3rCombo. Let’s make them feel welcomed.


http://www.elswordonline.com/


Written by:

Jacob Lopez


Hills of Glory is the newest addition to the list of games developed by BulkyPix. For me, there are two kinds of games for my iPhone: The ones that kill time and ones where I actually sit down to play a game. Hills of Glory falls into the time killer category, but that doesn’t mean you shouldn’t give this game a chance.


Gameplay

Hills of Glory is unlike most of the tower defense games on the market right now. Instead of setting up turrets to defend your base, you tap enemies who are on the way to kill you. When you tap them, depending on what characters you have on your team, a weapon will fire from your base and will hit the enemy instantly. Enemies are killed with one or more taps depending on the weapon and level of your characters. Other abilities involve swiping your finger vertically, horizontally, holding your finger in place, and more. In HoG, you’re actively  engaging the enemy as opposed to watching the action unfold after you build turrets around your base.


There are three categories for characters in the game, each with a primary ability and a secondary ability. When you use each ability in-game, you’ll have to wait for a recharge before you can use it again. Each category has a roster of different types of teammates that you can unlock as you progress through the game. Your first squad member will always be the one that fires when you tap enemies to kill them. For example, the first character you get is a rifleman. Their primary ability shoots a single rifle shot at enemies you tap. To use your secondary ability, you’d swipe your finger down the screen. Once you do that, a row of vertical machine gun fire will start at your bunker and stop at the bottom of the screen. I have to admit, I did find some trouble activating some abilities. As I moved my finger in the motion as directed, the game did not register it. However, this is only an issue for me on one specific ability as all the rest work fine.


The other two catagories of characters come with heavier weapons such as napalm, bombs, grenades, and even Chopper support. As you progress through missions, you will be granted XP and gold. You can use this gold to either train your squad individually, or purchase new characters to replace existing ones. Every new character comes with bigger and better guns, so it’s up to the player to decide which route they want to take when spending their gold.


If you end up taking enemies quickly, you can always call out the next wave before it enters for double, or if you want the challenge, triple the amount of XP. The game can get pretty fun when there are numerous enemies on the map and the strategy really kicks in when you plan out what abilities to use at what time. I won’t spoil the game for you, but as you progress and unlock new characters, the more fun it is to use the weapons that accompany them. The music for the game can get a bit tiring, but there’s no harm in turning the volume off while you play.


Graphics

You won’t be awed by the graphics in this small package, but you won’t be dissapointed either. The game shoots for a cartoony feel and they got it spot on. There’s no blood or extreme violence here.


I encountered little to no framerate issues when I launched of series of bombs and grenades while I had a chopper in the air. Don’t be afraid to fire everything in your arsenal. Enemies are easily distinguishable from the landscape as well as other enemies. You will be fighting in different environments depending on what mission you’re doing.


Game Modes

The game features “FIRE AT WILL”, which is a sort of instant action that has an unlimited amount of waves. You are tasked to get as far as you can without dying. Campaign is standard with three parts, each containing its own chapters.


You high scores will be posted to the leaderboards of GameCenter and OpenFient so you can share with your friends. There are no multiplayer features.


Final Word

Hills of Glory definitely sets itself apart form the standard tower defense genre for the better. While I like to see action unfold before my very eyes, I also enjoy actively participating in the defense of my base. For those of you who think this is just a tap-’em-up type game for the iPad or iPhone, you’re wrong. As you progress, the game becomes more challenging in the aspect of strategizing what abilities and weapons to use at which time, and what enemies. For tower defense lovers out there, this is a must buy.


Written by: Jacob Lopez – jake108@Geekscape.net

Nothing much to update this week. I’ll be attending Anime Expo, so be on the look out for video game news from the Expo. As for this week, Teabag Prevention zeros in on Zealot. Note: This article is based on Arena Zealot that can be found in both Arena and Team Slayer playlists.


THIS WEEK: ARENA ZEALOT


WEAPONS, YO

Concussion Rifle


This weapon spawns in the zero gravity area. You may either use one of the bigger colored lifts to get up here, or a Jetpack. Careful you don’t spend too much time in the zero gravity area, there’s a softkill zone up there.


Needler


The Needler spawns in the center of the map, both on the top platform, and in the room under the platform. The Needler works great at mid-ranged, which is perfect for this map.


Needler Rifle


Rifles are always a plus. This rifle spawns just ahead of where you and your team spawn.


DMR


The DMR spawns at the bottom of the map. It may be a little hard to see in-game, but you shouldn’t have any trouble finding it after looking at the picture above. A second DMR spawns on the opposite side of the map.

Energy Sword


The Sword spawns at 10:10, or two minutes after the game has started.

Lone Wolf or Team Player?

You’re going to have to make your choice before you choose your weapon class. In most cases, at the start of the game, the two teams will engage almost immediately due to the close proximity of spawn locations.


Knowing this, you can either go with your team and try not to die from the abundance of grenades being thrown at you, or you can run the other direction until you can either get a clear shot or reach a flanking position. You shouldn’t try this if you don’t have sprint. 

You should also try not to be Lone Wolf the entire match, or you may end up looking like this:


Another players sometimes plan an ambush to players walking up ramps near the Health Packs. While this can work out in your favor, you always have to wary that the number of enemies walking up that ramp may outnumber you or your friend.

It’s best to have a Sword in this situation.


Also, don’t forget you can drop down and really get the drop on enemies waiting below.


Don’t Be Afraid to Use the Lifts

The lifts provide a faster, and sometimes safer means of getting from point A to point B. There are two smaller lifts located at the mid section of the center of the map. Before using them, you may want to make sure your destination is free of enemies.

Using the larger lifts to get the zero gravity area of the map will also get you to the softkill zone. I like to get myself up there and drop down on enemies below.


Armor Abilities

Jetpack


Jetpacking may not be the best idea for this map. Sure, you may be able to reach the second level of the map, and even reach Zero Gravity from almost any area of the map, but with the softkill zone and low ceiling, you may want to skip the Jetpack this round.


Sprint


Sprinting is probably of Armor Ability of choice for this map. It allows you to get places faster on this smaller map as well reach cover in the curved hallways more quickly.


Active Camo


Camo is very effective on this map. Since Zealot takes place in a Covie ship, you’ll notice there are no corners, only curves and ramps. The numerous ramps and floors can confuse players when you activate your Camo.


Armor Lock


Armor Lock can be effective when you have your team not far from you for support. Armor Lock is not uncommon on this map due to the many grenades being thrown, Energy Sword, and the Concussion Rifle.


Hologram


As I stated earlier, there are many curves to Zealot. Since your Hologram can’t run with the curve, it’s use goes down a bit. When and if you choose it, remember that it’s not going to work in the hallways, but will be more effective sending it up the two smaller lifts as a distraction.


Teabag Prevention Written by:

Jake108

For any comments, suggestions, videos, screenshots, or inquiries please email us at:

TeabagPrevention@gmail.com

Show your Support!

Follow us on Twitter!

Join our Facebook Group!

Or more importantly, become a Fan!


And don’t forget to add us on myspace at:

www.myspace.com/teabag_prevention

Tell your friends about us!

As always, special thanks to Louis Wu and HBO


After a lengthily hiatus and a trip to E3, Teabag Prevention is back on track with this new installment. I can only hope I didn’t lose too many of you along the way, but fear not! Next stop is the Anime Expo, then San Diego Comic-Con. Between all the waves of Covies I slaughtered this week, I was able to put this together for those of you dying (literally) for another Teabag Prevention. Enjoy!


THIS WEEK: BOARDWALK


WEAPONS, Y’ALL

Rockets


Sniper Rifles

Blue Team:


Red Team:


Shotgun


Plasma Launcher


DMR


DMR’s spawn on the other side of Red Team Spawn towards the stairs. Downstairs, you’ll find another DMR.

Needle Rifle


BLUE TEAM


It’s no secret that power weapons are the most sought after weapons on any map. On this particular map, the Sniper Rifles are the most easily accessible to teams spawning on both sides of the map, with Rockets coming in second. Now, you might think Red team has the height advantage when they pick their rifle up. While this is true, it’s not going to matter if you and your team are out of their sight. Chances are, Blue Team is gonna come looking for you. Don’t be afraid to punch them in the face.


If you’re on Blue Team, one of you is going to want to secure the sniper rifle and head to the stairs to the right. From there, you might get a peak at the Red Team sniper looking for your comrades. If you’re able to reach this spot in a hasty manner, you should be able to counter-snipe without a hitch. From there, I like to, and this is much easier if you have a JetPack, jump to the garden area. Sure, there’s not much cover, but it makes an excellent sniping location for being a place where not many suspect you of being there. 


Can You See Me?

However, if you do not have the sniper rifle and are on blue team, you should support your team by heading to Rockets spawn. In a scenario that’s most likely to play out, you and the enemy team are going to make contact at or around Rockets spawn. If you have back-up, this should be a piece of cake (Kids still say that, right? I’m still hip!). Hopefully, the enemy team is outnumbered.


RED TEAM

You know what’s cool? Not shooting your teammates if they beat you to the sniper spawn. In fact, if you see them running up the stairs and cutting across the bridge, there’s a damn good chance they’re going to get to it first. Do humanity a favor and don’t follow them and instead focus your efforts on getting the next big gun or shooting down your opponents.


Red Team has the opportunity of setting up an ambush, if they choose to do it. You may or may not dully note that his particular ambush may not work and is risky. But I know you like risky. Let Blue Team secure Rockets and think they’re all alone down there. Fact is, there’s only one way out of Rockets spawn, if you don’t have a JetPack that is. Once they’ve cleared from spawn, you and your team can open fire from a variety of locations, which is better. Some can stay up top while some can fire from the stairs themselves. The point being that all of you are not in one easy location for one Rocket to kill you all.


So, What Armor Ability Should I Chose?

Using the JetPack can get you out of tough situations, but it can also land you in glorious amounts of trouble. JetPacks are best used to reach higher locations or get the drop on enemies.


Mind you, those are both strategic ways of using this Armor Ability. You shouldn’t jetpack into the air as soon as you spawn, or if you don’t know where your enemies are at. Hell, they might be ready to snipe you at the air at any given time.


Holograms can be useful here if you stick with your team. A Holograms main purpose on this map is for decoying and finding out where a sniper is or confusing the enemy. You’re not going to confuse them too much if you send a hologram out in the open.


On the bottom level of Boardwalk, there are halls and corners which makes using holograms easy.


Armor Lock‘s purpose remains the same, get the attention of the enemy, go into armor lock, have your team support you as back-up fire. Specifically on Boardwalk, many like to camp stairways and weapon spawns.


The areas of which this happens on Boardwalk are near both Sniper spawns. Send your armor-lockin’ buddy in first and make sure to support them with covering fire.


Active Camo can play a huge role on any map, if done right. Luckily for you ninjas out there, this map has multiple levels of access. If you’re feeling in the creepy stalkerish mood, there are also plenty of dark corners to blend in to on the bottom level of the map.


Don’t forget that this will also scramble the enemy motion tracker. Have fun!


Last, but not least, is Sprint. Sprinting will get you where you need to go, fast. Whether you’re rushing rockets your Snipe, if you want to stay on top of power weapons as soon as the game starts, Sprint is for you.


If you decide to stay with Sprint the whole game, be sure to stay near buildings or means of cover from JetPackers. Sure, they may be in the sky, but if there’s more than one of ’em, you’re just an ant running from their magnifying glass.


Teabag Prevention Written by:

Jake108

For any comments, suggestions, videos, screenshots, or inquiries please email us at:

TeabagPrevention@gmail.com

Show your Support!

Follow us on Twitter!

Join our Facebook Group!

Or more importantly, become a Fan!


And don’t forget to add us on myspace at:

www.myspace.com/teabag_prevention

Tell your friends about us!

As always, special thanks to Louis Wu and HBO


Anyone who is interested in mobile gaming has at least heard of, if not played Halfbrick’s Fruit Ninja. Fruit Ninja sliced its way onto the mobile gaming site in April of last year. Numerous updates later and a release on the Android marketplace, Fruit Ninja has gathered a cult following. How do I know this? I saw a shirt at Hot Topic. That’s like a right of passage with these kids these days, right? Anyway, Halfbrick has something new planned for the Fruit Ninja franchise, and what better way to slice fruit using the Kinect?


Single Player Gameplay


Fruit Ninja on the Kinect works just the way you think it might. You are able to use both arms to slice the fruit in mid-air. Everything from the mobile version is here. You’re able to connect your combos, slice around bombs, go into frenzies, and miss the frozen banana, to which you then proceed to restart the game.


I had some time to play around with some of the Kinect launch titles at E3 2010 and felt that some of the third party games were sometimes unresponsive, uncomfortable, and not as fluid as advertised. Fruit Ninja Kinect is a totally different story. We were immediately able to jump in and and get to playing right away, which brings me to the multiplayer portion of the game. With two players on-screen, the frame rate didn’t drop and was just as smooth as it is on single player.


Multiplayer Gameplay


Multiplayer works the same way it works on the iOS version of the game, without the lag. Multiplayer on Fruit Ninja Kinect is the way multiplayer is meant to be played. The fun is increased when you have your 2nd player standing right next to you. You and your partner will share the screen in all game modes multiplayer. As of right now, there are no plans for any sort of Xbox Live matchmaking feature. Fruit Ninja offers up Cooperative, Competitive, Classic, and Zen game modes. 


Fruit Ninja Kinect will more than likely be the first Kinect title that is released on the XBLA as part of the Summer of Arcade on Xbox Live. As of right now, there is no official price nor release date as Microsoft still has to work out those details. The title will likely go for 1600 Microsoft Points ($19) and will release sometime this summer.


Written by:

Jake108 & DarknessOrchid


I’ve heard a lot of grumblings about Gamersfirst’s APB: Reloaded. For those of you who know nothing about this game, think a GTA-esque open world MMO where players are divided between Enforcers (Police) and Criminals. It is this universe that Jonathan London would/will feel destined to rule.

APB: All Points Bulletin was released by Realtime Worlds in June 2010. Just two and half months later, the game was shut down due to the developer’s financial issues. Gamesfirst took over, tweaking a few gameplay aspects as well as the title. APB: Reloaded released earlier this year as an open, free-to-play beta.

Here’s a rundown of some changes, as well as gameplay features in the game:

New Shooting System


APB: Reloaded will have more a recoil when shooting a weapon instead of the shaky cam users are familiar with. The effect was easy to adapt to if you’re an avid gamer that plays shooters. Weapons zoom in when using the right click depending on what type of weapon it is. A rifle will zoom in some of the way compared to a Sniper Rifle that will use the scope feature.

New Matchmaking


Gamesfirst features a new matchmaking system that will improve the overall experience with gameplay. You’re going to need it in this MMO in order for this open world to be fun. I’d suggest making a few friends along the way.

Clan Support


Through this feature, you’ll be able to keep in touch with friends, schedule clan matches and meetings. Clan support is an obvious win here. The continuing clan matches will keep this game fresh if you’re like the competition.

Customization


I’m a sucker for customization. Anyone who has played Soul Calibur IV with me knows this. Fortunately, APB features a full-body customization. Perhaps the coolest customization feature worked into APB is the theme song tool. In APB, you’ll be able to create or upload your own theme song for your already fully customizable character. You can create a song using tools built into the game, or simply cut and upload your favorite Bieber song. The song will play when in missions during the story aspect of the game. The best thing about this? The song also plays for every opponent you kill. So while your enemies sit in respawn, they’ll be listing to your tunes.


Gameplay

The game had a nice flow. It wasn’t bright to play this shortly after playing Assassins Creed: Revelations. APB does feature fall damage, even when jumping rooftop to rooftop. The goal was defend an object on the map from opposing forces. I quickly found myself in an industrial part of town. The controls were easy to get the hang of and felt natural. The same went for driving. I drove a large van for a short while before crashing and wrecking it, not before hitting a few pedestrians of course. I was able to carjack an A.I. after being told it wasn’t possible to carjack another player.

The shooting mechanics also seemed to work well. I fired off a few shots before being gunned down by a sniper standing on a freeway overpass. Overall, I had a good experience playing this.


Keep your eye out on any future APB news and releases. I know we will.


Article written by:

Jake108 & Kelsie Nicole

As a Halo 2 veteran, I have fond memories of good ol’ Ascension. You know, things like flying a Banshee around while dodging the locked-on rockets, playing hide-and-seek, tower of power, and zombies. Halo: Reach’s counterpart, Pinnacle, shares strong similarities to Ascension, minus the Banshee and the super-jumping. If you haven’t played it yet, or if you’re not a Halo 2 vet, get ready for one of the funnest (that’s a word now, I don’t care 3rd grade teacher, I don’t care!!!) maps around. So let’s get down to it…


THIS WEEK: PINNACLE


TIP #1 – MY WEAPONS, WHERE ARE THEY??!!!

Rockets – The Rocket Launcher spawns just below Blue team.


Sniper Rifle Red – The Sniper Rifle on Red side spawns down the ramp from the big tower they spawn in. So be there, but keep in mind you’re not invisible. You’re actually kind of on display.


Health Pack/Sniper Rifle Blue – This Sniper Rifle spawns not far away from the exit point of the teleporter, which makes the teleporter the fastest way to get to it.


Health Pack/DMR – The DMR has multiple spawns. Look for them at the landing pad near the Health Pack, at the rocks near Blue spawn, at the Valero station behind the dumpster, and on the bottom floor of big tower.


Needler/Plasma Pistol – These two weapons spawn on the landing pad side of the map, near the center.


Shotgun –The Shotgun spawns at the exit point of the teleporter below Blue spawn. Be prepared to fight for it, and not with your teammates.


Plasma Repeater – If you’re interested, the Plasma Repeater spawns near the Needler spawn with two fragment grenades.

Health Pack Red Tower – It’s in the red tower, right where everyone hides.


TIP #2 – TOWERS, SNIPERS, JETPACKING

There are two towers located opposite each other on the map. While you’d think setting one up with your team would be first priority, the usual case involves players rushing Rockets and other power weapons. I’m not saying this is wrong, but be aware each power weapon his a high probability of enemy engagement and is usually a pain in the butt to reload. It is important to note that throughout the whole game, you can expect Blue team to have relatively the same spawn. Be warned, many may consider this to be a form of spawn killing. I call it spawn winning…unless of course I’m on Blue Team.


Granted, one is more fortified and provides more cover, but the other, smaller one, provides a limited number of ways of getting passed enemies. Even then, it’s damn near impossible to go undetected if you have enemies who pay attention to the surroundings. The larger tower allows you to maneuver your way in and even set up a quick ambush.


Getting to the very top of the tower will land you in a soft-kill zone, but if you perch yourself at the window ledge, you’ll have the potential to get awesome assassinations on unsuspecting enemies. You don’t necessarily need to move around the map with your teammates. If you set yourselves up at a tower with power weapons, particularly the biggest one, you should have no problem controlling the map. 

If you’re an excellent sniper, this map will be fun for you. Make sure to stay back and provide covering fire, as in sniping the enemy before he even encounters your teammate. And as always, make sure to watch your back because in this map, it’s pretty much always exposed. Just like your sister’s (natch.)


TIP #3 – ARMOR ABILITIES

Sprint – Using sprint will definitely allow you to get around easier and faster than some, but be aware that this is not the armor ability of choice. Sure, you might reach a particular power weapon first when the match first starts, but don’t be surprised if you choose a different armor ability mid-game. You WILL have enemies shooting you from the air. So if you’re prepared to deal with that, sprint away.

Jetpack – Playing a regular team slayer match on this map will guarantee you’ll be fighting against jetpackers. Prepare for this by either equipping yourself with a Jetpack or with a rifle. If you’re superb with shooting a rifle while jetpacking, be it a DMR or a Sniper Rifle, then this is an excellent map for you.

Just don’t jetpack into the air without knowing where you’re going to land. Otherwise, you’ll just look like an idiot. And make yourself an easy target. It’s kind of like shooting a flare gun that spells out “KILL ME” and makes an arrow that points to where you are.

Camo – Activating Active Camouflage in the right places will certainly work to your team’s advantage when storming a tower or enemy location. If you can get yourself behind the enemy team while using it, even better.


Hologram – Using Hologram on this map might not be as effective as it is on other maps. There aren’t very many close quarter combat situations for a hologram to do its thing. The best case scenario of using hologram would be to distract a Sniper. Other than that, I’d say you’re probably better off using another armor ability.

Armor Lock – Using Armor Lock in an open area will prove useless if you have no backup. That said, unless you plan on staying near the towers, you should consider another armor ability.


*rocks back and forth and hopes nobody notices he’s hiding in plain sight*


Teabag Prevention Written by:

Jake108

Edited by:

Brian Gilmore 

For any comments, suggestions, videos, screenshots, or inquiries please email us at:

TeabagPrevention@gmail.com

Show your Support!

Follow us on Twitter!

Join our Facebook Group!

Or more importantly, become a Fan!


And don’t forget to add us on myspace at:

www.myspace.com/teabag_prevention

Tell your friends about us!

As always, special thanks to Louis Wu and HBO

Powerhouse is a medium-sized map where the majority of the battles are medium to long-range. There are no vehicles on this map. Sure, you’ll have your occasional close quarters battle, but that’s what your fists are for… and Gravity Hammers. They’re for that too. Aside from that, it only makes sense to pick up a rifle on this map, along with Rockets, Grenade Launcher, Sniper Rifle, and…and…


THIS WEEK: POWERHOUSE


TIP #1 – POWER WEAPONS

Rockets – The Rocket Launcher spawns near the powerhouse in the water on ground floor. They’re almost always rushed.


Shotgun -This spawns in the back behind Blue Team spawn.


Gravity Hammer – The Hammer spawns near blue team spawn in the building off to the right.


DMR/Needle Rifle


Grenade Launcher – High priority, especially if you have rifle spawns.


Sniper Rifle/Beam Rifle – Must Have.


Health Packs:


TIP #2 – WHERE DO I GO? WHAT DO I DO?

Powerhouse has an uneven landscape. You and your teammates are going to want to stay on a highpoint. While standing on a highpoint, the Grenade Launcher + DMR combo is very effective.  The roof housing the Grenade Launcher spawn is a good candidate for killing enemies:


Some may also find it appealing to plant yourself on the slope leading up to the second floor of Powerhouse.


As long as you can hold down your position, there shouldn’t be any reason to move. Having the team near, but not too near, helps greatly when one of you gets in trouble.


Since you’re going to be up higher than enemies, watch out for Jetpackers. Having just two DMR’s on them will make an easy kill.

Since there are other weapons more effective at close range than the standard rifle, don’t be afraid to pick the Gravity Hammer up. Just like the Energy Sword, Sprint + Hammer makes a great combination. If you decide to do this, stay indoors and lurk in the shadows. This will give your teammates peace of mind knowing no one’s going to sneak around them.


One more thing to note is the efficiency of the Beam Rifle. This weapon has a 2x zoom and works great at close range.


TIP #3 – ARMOR ABILITIES

Sprint – Having Sprint as an armor ability works in all gametypes. You won’t have to worry about being at a disadvantage if you spawn with Assault Rifles or DMR’s. Sprint will allow you to move through buildings fast and get behind cover faster than others.


You may cover more ground than the average person, but when in close quarters, you’re not going to have that quick getaway option. That belongs to Evade.


Armor Lock – Armor Lock can work in a variety of situations in Powerhouse. While using it out in the open may enable enemies to wait for you to get out of it from afar, using armor lock indoors will enable teammates to back you up if they’re near.


I’ve said this before, and I’ll say it again: Use Armor Lock in a supporting fashion to help your teammates pick off enemies.


Hologram – I normally don’t use Holograms on Powerhouse simply because they are many curves. There’s really no straight route for a hologram to run without getting caught on something or looking like an obvious decoy.


If you’re confident in using this armor ability, I would suggest using it indoors near doorways, or at high points around the map to trick enemies into shooting at it once or twice.


Jet Pack – Like Reflection, once you get high enough on the map, there’s really nothing to shield you from gunfire. Sure, Jetpacking can be useful if you want to reach a roof faster than others, but more than likely you will be seen by enemies afar and be shot down.


If you’re lucky, you can catch an unsuspecting enemy.


Camo – Using this Armor Ability can be helpful when trying entering enemy territory.

This is especially true when you’re near Grenade Launcher building or near the Powerhouse.


FAN SUBMISSIONS

This one comes from Kwy.

Check out their vids!


Teabag Prevention Written by:

Jake108

Edited by:

Brian Gilmore 

For any comments, suggestions, videos, screenshots, or inquiries please email us at:

TeabagPrevention@gmail.com

Show your Support!

Follow us on Twitter!

Join our Facebook Group!

Or more importantly, become a Fan!


And don’t forget to add us on myspace at:

www.myspace.com/teabag_prevention

Tell your friends about us!

As always, special thanks to Louis Wu and HBO


Ghostbusters: SOS has been out for the Xbox Live Arcade for one week and is will be available to download on the Playstation Network today. Some of you may or may not be hardcore fans of all things Ghostbusters, and honestly, that could be the make or break when deciding to buy this game or not.


Gameplay

Gameplay is what’s most important when it comes to games going straight to XBLA and PSN. Ghostbusters has a very casual feel to it. Hardcore gamers won’t get anything out of this game if you’re looking for a challenge. While the idea and action of taking down ghosts with your proton pack is appealing, the enjoyment won’t last due to enemies becoming repetitive not far into the game. Be aware that this game will only provide hours of gameplay on one playthough.

The controls are simple enough for anyone to pick up and play. The left stick moves your avatar while moving the right stick fires your proton pack in the corresponding direction. As your progress through the game, you will be add more variations for your proton pack. These variations are used depending on the color of enemy you’re fighting. Switching weapons is easy, especially for the Xbox 360 controller as they are mapped to the color of the buttons on the controller.


Catching bosses is initiated by pressing the Right Trigger. Afterwards, you are prompted with buttons to press similar to quick-time events.

Playing with CPU’s can be fun, playing with friends is even better. Don’t get me wrong, the CPU’s are far from frustrating, save a couple of fights. They waste no time in trying to revive you if you go down and don’t stand in corners during boss battles. They are always active, and that’s definitely a plus.  In some cases, CPU’s may have the advantage in boss battles simply because they tend to stay out of the way of area effect attacks done by the boss.

It’s fun at first, but it can get boring fast. If you love Ghostbusters and are afraid of a little repetition, it’s strong enough to hold you’re attention to the end of the game. 5/10


Story

If you plan on keeping up with this story, get ready to do a lot of reading. The cinematic are told through comic-book style art, which was nicely made, and speech bubbles. I won’t spoil anything for those of you planning on playing this game, but the longer the game went, the more my interest in the story deteriorated. The four characters are somewhat likable and are introduced at the beginning of the game.


While it may satisfy Ghostbuster-loving fans, don’t expect it to wow you.  6/10


Graphics

What you see is what you get:


It doesn’t get any better than that. One level that is worth pointing out puts the team in the back of a truck which is driving through a city with ghosts attacking you from all directions. It’s up to you to fend off attacking ghosts long enough for the driver to escape. Don’t worry, if you have three friends with you, you’ll all be in the back. No driving in this game.

The graphics are on par for XBLA and PSN games. 8/10


Final Score

6.3/10

Ghostbusters: SOS is somewhat of a party game and can be fun with friends in the same room or over PSN or XBL. If you buy this with the intention of playing through alone, the amount of boredom increases with the amount of time you spend on this game. Casual Ghostbuster fans, this game will probably do you right. In any case, hardcore Ghostbusters fan or not, download the trial/demo before purchasing.

Haven’t bought the new maps yet? Maybe you already made up your mind or maybe you’re still on the fence or maybe you just need to grow a pair. In any case, Teabag Prevention is here to help you make your decision — growing a pair is a huge step in a man’s life, especially if you’re a girl.

First off, it’s important to note that these three maps are NOT made by Bungie. The Defiant Map Pack was created by Certain Affinity in partnership with 343 Industries (that’s the company name, not the amount of industries that helped.) Here we go…


Defiant Map Pack Review

Highlands


First, we’ll start with the biggest map, Highlands. This map is MADE for big team battle matches. Anything short of at least six players on each team renders this map a tad boring. The textures of the map look nice. The only thing I found distracting was the distant trees on the hills in the background. But who’s going to be looking at distant trees anyway? Also, I must say that it is nice looking at the Covenant Crusiers glassing the planet in the distance, when you’re not, you know, getting shot at.


While I feel that this is a big team battle map, Highlands is lacking in tanks, which is actually kind of a good thing. With all the buildings and uneven landscape, being in a tank would feel frustrating. One thing I wish was on this map is a Banshee spawn. Still, the amount of vehicles on this map will suffice.


One thing I do like about Highlands is the fact that there are power weapons scattered around the map. Highlands plays host to Shotguns, Rockets, Plasma Launcher, Grenade Launcher, Sniper Rifles, and even a Spartan Laser. Vehicles include Warthogs, Mongeese, and Ghosts. Vehicles can be your main source of travel and prove effective in objective gametypes. However, with the assortment power weapons, the map proves to be balanced, which is an important feat.


If you don’t want to go driving around the map trying to get from one side to another, you have multiple teleporters at your disposal. I’ll be doing tips on the map at a later date as a Teabag Prevention article, so instead I’ll tell you how well the teleporter system works: Ready? It works great! Granted, there will be some players who camp teleporters to catch unsuspecting enemies off guard, but the same can be said for any multiplayer map, of any game featuring teleporters. Frustration can easily be avoided by simply not using the teleporter system.


Quick Tip: Get yourself a mid to long range weapon. Spartan Lasers will certainly enable you to get some kills, provided you’re on some higher ground, both physically and morally. Sniper Rifles also work out great. Just watch out for counter snipers and people sneaking up from behind you.

Final Word: After many games on this map, some great, some very frustrating, I can say this map will be a great addition to the Big Team Battle playlist when it is added. As of right now, it’s a 50/50 chance of the game becoming boring once one or two people quit. Make the most of it by playing with your friends to avoid this.


Condemned

Condemned takes place on Orbital Station Gamma, a long-range communication space station meant to establish communication between Earth and Reach. This space station isn’t all pretty though. The Covies have entered and destroyed parts of the station. If you pay attention to the walls, you’ll see Covie blood splatters and destroyed monitors.


Condemned is definitely my favorite of the two competitive maps. The map features a slightly darker feel from the other maps. The map also features a low-gravity area in the middle of the map. What’s appreciated are the two Sniper Rifle spawns on this medium-sized map. This map also houses a Shotgun, Energy Sword, and a Rocket Launcher.


I’ve already written up tips for this map, which you can find here.

Final Word: As I stated above, Condemned is a medium sized map and proves to be tons of fun with 4-6 players. Also, don’t worry about Condemned closely resembling Anchor 9. The two are very different.


Unearthed

Unearthed is a Firefight map only. Its setting is an abandoned titanium mining facility. Off in the distance, you’ll see the titanium fragments sticking out of the ground. This map is a little more open than other Firefight maps. You can get to higher elevations, but don’t expect to get to the top of the highest building.


The map is complete with a Rocket Warthog and the occasional Wraith drop-off for those of you who like to play Firefight inside of a vehicle. It’s easy to pick a point and hold off the waves of Covies.


Quick Tip: Find a position when playing with your friends. Defend it and move as a team when moving to a different position.

Final Word: For those of you with friends who enjoy occasional Firefight matches, be it in customs or in matchmaking, then there’s no reason to enjoy some time on Unearthed.


Teabag Prevention Written by:

Jake108

Edited by:

Brian Gilmore 

For any comments, suggestions, videos, screenshots, or inquiries please email us at:

TeabagPrevention@gmail.com

Show your Support!

Follow us on Twitter!

Join our Facebook Group!

Or more importantly, become a Fan!


And don’t forget to add us on myspace at:

www.myspace.com/teabag_prevention

Tell your friends about us!

As always, special thanks to Louis Wu and HBO


Condemned features hallways, rooms fit for a firefight, a low-gravity room, and a slightly darker feel than the other maps of Reach. Firefights on this map will range from short to long range firefights. You can pretty much use any kind of weapon on this map if you play your cards right. And that’s why we’re here; To tell you how to play your cards right.


THIS WEEK: CONDEMNED


TIP #1 – WEAPON SPAWNS

Rockets – Rockets spawn in the middle of the map, in the low-gravity room. Keep in mind, if you want to rush their spawn to pick them up, chances are you’re going to die if you go in charging.


The Rocket Launcher is usually the weapon everyone goes after first because it’s in the middle of the map. Be prepared to meet resistance.


Sword – Like Rockets, there are always a few who will rush Sword spawn.


In all likelihood, the amount of players who will go after the Sword can range from 1-3.


Once you have it, feel free to sprint through the hallways, but never around the center of the map.


Sniper Rifle – There are two Sniper Rifles on this map.


Like players carrying a Sword, you should never enter the center of the map. Instead, hang around the entrance, or a position where you can see through the entrance of the center room. Remember, you CAN shoot through what appears to be a force field.


Just remember, there will be a counter-sniper looking out for you.


Shotgun – Shotguns are highly useful in this map. Having a Shotgun will allow you to roam through the hallways.


Don’t whip this out if you’re locked in a firefight in a room.


DMR/Needle Rifle – Rifles are a good thing to have on this map.


If you see one, pick it up. It will have the advantage over any enemy carrying an assault rifle.


Health Packs –


TIP #2 -OMG NEW MAPZ!!11 WAT DO I DO?

After playing dozens of games on this map, I can say it is crucial that you work as a team. Always stay together and travel as a pack through the hallways, staircases, or even through the center room. Chances are, the enemy team will be scrambled and run aimlessly because they don’t know the map very well. If you travel in packs with your team, you will easily be able to take on the one or two enemies you find.


When you are with your team, it’s best if you all have rifles. If someone has Rockets or a Shotgun, don’t be afraid to let them enter the room first. Provide covering fire, and you may score a kill or an assist.


If you’re the lone wolf type, or think your teammates are not to your standards, try sprinting all the way around the enemy team. Go behind enemy lines and sneak up behind them. Either way, it helps your team.


TIP #3 – ARMOR ABILITIES

Sprint – Sprinting is possibly the best armor ability to use on Condemned. It allows you to make lengthy jumps through the center of the room and travel through the hallways at a speedy rate.


As soon as matches start, I tend to go the opposite way I was facing when I spawned in hopes that I will come across some enemies with their backs against me. This is the armor ability of choice on this map.


Armor Lock – Armor Lock can prove somewhat useful. During objective gametypes like Oddball or CTF, the use of Armor Lock goes up. Don’t try going into the center room with Armor Lock because you’ll be spending most of your time in the air, rendering Armor Lock useless.


If you like Armor Lock, feel free to roam the hallways. Just be sure to do it with a couple of your teammates around.


Hologram – There are many curves in this map. There are few straight hallways or rooms. Personally, I feel that because of this, the Holograms use goes down.


Sure, you can still set up ambushes by placing your Hologram at doorways or near entrances, but don’t expect to be able to send your Hologram far.


Camo – This armor ability can prove useful, even in the center room. If you’re able to get your feet on the ground in the center room, turn your Camo on and watch confused enemies jump into the air looking for targets. In objective gametypes, using this armor ability around an Oddball or Flag will bring your team to an advantage.

Granted, there aren’t levels of map like Sword Base or Countdown, but with the amount of room space, hallways, and corners to regain health at, Camo can prove useful.


Jetpack – Condemned does not feature multiple levels of gameplay. Unless you like Jetpacking in rooms to through enemies off, go for it. Even then, you will probably be fighting more than one enemy.


As an avid Jetpacker, I would advise to try and stay away from using the Jetpack on this particular map.


Teabag Prevention Written by:

Jake108

Edited by:

Brian Gilmore 

For any comments, suggestions, videos, screenshots, or inquiries please email us at:

TeabagPrevention@gmail.com

Show your Support!

Follow us on Twitter!

Join our Facebook Group!

Or more importantly, become a Fan!


And don’t forget to add us on myspace at:

www.myspace.com/teabag_prevention

Tell your friends about us!

As always, special thanks to Louis Wu and HBO

Sword Base is another multi-level map. The map features the interior of ONI’s Sword base on Reach. There are many hallways, some bridges and a couple power weapons you and your team should definitely secure. Travel as a team through the halls. Just don’t get distracted by the monitors…


THIS WEEK: SWORD BASE


TIP #1 – SHWORDGUN LAUNCHER

This map features a variety of weapons that are great for mid to close range combat– like your mom, for example. The most powerful weapons on this map are easily the Shotgun, Concussion Rifle, Energy Sword and Grenade Launcher. If you don’t already spawn with a DMR or Needle Rifle, they spawn on the second level of both the Red and Blue side.

Shotgun – This weapon spawns on the second level of Blue’s side under the ramp leading up to the third level.


Because there’s no straight-forward way to get there if you have anything, but a Jetpack from your spawn point, the fastest way to get there would be to take either the Yellow Lift to third level and jump to the second.


Concussion Rifle – The Concussion Rifle spawns on the middle bridge. This spawn point favors Red depending on what gametype it is. Blue Team Jetpackers could easily reach this weapon before or at the same time as a Red team at the start of the match.


Picking this weapon up will allow its carrier to back up teammates in certain situations. Use it wisely.


Energy Sword – The Energy Sword spawn favors Blue team. As long as someone rushes the spawn point at the start of the match, there should be no resistance. Soon afterward however, you may want to watch out for Jetpackers flying through the window, or sprinters sprinting through the hallway to get to the spawn.


Grenade Launcher – The Grenade Launcher can favor Red Team, but making a mad dash for it will cause you to be out in the open for Blue team to shoot you before you get away with it. This weapon is definitely one you should pick up if you’re comfortable with it. If not, let your teammate pick it up.


The Grenade Launcher provides a huge advantage when shooting down hallways or clearing out rooms from around the corner.


TIP #2 – LIFTS 101

Players repeatedly going up the same lifts are subject to repeated deaths at the hands of the enemy. Change your routine up a little, and you may get the drop on waiting enemies.


You also have to know which lift to take at what time. If you’re trying to get to enemies on Level 2 & 3 of Red side, yellow life may be compromised by a camping enemy. In this case, Use the central Blue lift:


Combining the central Blue lift with a JetPack will allow you to quickly gain a height advantage over unsuspecting enemies below.

Grenades also work with lifts. Toss some up before heading up to a room.


You can even get tricky by sending an Armor Locking Teammate up followed by a plasma grenade.


TIP #3 – ARMOR ABILITIES FTW

Armor Lock – Like Countdown, Armor Lock can prove useful here when used with your team right behind you.


Sure, you’ll definitely make the enemy team angry after the second or third time you do it, but if they’re anything like Miyazaki’s boars, they’ll grow just as stupid and begin to carelessly fight in the sometimes close-ranged battles.


Camo – Also like Countdown, Camo proves to be a nice choice when you want to confuse enemies who decide to take control of the top part of the map.


Scrambling their motion tracker will give your teammates a window of opportunity to take one of the many routes to the top of part of the map. Don’t be afraid to join them. 


Sprint – Sprinting comes in handy when you’re rushing to aid another teammate, or quickly run across bridges to opposing sides.


Jetpack – This may be the quickest way to get around Sword Base. The Jetpack is extremely useful when you spawn at the bottom of the map only to surprise enemies near the entrances of the top bridge.


Jetpacking will also allow you reach areas not easily accessible to those without it, creating the element of surprise if done right.


Hologram – Hologram, to me, would prove to be the most useless here on Sword Base.


The best places to use it would be down hallways, bridges, and as a decoy. Using your hologram as a decoy may work very well the first couple times, but trust me, those enemies will catch on sooner or later. Perhaps that will be when you choose a different armor ability. And that fine day, friends, will be memorable. And you will remember this. And we will speak.


Teabag Prevention Written by:

Jake108

Edited by:

Brian Gilmore 

For any comments, suggestions, videos, screenshots, or inquiries please email us at:

TeabagPrevention@gmail.com

Show your Support!

Follow us on Twitter!

Join our Facebook Group!

Or more importantly, become a Fan!


And don’t forget to add us on myspace at:

www.myspace.com/teabag_prevention

Tell your friends about us!

As always, special thanks to Louis Wu and HBO


Ivory Tower… er… Reflection offers three levels of shooting each other. Between firefights by lifts, or races to the Rocket spawn, may I suggest you make acquaintances with the resident fishes that witness the atrocities you commit. Already have you say? Well, they were my friends first.


THIS WEEK: REFLECTION


TIP #1 – I WHIP MY NEEDLER BACK AND FORTH

You’re going to want stay on top of numerous power weapons on this map. Numerous. Unlike Countdown, you have to watch out for more than just a couple of rounds from a Shotgun or a quick swipe with a Sword. Reflection houses Rockets, an Energy Sword, Shotgun, Needlers, Plasma Pistols and a Sniper Rifle. Which one is best solely relies on what you’re good at — I prefer the Sniper Rifle, personally, and so should you.

Needlers do a great deal of damage when you’re firing from the right range. The Needler spawns by Red spawn and by the double lift side hallway. So either way, you need to beat your enemies there.

If you’re too far, the Needler won’t read the target. If you’re too close, your enemy will easily avoid those flying pink things (or as we, and only we, yes this is unique to us, call them — needles.) On Reflection, firing a Needler down one of the hallways will do the trick. Just always make sure to fire slightly ahead of your enemies, as your needles will find them. The way to avoid the needles is to stay ahead of some idiot shooting right at, or behind you. Don’t be that idiot, nobody likes “that guy.”


Try hitting enemies in open areas who are at mid-range.


Plasma Pistols also work great in combination with a Rifle or Magnum when at mid-range. Use the plasma pistol to get their shields down, and then shoot them like the sitting ducks you’ve made them. Just make sure nobody else is around to poach your kill. If you’ve made it ripe, you deserve to chew the succulent fruits of the murder you are about to commit *bites tenderly into a blood orange*.


Also, if you’re sprinting around the hallways or rooms down below, this will enable you to do a one-two punch.

Having a Shotgun will give anyone the opportunity to camp. Granted, you and the enemy may not be camping in the room where I occasionally drink tea at the bottom part of the map, but players are prone to crouching on the top part of the map — because that actually works a lot better than at the bottom (you have the upper hand there, you see.) *Drinks a light sip of tea made from the blood of his enemies*


Many like to camp on the top part of the map. Best thing to do? ‘Nades, natch. That and hoping their teammate isn’t around the corner waiting with a Sword. Also note that crouching while going up the elevator lift will not grant you supreme invisibility to your enemy. In fact, they may already be looking at you. Right. Now. Watch your back (and your front.) Always.


Rockets are THE thing to have on this map. The spawn is located on the mid-section of the map by the mini-waterfall, near Red spawn, or as I like to call it “that place where it’s easy to get killed because everyone’s going for the rockets.” You can make a mad dash to them as a Blue team member, but don’t expect repeated successful results.


Many will attempt to grab Rockets, and who can blame them? There’s not much you can do if you’re running down the hallway with Rockets waiting for you at the end.

The Energy Sword spawns at the bottom part of the map at the pond, so get it before that rat bastard fish gets his fins on it.


If you do get your hands on it, make sure to stay up top where the hallways are so that your enemies won’t have much maneuvering room. You will be as a God.

If you thought being on Blue team was already bad, then you won’t be happy to know that any Red team member can sprint down to the spawn and ‘nade any unsuspecting enemies. So, unlike the Cold War, Red is the way to go in this map, unfortunately.


The Sniper Rifle spawns on the highest level. It’s easy for Blue team to get first, especially if you have a Jetpack. So hopefully you have a good sniper on your team that can own people left and right with little to no protection. It’s really a great sniping spot for this map.


The Sniper Rifle allows players to snipe from its spawn and towards Red team spawn. Not to mention you can aim down hallways. That’s always nice too, so take advantage of it like you would a live grenade on a dead enemy’s belt. 


TIP #2 – WHAT CAN ARMOR ABILITIES DO FOR YOU?

In the case of using Camo as an armor ability on this map, its main purpose, whether you like it or not, is to scramble the enemies motion tracker. Let’s face it: If you’re not up there by Sniper Spawn, then the enemy is. The real question is what weapons do they have?


Since Swords and Shotguns are the most common, you must rely on when that enemy is going to peek out at you to get a quick kill. If someone’s Camo is messin’ with motion trackers, those poor players walking down the hallway won’t know what hit them. This armor ability can be used in both support for the team or in Ninja-like fashion. Either way, on a relatively mid to close range map (unless you’re sniping) this really comes in handy even though it’s arguably the most annoying armor ability.


Sprinting will do what it does best: Get you there quicker. Like I mentioned earlier, Sprint can be used to get to sword spawn as Red team at the same time as Blue team gets there. Besides that, Sprint should be used as a tool for flanking. The most sought after spot on the map is by the Sniper Rifle spawn. Get there quick, and own ass at it. Also, unless you’re good at it already, don’t try no-scoping people. Just have a better close/mid-range gun ready for when people blow up your spot.


There are three ways to get there without using a Jetpack. If you’re team decides to rush in on Shotgun side, it might be a good idea to sprint around and attack the enemies while their backs are to you. Talk to your team. You’ll get it done. Good luck.


Jetpackers beware, there’s not much you can do when there are many places you can be seen from if you decide to fly. While Jetpacking is my preferred choice of Armor Ability during games, it becomes apparent that there’s not much you can do if you’re in the air and your target is in armor lock, or has sprinted away.

“I’m so alone”

Jetpacking should instead be used to help flank enemies. Also, make sure you have a DMR. There’s no point in flying up just to spray bullets at low accuracy and make yourself an easy, slow-moving target. When is the last time floating conveniently made anything hard to shoot?


Armor Lock can be used to most players’ advantage, especially if you don’t have a power weapon at your disposal.


Strategic players will send teammates who have armor lock out first with other teammates behind for support. Others will leave him there to simply and stupidly postpone his own inevitable death. Armor Lock, pffft. More like a death sentence.


Sending out Holograms can work when going down hallways. Because some portions of the map are one-way, it’s a “fool me once…” deal. So, you know, fool them once (unless they’re dumb.)


If you decide to use holograms, make sure you’re not too far away or hiding. It’s easy to trace a hologram back to its origin point, unless you’re creative. Either way, you should know the difference between holograms and regular folks at this point.


TIP #3 – Power Bottoms

The place to control on this map is definetly the area around the Sniper Rifle spawn. Your sniper will always be on top. From here, you can see the action going on down by Rockets, Sword, and you can also keep an eye on the hallways leading to your position. It’s easy to get overwhelmed, so you’re going to want to position yourself and your teammates at the right place — or nearer to the bottom. Plan according to armor ability and weapon. If your teammate has a close-range weapon, have them near the elevator lift or near the most enemy-populated hallway. Once you own this area, it’s really just a defense of your awesome sniper, shooting people’s bodies until their families get sad letters in a few weeks.


If you have a Rifle or mid-ranged weapon, it’s best to stay near Sniper Rifle spawn and fight as a team when enemies show up. Remember, multiple ‘nades will come flying at you. Stay on top of those power weapons, and you should be good to go. Stay on top.


Teabag Prevention Written by:

Jake108

Edited by:

Brian Gilmore 

For any comments, suggestions, videos, screenshots, or inquiries please email us at:

TeabagPrevention@gmail.com

Show your Support!

Follow us on Twitter!

Join our Facebook Group!

Or more importantly, become a Fan!


And don’t forget to add us on myspace at:

www.myspace.com/teabag_prevention

Tell your friends about us!

As always, special thanks to Louis Wu and HBO

The first thing you need to know about Countdown are the multiple levels for fighting. It’s layered, just like an onion, a good cake, an ogre or your heart. There are a total of four floors, the highest being a soft-kill zone. You’re also going to need to know how to use the lifts, as in which one to use at which time. Lastly, you’re going to need to stop baddies carrying power weapons, because you know, it happens a lot. Here’s a thorough account of not only how much time I don’t spend doing schoolwork, but of how to perfectly make this map, as well as any players on this map, your complete and absolute biznotch.


THIS WEEK: COUNTDOWN


TIP #1 – WEAPONS, YO.

Shotgun –  The Shotgun quickly becomes the weapon everyone rushes to because of its proximity to both the Red and Blue team’s spawns.


At the start of the match, you’re going to want to run towards the inside of the map. Do it. Just… do it. Man up. You can do this.


Be prepared to meet 1-4 enemies on this path. ‘Nades will be thrown, shots will be fired, but if you want to be a ninja, just sneak on through and run, if you can.


Concussion Rifle – This weapon is a vital part to your team’s success. The Concussion Rifle spawns outside on the highest floor, so be ready to head to this often highly-trafficked spot. There’s almost always someone camping there waiting to kill someone, so be on the lookout.


It is a sword-killer, a shotgun-killer, and an excellent weapon to catch enemies off guard or in an ambush.


If you’re not familiar with the weapon, it basically props your enemies into the air, both damaging them and pissing them off at the same time. You’ve never heard more pissed off 8-year-olds that can usually kick your ass than when you use this gun. Ever. Just remember to time your shots and land hits towards the ground for splash damage to prop them up, then hit them while they’re helpless in the air. Reason #209348230984 the Ghostbusters game failed us all: Halo even got proton packs more “right” than they did.


Energy Sword – The Energy Sword needs no introduction. However, it is probably best if you use the Sword with Sprint equipped. This will allow you to sprint through the halls towards unsuspecting and frightened enemies.


Just make sure you have your team to back you up if things go sour. And please, never charge at mid-range with a sword. You should know better than that by now.


Plasma Pistol/DMR/Needle Rifle Combo – This combo will get those kills who are across the map, across the room, or even those unsuspecting enemies walking through the doorway.


The Plasma Pistol spawns on the third level near the air lifts by Sword spawn while DMR’s and Needle Rifle’s spawn on the floor below it.


TIP #2 – WHAT ARMOR ABILITY FITS YOU?


I would honestly recommend ALL armor abilities when playing on Countdown. It depends on what your strengths are as a player, but there are a few that really do serve quite the advantage when using them. If you like Jetpacking, you’ll be able to fly to the floors above you when you typically spawn on the lowest level. You’ll also be able to catch the ones above off-guard because they’re always looking down. Another tricky maneuver to pull is to fly to, or near, the soft-kill zone and watch enemies look for you — like a buzzard or, if you pull it off correctly, moreso in the style of “a BOSS.”

When the time is right, or before you die, jump down and get the advantage on them. 


Using Camo is always a plus on a map like this. Because there are multiple floors in this map, using Camo on any of the floors will disrupt your enemies’ motion tracker. Camo also provides the option to ambush by hiding in the corners of the map. Is it camping? Some might consider it to be, but staying out of sight while in Camo is a valuable asset to your team when they’re out looking for the kills. Oh yeah, and it’s also the entire point of the armor ability.


Holograms also have great potential on Countdown. Send your Hologram up a ramp, through a room, or set a trap for a pursuer. Since this map will be fought using mostly close-quarters, strategically placed Holograms can give you up the upper hand at the start of the battle. Also, they can give you the upper hand when stupid jerks like the people in the last tip I gave you are using their Camo armor abilities… like this:


Armor Locking can be considered to help your team more than yourself in some situations. It’s really a selfless act of “save yourselves!” or even “I’ll take care of this and please, tell my wife I love her and to name the baby… James.” If you draw the attention of multiple enemies and armor lock, it will give your teammates the opportunity to get first shots at the enemies facing you, thus securing more kills.


Just remember to use it to your advantage when in close-quarters with an enemy, and by that I mean to take full advantage of the EMP blast that happens when exiting armor lock. It can knock a mofo on his back, or even deflect grenades — namely, plasma grenades.

Sprint easily gets you around the map the quickest. Duh. Granted, you have to sprint to lifts to get to certain places quicker, having this ability will allow you get to weapon spawns faster at the start of the game. It will also allow you to flank enemies. This armor ability is a little more Rambo than the others, but since this map is chock full of corners and turns, outrunning and surprising people will always be easier with this ability. Just make sure to watch your back, as there are plenty of campers. Especially jerks with the Camo armor ability (which you have now learned how to use on this map.)


TIP #3 – HOME DEPOT

A vital part of wining games is securing a place on the map where you know you’re going to get kills. Whether it be you and your friends, or you and your Shotgun vs the world, it is imperative that you act like a spider and spin your web. Spin it until your butt can’t produce anymore web fluid. That’s how science works, right? 

In the case of Countdown, there are a couple of good places to secure for kills.

If you’re alone, or have a teammate with you, you might want to set yourself up near one of the air lifts by the Sword spawn (see TIP #1.) Since portions of this map are on the smaller side, you’re going to want close combat weapon. You also might want to have Camo or Armor Lock, depending on what you work best with.


Now, I’m not saying to camp inside the room, that would be silly considering the amount of ‘nades that would be tossed in there by frustrated players. Instead, make a route. A sort of patrol will help you stay on your feet and keep enemies guessing.


“Oh thtop! You know bulletths make me bloaty!”

If you and your friends are ready for some teamwork, the best area to secure on Countdown is the top floor. While you’re up there, take advantage of the Health Pack.


Just make sure to watch out for sneaky enemies:


You don’t necessarily have to go outside, but rather watch the doors for enemies trying to get through. You also have to watch the triple air lifts in the middle, as well as the two air lifts by Sword spawn. I know it doesn’t sound easy, but if you and your friends stick together, it’ll be no problem repelling portions of the enemy team until they yell loud enough for their moms to take away their Halo altogether.


Teabag Prevention Written by:

Jake108

Edited by:

Brian Gilmore 

For any comments, suggestions, videos, screenshots, or inquiries please email us at:

TeabagPrevention@gmail.com

Show your Support!

Follow us on Twitter!

Join our Facebook Group!

Or more importantly, become a Fan!


And don’t forget to add us on myspace at:

www.myspace.com/teabag_prevention

Tell your friends about us!

As always, special thanks to Louis Wu and HBO

If you’re a new reader, or haven’t caught the last few score attack tips, feel free to check them out below:

Week 1

Week 2

Week 3


So far, we’ve seen how to level up a few of your commendations through score attack. These commendations have consisted of killing Covenant with guns. This week, we’re going after commendations consisting of splatters. Lots of them. Load up Beachhead with either a full party, or just by yourself. Sniperfight is ideal, but you don’t necessarily need to choose that specific gametype, because this is America.


THIS WEEK: VEHICLE COMMENDATIONS


TIP #1 – VEHICLE SPAWNS


Initially, the only vehicles available are the Ghost and Missile Warthog. Feel free to jump into either one, but if you’re lacking friends, the Ghost will probably be your best bet.


TIP #2 – GHOST

Once you hop into the Ghost, look out to see where the Phantoms are dropping enemies off. It’s better to catch them with their backs towards you, and if that’s not the case, try to get them in tight quarters so they won’t have anywhere to dive off to.


If you’re out in the open, you may want to watch your shields. When your shields start to take a beating, drive around the hill and wait for the recharge. Even better, develop your own route that allows multiple splatters and recharge time.


The only things to watch out for are Armor-Locking Brutes and Elites. There’s no telling who will use it and who won’t (the exception being Elites with Jetpacks on their backs, ready to dominate.)


TIP #3 – WRAITHS


Phantoms drop Wraiths. Find a way to get to one and knock out its gunner. This will allow you to board with ease. Give the Elite in it a couple of smacks, and you’re good to go.


Wraiths are an easy way to rack up multikills and splatters. I found that the easiest way to rack up the kills is to look out for the Phantom that drops enemies off to the right of the base, behind the hill.


While you’re out there, don’t forget to kill other Wraiths too.


You don’t have to worry about running out of ammo, but don’t go crazy. You might end up killing yourself.


TIP #4 – MISSILE WARTHOG


Have your friend drive you around in this Hog that’s found to the left of the base on a pad.


Make sure your friend is a good driver because your rockets may accidentally propel the Hog to flip if the explosions are too close. Be support fire and fire from afar. Though it may look like support, you’ll be the one with the highest score.


Teabag Prevention Written by:

Jake108

Edited by:

Brian Gilmore 

For any comments, suggestions, videos, screenshots, or inquiries please email us at:

TeabagPrevention@gmail.com

Show your Support!

Follow us on Twitter!

Join our Facebook Group!

Or more importantly, become a Fan!


And don’t forget to add us on myspace at:

www.myspace.com/teabag_prevention

Tell your friends about us!

As always, special thanks to Louis Wu and HBO


This week, we go over another way to score big, credits wise. Corvette is one of the smaller Firefight Maps and is easily one of the best maps to play Gruntpocalypse on, as well as the reason I was grounded in second grade for a month and a half. However, there are a few places you need to account for before you score big. Get ready for this.


THIS WEEK: GRUNTPOCALYPSE ON CORVETTE


TIP #1 – HALLWAY OF FRIENDS


First off, you spawn with the Armory in the same room (as always.) As you exit the room, you’re going to want to head toward the left side of the map. As you SPRINT through the hallway, you might notice two Health Packs along the wall and a couple more next to the armory.


Remember this place because if needed, it will become your Alamo. That and you’re going to need to get more ammo eventually because life is hard.


TIP #2 – NEST OF CHAMPIONS


As you exit the Hallway of Friends, head up the ramp to your left, and about halfway up, top and look across the room. By now, the Grunts should be coming out of their doors and towards you.

You’ll be able to see the following Grunt spawning locations:

And finally, from here, you can get some of these…


TIP #3 –  SPAWN KILLIN’

If you venture to the top of the platform, you’ll be able to kill Grunts BEFORE they exit their doors. Don’t be afraid to shoot into what appears to be a blue shielded door. Just do it.


Just remember to watch your back. They like to be sneaky. I’ve hunted these things since you were in diapers — if you wore diapers when you were 10, in which case, you have problems.


And never be afraid to use your Pistol when your DMR runs out of ammo, even if it’s for punching purposes. It’s necessary. Just like liking us or following us on Twitter. And checking out halo.bungie.org and bungie.net


Teabag Prevention Written by:

Jake108

Edited by:

Brian Gilmore 

For any comments, suggestions, videos, screenshots, or inquiries please email us at:

TeabagPrevention@gmail.com

Show your Support!

Follow us on Twitter!

Join our Facebook Group!

Or more importantly, become a Fan!


And don’t forget to add us on myspace at:

www.myspace.com/teabag_prevention

Tell your friends about us!

As always, special thanks to Louis Wu and HBO

This is a non-spoiler review of the book, so feel free to read without squinting!

Yeah, I know, Jake108 doing a book review. Bet you didn’t see that one coming. Believe it or not, that’s the best intro I got. If I go any further, I’m going to sound like Zach Galifianakis on the rooftop at the beginning of Hangover. So I’ll spare you my wolf speech and get right into it. This novel, written by Greg Bear, takes place thousands of years before the events of Halo: Combat Evolved and centers around a young Forerunner. It is the first of three books and is put out by 343 Industries. You can find some interviews about the book on Waypoint, but they’re a little spoiler-ish, so make sure to read the book first!


Halo: Cryptum Review from a Fan, to Fans

 Having read the other Halo books that have come before this, I wasn’t expecting anything drastically different. I’m not saying the previous titles were bad, but rather what is to be expected from a Science Fiction novel based on a best-selling video game franchise. See what I’m saying? It comes to be expected for drawn out action sequences describing which Spartan is using what weapon, which includes the model number so we can say, “Hey, I know that gun! Though I do say, I much prefer the MA5C over the MA5B when dealing with a horde of Grunts.” With Halo: Cryptum, you can expect a full on story without action scenes being a prominent role in the book. When you open this book, you may think you know a lot about Forerunners, their relation to humans, even Covenant. Let me tell you right now that I did too.

But never mind that! Already, I’m going too much into the game. First and foremost, if you are a dedicated Halo fan reading, then know this: By reading Halo: Cryptum, the Halo universe will become so big, so expanded, that it will make playing Halo: Reach, or any other Halo game for that matter, a TINY portion of Halo universe as a whole. Is it a bad thing? Not even in the slightest.

Never read a Halo novel before? Didn’t delve into the terminals in Halo 3? Did you accidentally skip a cutscene in Halo 2? No problem! You can delve into this novel without any prior knowledge of the universe. The novel centers on a Forerunner, whose full name is Bornstellar Makes Eternal Lasting. But, you know, we can just call him Bornstellar for short. Borstellar, like me when I was his age, is a rebellious little Forerunner and has become a handful for his prominent, widely respectable, higher-up father and caring mother. It is then that Bornstellar is sent away from his family, which can be regarded as the highest class of Forerunner, to live with Miners on a different world. But little ‘ol Bornstellar doesn’t care! You see, he loves to study these ancient artifacts that are usually dug up by miners. This artifacts belong to a race known as the Precursors. I don’t need to say that name twice for you to know these beings existed long before Bornstellar and his family.

Now, story-wise, I’m going to have to stop myself right there so I won’t give too much away. There’s been quite a few comments regarding the cannon of the book and it’s relation to the games. Would I say it destroys cannon, even a tiny bit? No way. In fact, some of the dialogue sequences found in the cutscenes of Halo: Combat Evolved, 2, and 3 are starting to make sense in a different way and much more sense at that. Does this tie in with the Halo: Legends Episode Origins? Absolutely.

This is the book for the Halo fan and I have not been more impressed since finding out what Onyx really was. If you still haven’t bought his book, you need to do it now.

Crpytum comes in at 342 pages and is available to buy through Amazon or wherever you buy your books from.

We’re back on track with a set of Score Attack tips. This week focuses around Gruntpocalypse on Courtyard. With a few easy tips, you can get one session down to a routine six minutes, while keeping your credits high of course. Let’s do this thing, babies.


THIS WEEK: GRUNTPOCALYPSE ON COURTYARD


TIP #1 -YOUR FALLBACK LOVES YOU

The Ammo Box is located in the room you spawn in. You’re going to want to reload on DMR ammo BEFORE you run out. While there are two Ammo Boxes located on the map, this is the one you’ll have to run back to once you run out of ammo, so make sure not to insult it or it’ll hate you and when you go back it’ll be awkward.


You should also note the amount of Health Packs you have at your convenience around this location. (Four to be exact.)


TIP #2 – THE BRIDGE IS OOOOOUT!

From this bridge, you’ll be able to get a good shot, no matter where the Grunts spawn. The Bridge is located right outside the doors you exit at the start of the game. Continue straight and hang out around the mid-section of the bridge. Own non-stop.


“WHHHHHHHHHHHHHHHHHHY????!!!”

Make sure to listen for Grunt-talk or the hissing of plasma grenades. Periodically, check both sides of the bridge for oncoming Grunts. If you choose to ignore it, it may come around to bite you in the end. Or shoot you. Yeah, it’ll shoot you.


TIP #3 –  GRUNT SPAWNS AKA YO DAWG, I HEARD YOU LIKE TIPS

Watch for a line of Grunts exiting the doors to the left of the screenshot. They come from underground and in Sand People fashion.


This spectacular Grunt entrance is usually followed by a couple of Overkills or a Killtrocity. Watch for them to spawn in that area as well as walk in a line around the corner of the wall. (Your Tip within a Tip: Shoot the Grunts with the helmets first, therefore knocking them off. Then proceed to kill the normal Grunts. You know, the grunts of the Grunts. Oh, and watch out for Grunts carrying Fuel Rod Cannons. They’re bastards.)


Occasionally, a group or two of Grunts will spawn in this location. A couple of ‘Nades should do the trick. Whether they die or not depends on the their level of Spidey-Sense.


Now, let’s not forget the side our backs are turned towards. Make sure to turn around to kill any wandering Grunts. They don’t usually make an attempt to rush you right away, but they’ll definitely get you when they feel like it if you don’t nip it in the bud. Yeah, I said that.


Thanks for reading, everyone!


Teabag Prevention Written by:

Jake108

Edited by:

Brian Gilmore 

For any comments, suggestions, videos, screenshots, or inquiries please email us at:

TeabagPrevention@gmail.com

Show your Support!

Follow us on Twitter!

Join our Facebook Group!

Or more importantly, become a Fan!


And don’t forget to add us on myspace at:

www.myspace.com/teabag_prevention

Tell your friends about us!

As always, special thanks to Louis Wu and HBO

This is the third and final map of the Noble Map Pack series. Make sure to check out our last two articles, Anchor 9 and Tempest, if you haven’t already. Let’s go to the station, get a ticket, find out it’s cash only and then go to the ATM, then get back to the ticket booth, pay for the ticket then get on this motherflippin gravy train!

Breakpoint certainly is the largest map of the three. Going in to this map, you’re likely going to be playing Invasion or CTF. Due to this high possibility, you’re going want to make sure you know where all the power weapons are, so that you may be able to take down Wraiths and Banshees alike.You’ll become what we like to call “the human weapon.”


THIS WEEK: BREAKPOINT


Spawns

Wraith –


Ghost –


Banshee/Falcon & Warthog –


Sniper Rifle –


Rockets – 


Grenade Launcher –


Covie Beam Rifle –


Spartan Laser –


TIP #1 – HIGH FLIERS

At the start of each Slayer/CTF match on this map, you will see a number of players either Roll or Sprint towards the stationary Banshee. you may even see the losers of said race shoot at your teammate in the Banshee if you’re playing with complete jerks. This Banshee then goes towards the middle of the map to have a dogfight with the enemy Banshee. Only one will prevail. 

If this battle isn’t over within the first 30 seconds of playtime, it’s up to you and your team to deal some damage on the enemy Banshee.


If you and your team are successful in destroying the enemy Banshee at the start of the match, you won’t have to run indoors or in caves as if Nazgûls are roaming the skies. If you secure ‘Laser and Rockets’, you’ve paved the path to unmatched air support… if you’re good with them. Make sure to never take really important weapons unless you’ll actually be able to use them at the appropriate times (and well.)


TIP #2 – TUNNEL OF LOVE

Battles fought in this tunnel can last seconds or minutes depending on the willpower of the team. By willpower we mean ability to not try and Rambo everything and by team, we mean you. The tunnel is curved and long enough for mid-ranged combat. It’s best to go into these battles with a DMR, which you can find inside your base. Keep in mind that there are Needlers off to the side of the tunnel, as well as a Plasma Pistol.


Remember that ALL vehicles can fit inside the tunnel, and if a huge one happens to enter, you better have the firepower to destroy it before it wipes you all out. (Protip: Grenade Launcher disables vehicles with its EMP blast.)


TIP #3 – WHERE THE SNIPERS ROAM

Since this is a big map, there are a number of sniper hideouts. Among the most popular and best are the following:

The Ridge: Yes, you can see almost the entire map from this point, but the entire map can also see you.


On Top of Blue Base: This nest provides cover and Health Packs when needed. Just take a few steps back to retrieve both.


Wraith Spawn: This is an excellent place to Camo-Snipe. When they come knocking at your door, they won’t exactly know where you’re at. Just keep a Shotgun handy.


Do this, friends, and dominate this map pack. *Releases a flock of exploding doves*


Teabag Prevention Written by:

Jake108

Edited by:

Brian Gilmore 

For any comments, suggestions, videos, or inquiries please email us at:

TeabagPrevention@gmail.com

Show your Support!

Follow us on Twitter!

Join our Facebook Group!

Or more importantly, become a Fan!


And don’t forget to add us on myspace at:

www.myspace.com/teabag_prevention

Tell your friends about us!

As always, special thanks to Louis Wu and HBO

We’re back, and we’re going through the maps on the Noble Map pack, one-by-one, week-by-week, day-by-day, we’ll get through all of this together, folks. We’ll come out stronger, smarter and sexier for it, so let’s get this Shakespeare-ass Helen Mirren movie rolling.


THIS WEEK: TEMPEST


Tempest is on the larger side of the maps we’re used to and is fit for mid-to-long range combat, as well as vehicle combat. There are a few items you may want to look out for on the battlefield:

Spawns

Rockets


Sniper Rifle


DMR 


Needler 


Shotgun 


Needle Rifle 


Turrets 


Flag –


TIP #1 – GET YO’SELF READY

The majority of the battles on this map are fought at mid-range. In other words, your Assault Rifle and Pistol may not cut it in some of the lengthy battles, especially when people with aim will have better suited weapons and will knock you out with a classic grenade-headshot. Substitute your starting weapons with a Rifle or any other mid-ranged weapon, just to get the up on people who are sticking to the default weapon-set like chumps.


If you already start with a DMR or Needle Rifle, make sure to have a handy pistol or shotgun by your side. This will keep you ready for all potential firefights on the map, as well as a better precision weapon for those close calls. Headshots are always the way to go.


TIP #2 – BACK ROUTES

There are a few back routes to take to enemy bases as well as a couple of sniper nests that will keep the enemy guessing as the where you’ll infiltrate their base next. Quick ways to access these back routes rest solely on the mongoose (as many things do in life). The below two ways are off to your left when facing Blue Base.


My quick and nimble friend has already gotten me a number of flag scores and has granted me the ability to assassinate enemies in their own base and really, nothing feels better. What makes it even better is taking a friend along with you, kind of like that one time you went to Mexico…


If you’re Blue Team, get to Red Base by going off to your left hand side, when facing Red Base of course. There, you’ll find a tunnel area that is great for crouch walking so you can sneak up on your enemies. I prefer the Sniper Rifle…


TIP #3 – SNIPING NESTS

There are a couple of areas of the map that can make a Sniper’s job easy. Like, almost-unfair easy. One area is over by the water fall, off to the side of blue base. Now, I’m not talking about the water BEHIND blue base, but rather the area near one of the back routes:


The next area is off to the side of Red Base. Increase your deadliness by choosing the Camo class.


TIP #4 – TURRETS

Providing covering fire may be difficult if you have an average weapon pushing towards the enemy base. Don’t be afraid to break a turret off and push enemies back into their own base, with the aid of your teammates of course. Be sure to hang out off the side of battle, because you know, it’s not like you’re going to go sprinting to cover with that thing.


So, that’s pretty much all you need to do to own some serious butt in this map. Go hard or go home, and let us know how your experience with these tips went. See you next week!


Did I miss anything? Feel free to comment or email regarding anything I missed, wish us to cover, or if you just want to share some Reach content. Our email is below!


Teabag Prevention Written by:

Jake108

Edited by:

Brian Gilmore 

For any comments, suggestions, videos, or inquiries please email us at:

TeabagPrevention@gmail.com

Show your Support!

Follow us on Twitter!

Join our Facebook Group!

Or more importantly, become a Fan!


And don’t forget to add us on myspace at:

www.myspace.com/teabag_prevention

Tell your friends about us!

As always, special thanks to Louis Wu and HBO

Hey guys? It’s here. It’s really here. The Noble Map Pack. This is the noblest map pack we’ve ever gotten and so far, I’ve had a blast, and I can only hope you have one too. Don’t forget to submit your content so I can post it up on the next article. Now, for your entertainment/information, the first map in the Noble Map pack that we’re going to cover *drumroll*….


THIS WEEK: ANCHOR 9


Anchor 9 has a couple of things going for it: It’s an asymmetrical map and a portion of it provides Zero-G combat. Inside, there are two levels. You’ll find your way to the Zero-G portion of the map by crossing the blue barriers, but I hope you already knew that.


Weapon Spawns

ROCKETS


MACHINE GUN TURRET with NEEDLE RIFLE behind:


NEEDLER:


DMR:


SHOTGUN:


HEALTH PACKS:


TIP #1 – WHERE SOME MEN HAVE GONE BEFORE

Before trekking out into space, you’re going to want to make sure you’ve got these rules set in your mind:


JetPackers usually have the advantage due to being able to maneuver around and even drift away from the platform, away from melee range, and out of accurate reach for short ranged weapons.


By using the jetpack, they will of course float around which enables them to get a steady shot. This will also cause them to be perfect targets when using the Needler (always shoot ahead of them), or vice versa, so watch out for needling, flying menaces.


Jetpack on Jetpack will be a battle of accuracy.


Say you don’t have a Jetpack, but decide to venture out into space anyway. Well, in this case, make sure to stay near the the entrance that goes back into the station. If you’re going up against a Jetpacker who has Rockets or a DMR, you may want to run back in for cover. Just DON’T jump when fighting out there. You’ll only make yourself an easier target for Pistol/DMR shots. Jumping in this context does not make you a “moving target”, but a slowly-floating, easy target.


TIP #2 – BAIT THEM


Using this tactic, I got one of the new achievements for getting a double kill with a shotgun. Easy peezy. Since the blue force field won’t allow bullets to penetrate them, you may want to bait the enemy into gunning for you when you indeed have a shotgun or charged up plasma pistol like seen here (above.)


TIP #3 – CONTROL, YOU MUST LEARN CONTROL


Even though space is a huge part of the map, emotionally, it’s really not the real meat of it (just the “coolest” part). Everyone spawns inside and the best way to control the two floors is to stay on top. Always have a higher view than your enemies. You may want to equip yourself with a DMR/Needle Rifle to pick off enemies below, but make sure to not just stand in one place. There’s a delicate art to manning an area and there’s a pencil thin fence to walk between that and camping, so keep moving. Make sure you have your Assault Rifle or short-ranged weapon handy when they try running up the stairs, always stick with your guns if you start shooting before throwing a grenade.

Deciding, all of a sudden, that you should’ve thrown a grenade will just get you killed. If you started shooting at the same time as your opponent and didn’t throw a grenade beforehand, you already made your mistake, stick with it and see it through til either the end or victory.


Did I miss anything? Feel free to comment or email regarding anything I missed, wish us to cover, or if you just want to share some Reach content. Our email is below!


Teabag Prevention Written by:

Jake108

Edited by:

Brian Gilmore 

For any comments, suggestions, videos, or inquiries please email us at:

TeabagPrevention@gmail.com

Show your Support!

Follow us on Twitter!

Join our Facebook Group!

Or more importantly, become a Fan!


And don’t forget to add us on myspace at:

www.myspace.com/teabag_prevention

Tell your friends about us!

As always, special thanks to Louis Wu and HBO

This week, Teabag Prevention is moving on from the good ol’ armor abilities, and into a different kind of gametype. Score Attack is a variation of Firefight, and allows players to get some of their much beloved “game” on by themselves, like we’re used to. You’ll have three different gametypes to choose per map, but really, are you going to be playing Generator Defense and Mythic Attack if you’re looking for a speedy rank up? No. No, you are not. Don’t get me wrong, those are fine gametypes, but there are easier ways to rank up through score attack. And here they are…

THIS WEEK


SNIPER ATTACK

Courtyard is arguably the best map to play Sniper Attack on. This is for one simple reason: Multikills. There’s a simple procedure that needs to be done in order to score high like all your butthole friends who won’t share how they got such a high score. I’m looking at you, ZZoMBiE13.


First, you’re going to want to choose the ‘Medic’ class so that you won’t have to run to a health pack and have a way to shield yourself from heavy fire.


Next, you’re going to have to run to the catwalk off to the right corner of the map. That doesn’t mean you can’t get a few kills along the way.


Once at the corner of the map, you’re going to camp there and wait for your targets to line up.


Soon after, you’ll be scoring multiple multikills, like your girlfriend. My favorite: Watching Jackals fly though the air.


Speaking of Jackals, they get to be annoying when they fire their Beam Rifle and Needle Rifle shots at you from a distance aka, provide any semblance of a challenge. Simply crouch behind your companion cube for some cover.


Now I know it’s hard to resist seeing Brutes just stand there as soon as they spawn, but trust me, it’s more worthwhile if you wait for them to line up for you. 


By now, you should have the hang of it. Wait for your kills to line up and fire away. It really is just like shooting alien fish in a barrel (which, come to think of it, sounds terrifying.) You should be getting Overkills or more in this game type if you’re even at an intermediate sniper level. Remember, the key to scoring high are mutlikills. Two birds, one stone. 5 Covies, 1 sniper bullet. You want to mix it up by Jetpacking and lining up your shots, but if you’re one of those guys who can Jetpack around maps while sniping, I feel sorry for you — it must be lonely being God.

But really, if you do this, more power to you. Just make sure to send in some screenshots because dear Lord (sorry to misuse your name, Jetpack Sniper, ninja of the earthly realm). See you guys next week.


Teabag Prevention Written by:

Jake108

Edited by:

Brian Gilmore 

For any comments, suggestions, videos, or inquiries please email us at:

TeabagPrevention@gmail.com

Show your Support!

Follow us on Twitter!

Join our Facebook Group!

Or more importantly, become a Fan!


And don’t forget to add us on myspace at:

www.myspace.com/teabag_prevention

Tell your friends about us!

As always, special thanks to Louis Wu and HBO

Teabag Prevention is back with the last Armor Ability! What are the plans for the future weeks you ask? Well, that’s up to you! You know how to get in contact with me, so lets hear it. Which will it be? Maps, Weapons, Vehicles, or Firefight tips? Now, back to this week, Doc…


THIS WEEK: EVADE

Now, I know what you’re thinkin’: What the can go wrong with using Evade in any match? Well, using this wrong will most likely lead to your death and you looking like you’ve been possessed by a demon. That should be a given. Using this right can confuse your enemy, get you to cover faster, or even look like a Super Action Spartan. Evade allows players to roll a distance twice before the ability runs out. It recharges fairly fast, but don’t always rely on it (this is why it’s not the greatest of Armor Abilities).


When to Evade


One of the best ways to use this armor ability is in order to confuse/disorient an enemy during a firefight. For this to happen, your enemy must be in relatively close proximity to you. Since Evade is used to roll forward almost every time, rolling backwards will result in distracting your opponent enough so that you can get a clear shot. Just make sure you have the right weapon (i.e. NOT a Needler or Assault Rifle).


Make sure to always evade the same way your father always told you to walk: with a purpose. You only have two evades per every recharge. If you go around using them to get places when you’re already close to a battle, you might as well go into every spawning round of yours without using an armor ability at all. It’s not called “cool run” or “dash instead of run”. It’s called Evade. Wait till you’re at a battle, and use it to frakkin’ Evade. Evade is best used when escaping a sticky situation or dodging vehicles, so save up your charges for that.


A particularly risky move would be evading to hijack. This may surprise whoever is driving the vehicle at the time, yet might not always work (this NEVER means not to try it, but just fair warning). Time it right, and you’ll have yourself a new pair of wheels… or a new Boosted Gravity Propulsion Drive.


When NOT to Evade


It’s almost entirely useless to evade while getting shot at. Not only will you move slower, but you’ll only disable your only chance at injuring your enemy enough for a teammate to finish ’em off. If in an open space and mathematically unlikely to win if you started shooting now (running instead of shooting when you clearly have a better chance if you shoot back is one of the biggest, most common problems found on any game and you should all stop it right now. Realize when you’re doing it and stop it. Right. Now.), then it is actually best to Evade TOWARD your enemy, which will give you a chance to face them head-on, disorient them and possibly win the fight (what were you doing out in the open anyway?)


Like Sprint, it’s not advisable to Evade towards a boosting enemy vehicle. You’ll just end up as a grill ornament.


Never evade out in the open with low health. On larger maps, there’s a good chance a sniper has their sights on you and that you’re probably dead anyway… so don’t put yourself in that situation (we like to end these on an UP note!)


Teabag Prevention Written by:

Jake108

Edited by:

Brian Gilmore 

For any comments, suggestions, videos, or inquiries please email us at:

TeabagPrevention@gmail.com

Show your Support!

Follow us on Twitter!

Join our Facebook Group!

Or more importantly, become a Fan!


And don’t forget to add us on myspace at:

www.myspace.com/teabag_prevention

Tell your friends about us!

As always, special thanks to Louis Wu and HBO


“Wooooooooo!!!!!!”

You’ve always had imaginary friends, but now they can actually make you a useful member of society. Get ready to learn how to play the armor ability that shares a name with the most valuable kind of Marvel cards…


THIS WEEK: HOLOGRAMS!


How to Use it


The Hologram armor ability is a different type of ability. If you thought this armor ability was for the recon stealthy type, I’m afraid you’re more wrong than right. I won’t say you’re completely wrong, because ways to use Holograms during Sniper games can be found, though usually don’t prove as effective. Hologram is a simple one use per recharge. You don’t have to hold the button down or anything, you simply point and push.


When to Use it


Setting up ambushes can be fun, even when you don’t have anyone to do them with. That’s when your imaginary friend comes along. The trick to doing this is to send your hologram to the place most likely to be scouted by an enemy first. In times of battle, and when thinking on your feet, this could be a 50/50 gamble. Also note that this is best used on smaller maps and/or inside structures.


Need to know if there’s enemies lurking around in the next room while keeping your distance? Send your Hologram over and watch where the enemy fire comes from, if any. This is also a good way to see what kind of weapons the enemy has. If you’re lucky, they’ll waste a rocket or two.


The best way to use this armor ability is to of course distract your enemies. Distraction is a big concept. The key goal here is to capture the enemy’s attention so that you, or your teammats can get the kill while the enemy is trying to kill your hologram.


When NOT to use it


Holograms are supposed to deceive the enemy into thinking its a target. Let’s just say there’s no deceiving going on if your hologram running into a wall/corner.


One thing you MUST be mindful of is the fact that holograms show up on the enemy’s motion tracker. If you’re going in with stealth, it is NOT  a good idea to even activate your hologram. Wait until the enemy knows you’re there.


Never stay with your hologram. You can make it go in any direction you want. If you run with it, there’s a good chance you’re going to get shot too, even when the enemy is shooting the hologram. Unless your entire team has hologram equipped, and are following sandpeople strategy by returning to a location in what appears to be greater numbers, just don’t do it.


Teabag Prevention Written by:

Jake108

Edited by:

Brian Gilmore 

For any comments, suggestions, videos, or inquiries please email us at:

TeabagPrevention@gmail.com

Show your Support!

Follow us on Twitter!

Join our Facebook Group!

Or more importantly, become a Fan!


And don’t forget to add us on myspace at:

www.myspace.com/teabag_prevention

Tell your friends about us!

As always, special thanks to Louis Wu and HBO

Teabag Prevention is back with another dosage of Reach tips. In case you haven’t heard, on October 19th, Bungie introduced another update to the game. This update added more playlists while removing some gametypes from the playlists we have now. For example, you can expect an Infection playlist and expect Infection to be removed from Rumble Pit. I like infection as much as the next fan, but out of all the Rumble Pit games I’ve played, I have yet to play a true FFA. Here’s to the new update overlords!


THIS WEEK: SPRINT


Sprint allows the player to run at a increased speed for a limited time. Note that you can jump while sprinting, and while it does have an effect on how far you jump, you must also note that it will continue to drain your armor ability. Since Sprint can be drained pretty quickly, it’s important to know that sprint IS NOT a means of getting across the map but rather a means of getting you to short ranged distances quickly.


When to use Sprint


Sprinting is best used when moving from cover to cover. Be swift, young ones.


Sprinting can also be used to get the upper hand on an opponent. By moving quickly around them, they, like me, might have their sensitivity set at 1 and will not be able to turn around fast enough.

Another context that actually gives you the upper hand if you have Sprint (a sentence I never thought I’d right… HI-OH!), is in those idiotic melee fights that people get into.

If you’re going to hit each other at very close range, you both have the same amount of hits left before you’re dead, this means that the most likely outcome is that both of you will die, which helps your respective teams out in absolutely no way, shape or form. But hey, if you want an extra boost in those situations, hit the person once, and then before they know it, run at them and hit them before they can recover.

It’s worked many times when I’ve gotten into these situations, but I would recommend staying out of them for the most part.


At the start of the game, it’s a good idea to sprint towards power weapons, vehicles, or positions to ambush your opponents. Just keep in mind, they might do the same.


When NOT to use Sprint


Don’t Sprint into the open. You will die. Especially on larger maps. 


Another piece of common sense for you: don’t Sprint towards an enemy. You might as well just stand still.


When you’re battling a vehicle, I don’t care how badass you’re feeling, you’re not going to be able to hijack that Ghost while running fast enough to basically splatter yourself.


Fan Submitted Content


“Now, now, just step away from the body. We don’t want any teabagging goin’ on here, you see?”

Submitted by: Causes Chaos


Teabag Prevention Written by:

Jake108

Edited by:

Brian Gilmore 

For any comments, suggestions, videos, or inquiries please email us at:

TeabagPrevention@gmail.com

Show your Support!

Follow us on Twitter!

Join our Facebook Group!

Or more importantly, become a Fan!


And don’t forget to add us on myspace at:

www.myspace.com/teabag_prevention

Tell your friends about us!

As always, special thanks to Louis Wu and HBO